AI-Powered Vacation Planning: Your Personal Travel Assistant
Planning a vacation can be overwhelming when you have so many destinations and activities to choose from. Whether you're dreaming of a relaxing beach getaway, an adventurous mountain trek, or a cultural city exploration, AI can help! In this guide, we'll show you how to use ChatGPT and Notion to create a detailed vacation plan tailored just for you. If you don't have ChatGPT set up, please follow this quick and simple guide!
🎯 Step 1: Define Your Travel Goals
Before diving in, take a moment to think about your travel goals. What do you want to experience on this trip? Examples of goals could be:
- Exploring local cuisine 🍣
- Visiting historical landmarks 🏛️
- Relaxing on beautiful beaches 🏖️
- Immersing in a different culture 🎭
Take note of your travel dates, budget, and any specific preferences to structure your itinerary around that.
📝 Step 2: Use ChatGPT to Create Your Travel Itinerary
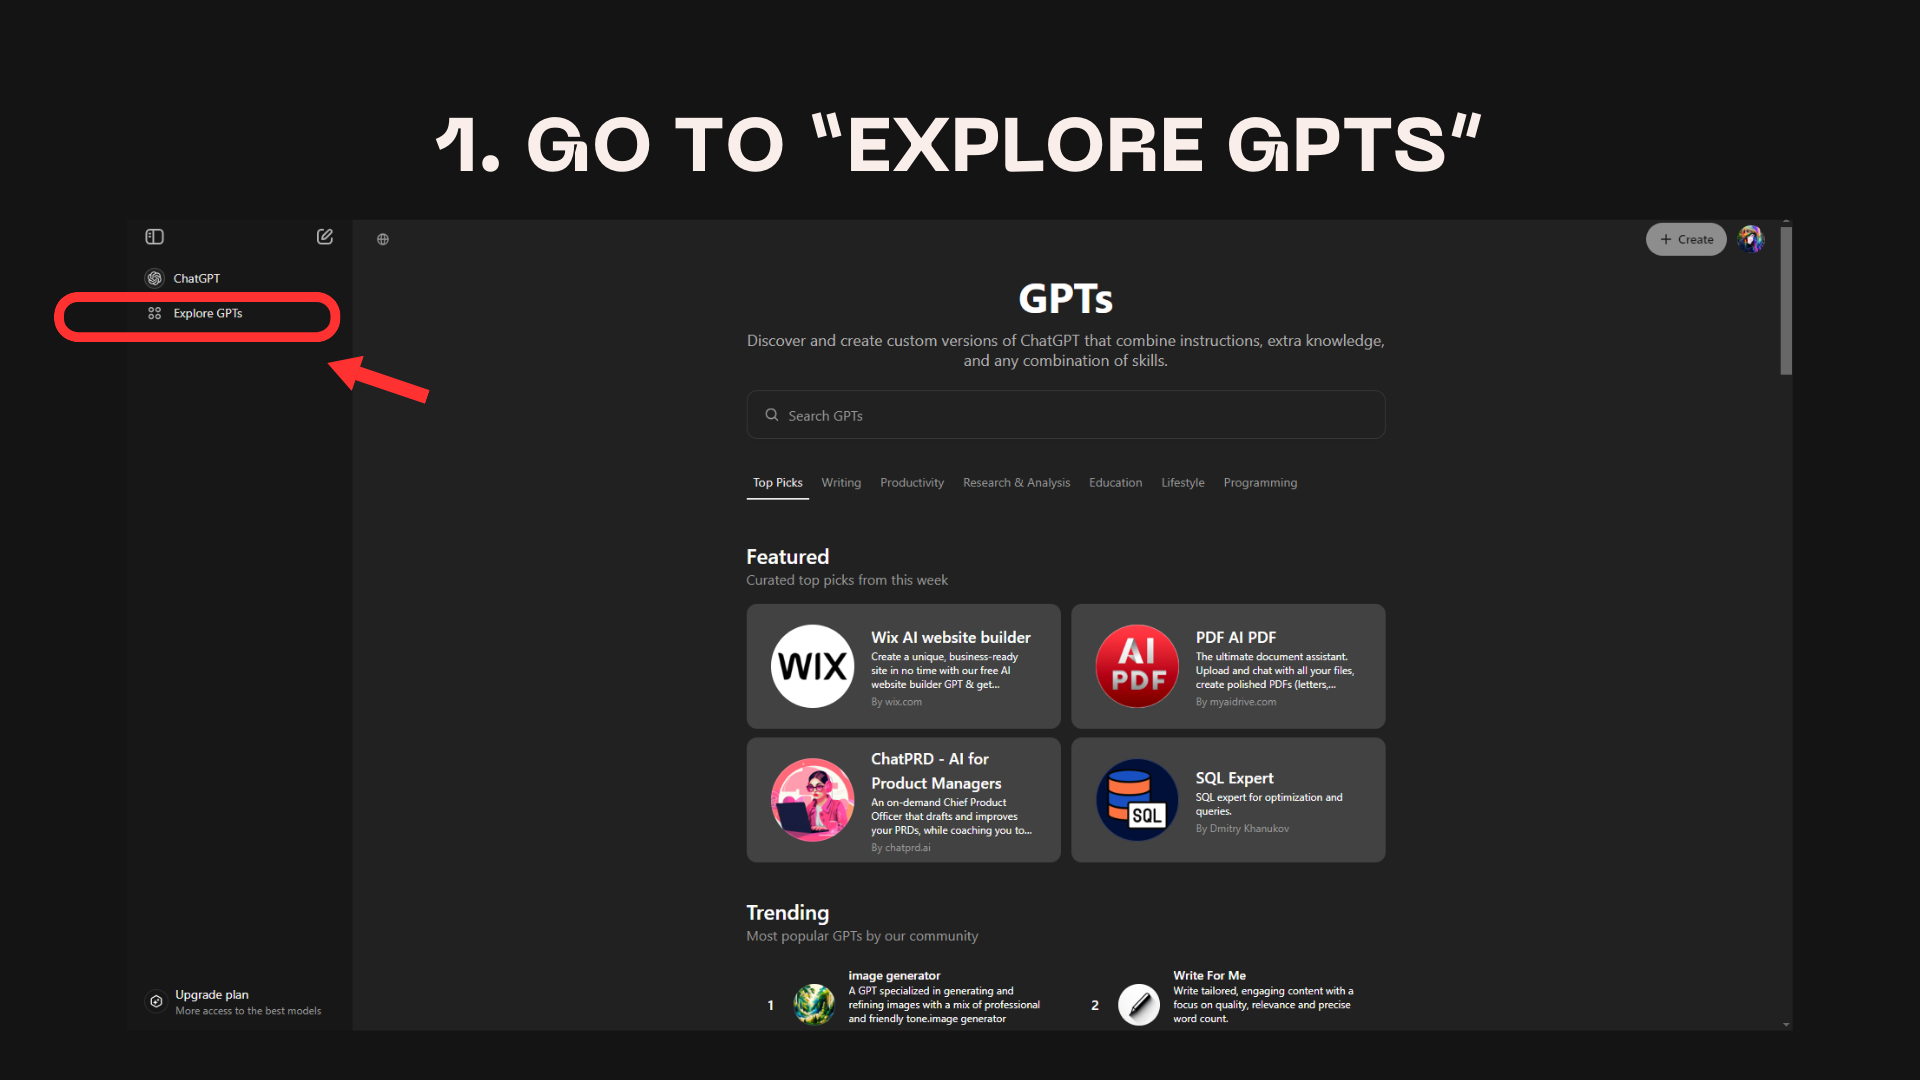
Open ChatGPT
Go to chatgpt.com and click Explore GPT.
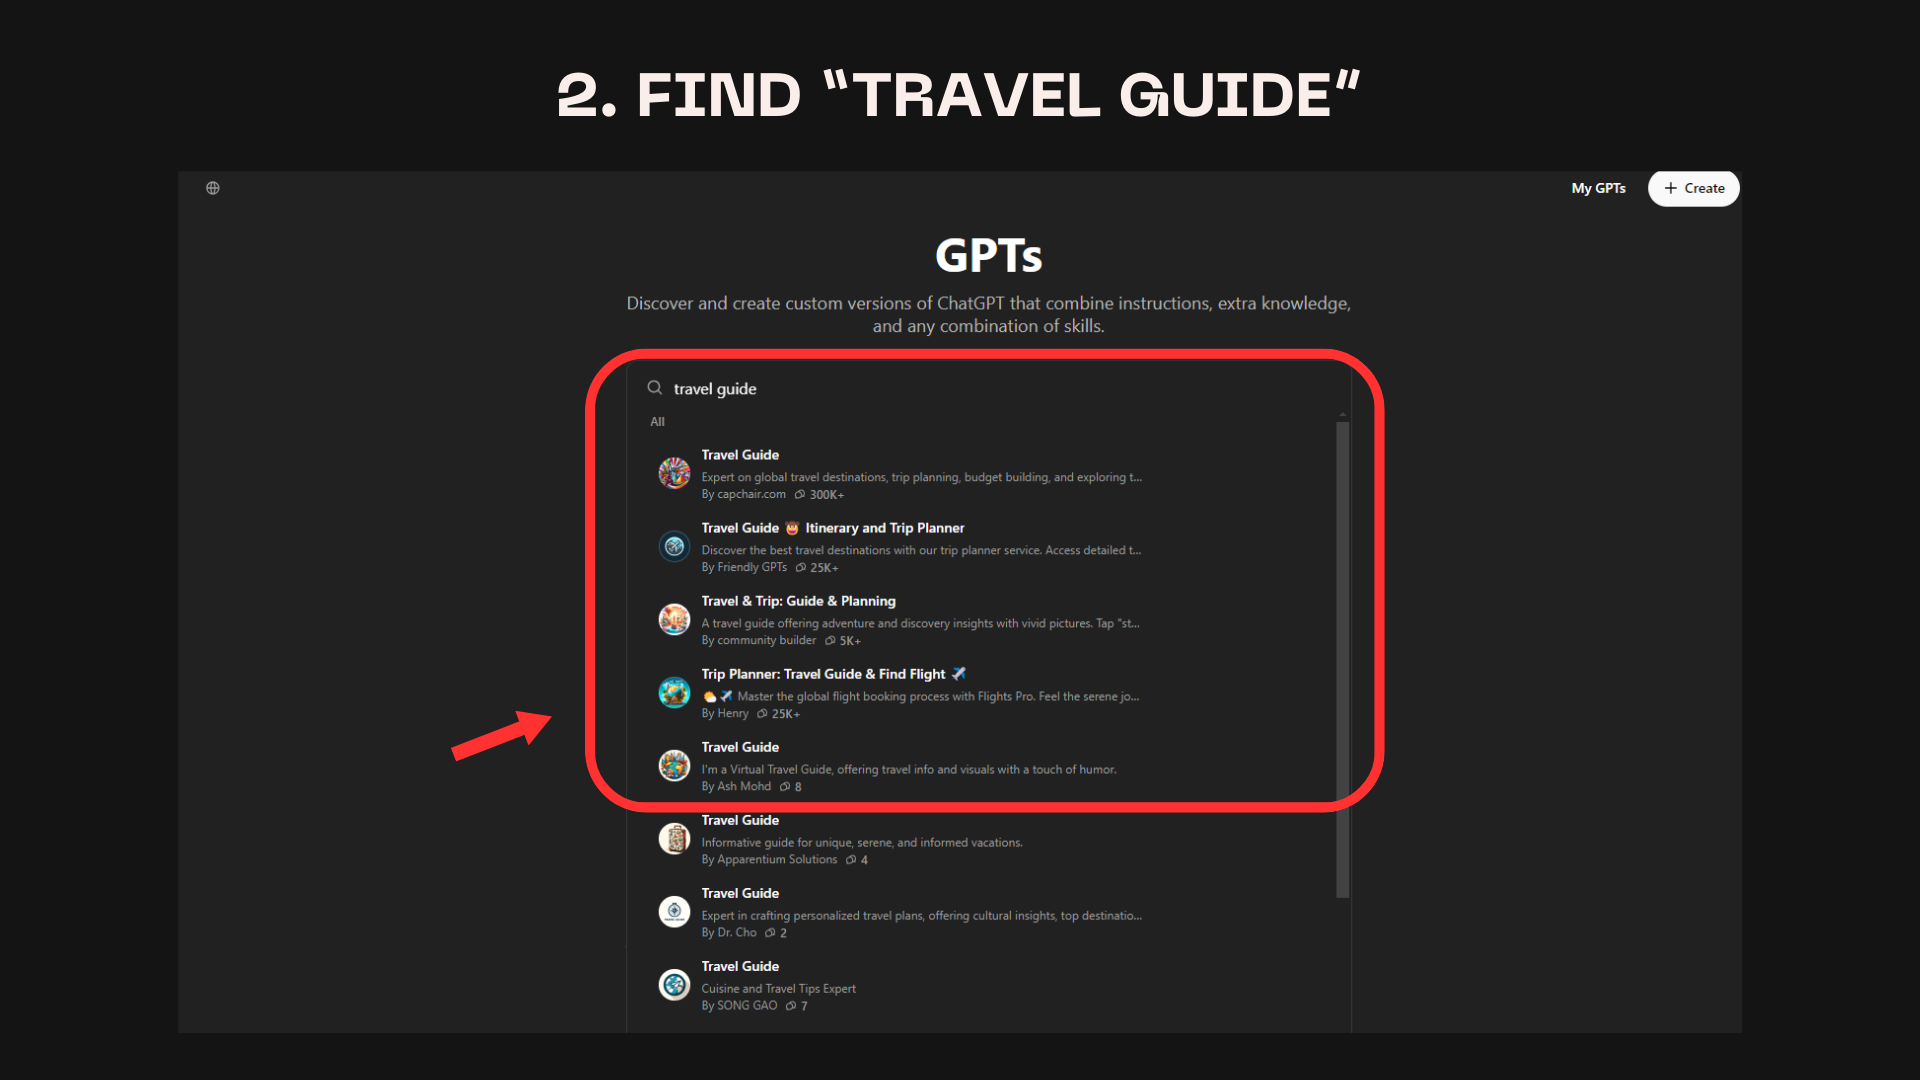
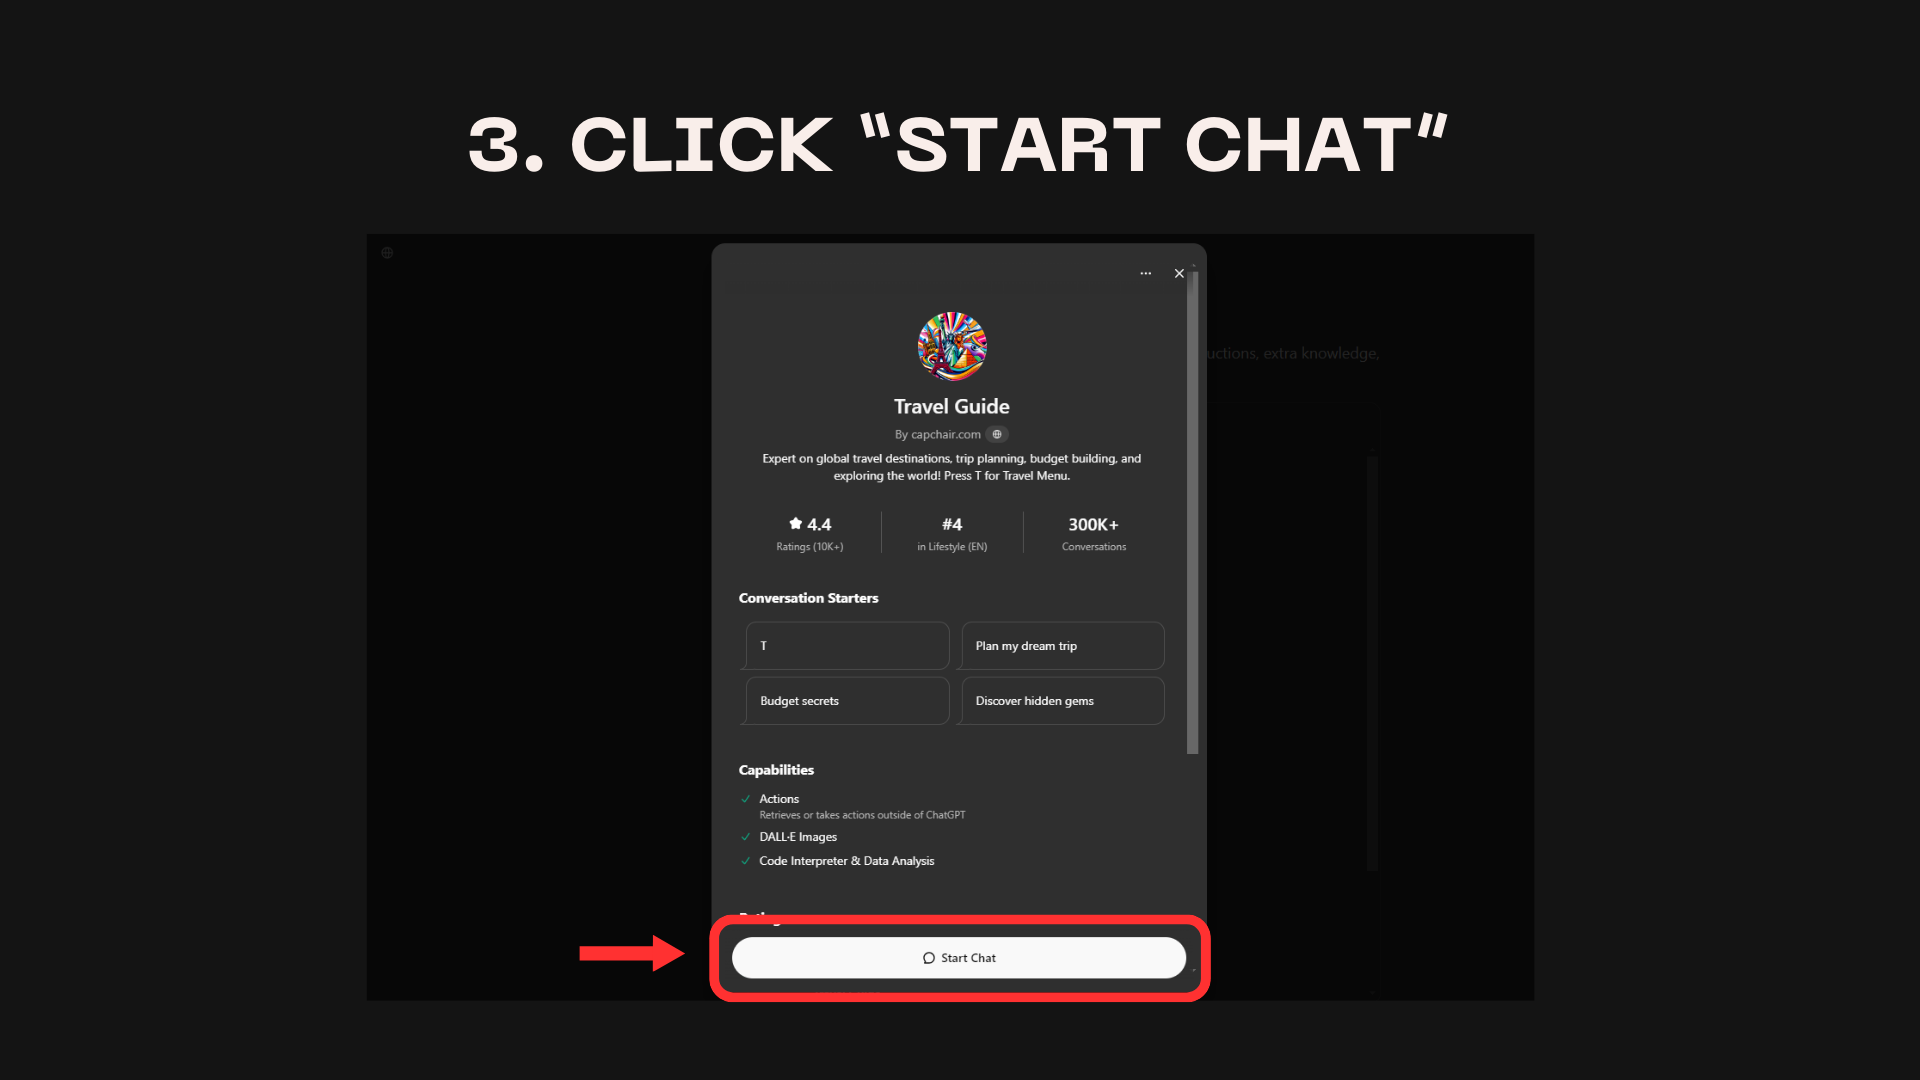
Select the Travel Guide in GPTs.
Example Prompt for ChatGPT:
Here is a very detailed prompt that you can start with:
Generate a detailed travel itinerary for a trip to [Destination]
from [Start Date] to [End Date].
My primary interests are [Your interests],
and I have a budget of approximately [Your budget].
Please include:
1. Daily schedule with morning, afternoon, and evening activities
2. Must-see attractions and hidden gems
3. Local food recommendations for each meal
4. Transportation options between locations with estimated costs
5. Suggested accommodations within my budget
6. Cultural experiences or events specific to the destination
7. Estimated costs for activities and entrance fees
8. Weather-appropriate clothing suggestions
9. Any necessary reservations or pre-bookings
10. Tips for local customs or etiquette

Please provide a plan that optimizes my time, prioritizes my interests,
and helps me experience the destination authentically while staying within budget.
Personalizing the Itinerary
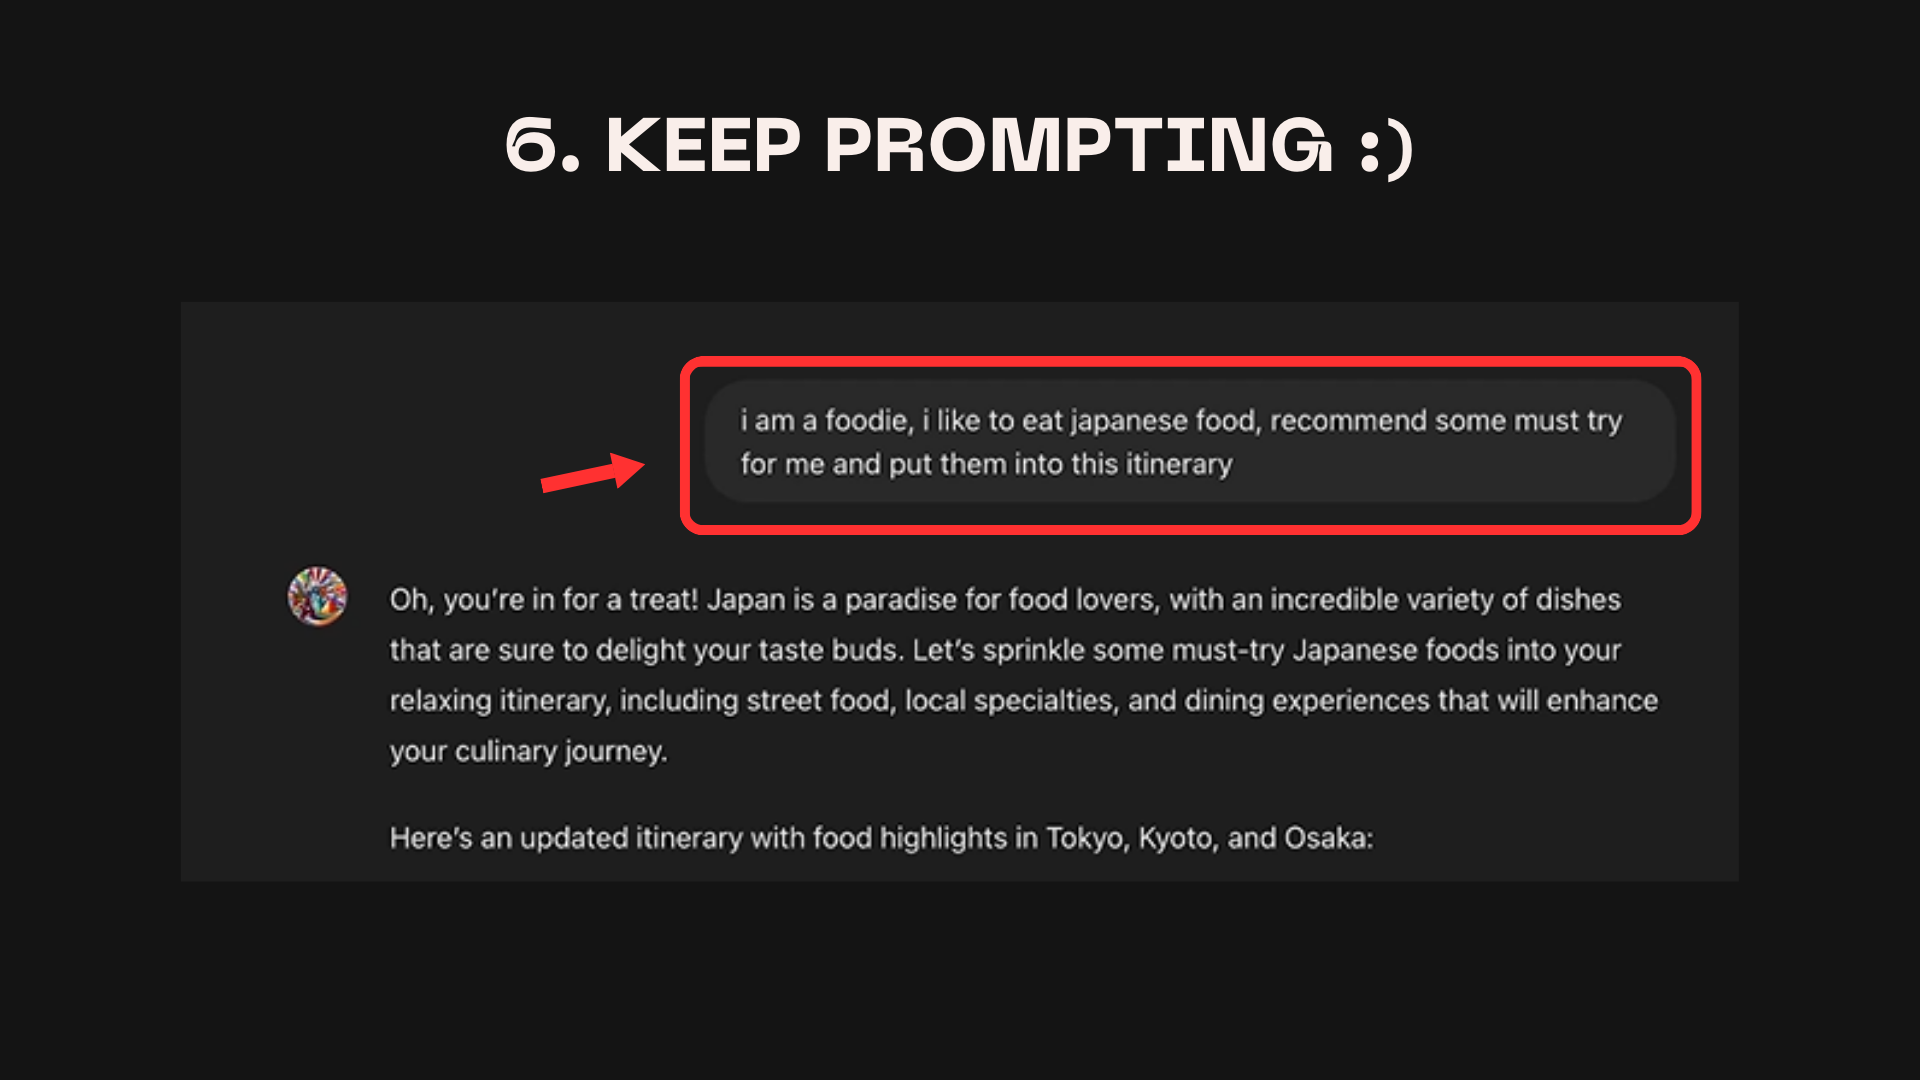
- If the initial response doesn't quite fit your needs, don't hesitate to ask ChatGPT for modifications.
- Keep refining your prompt until you're satisfied with the itinerary.
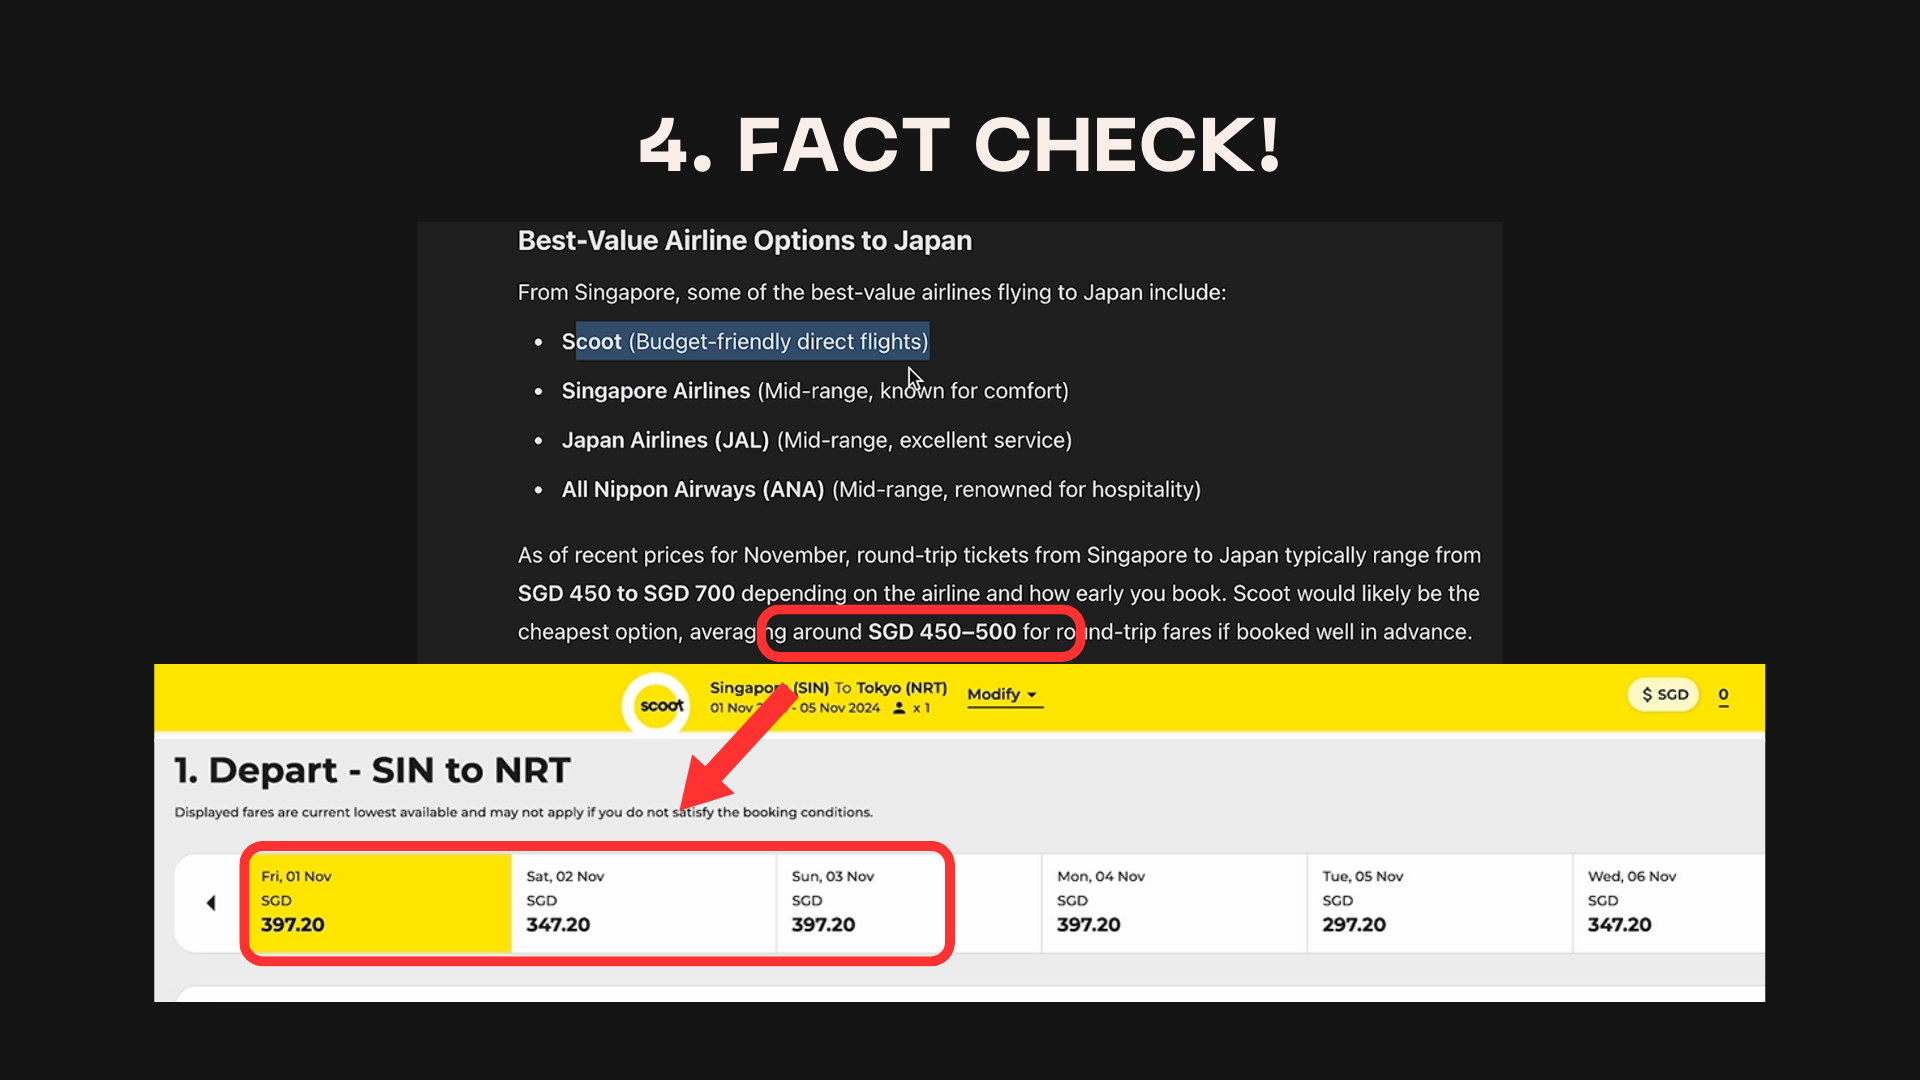
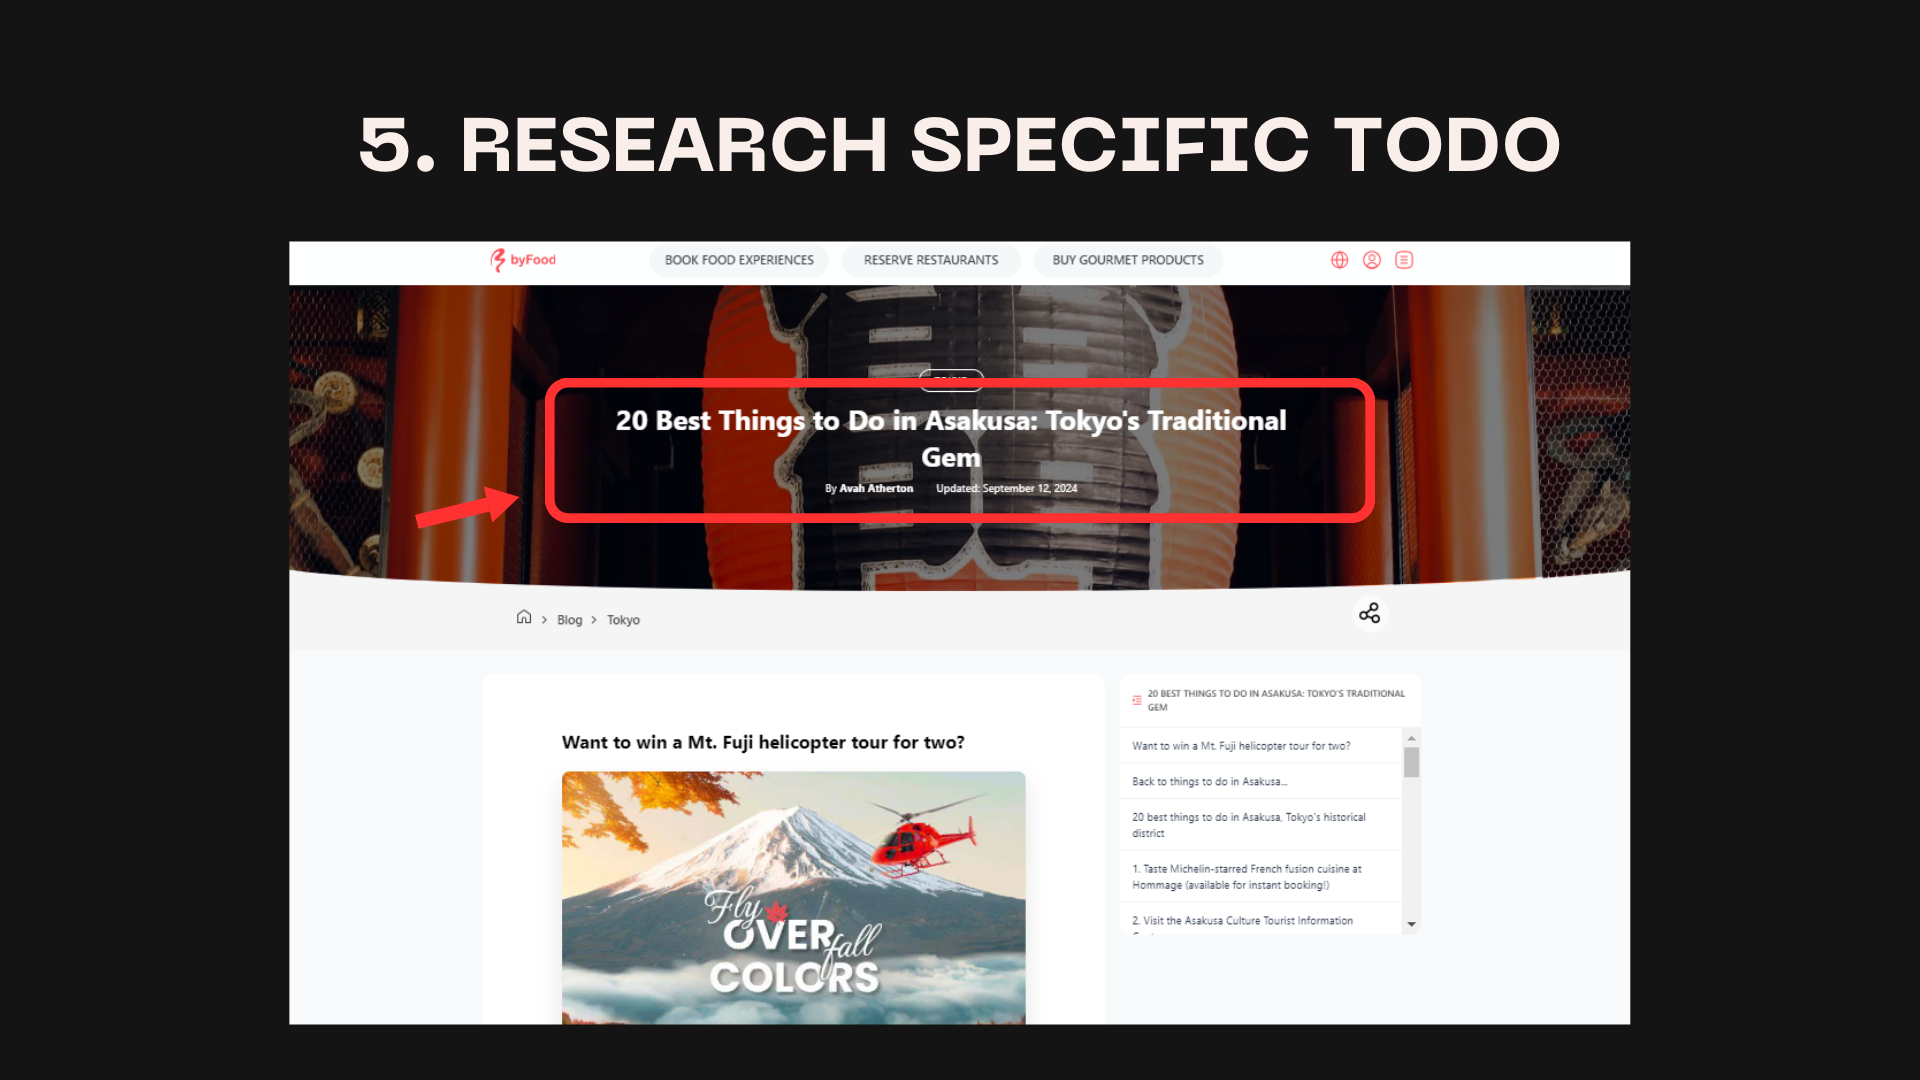
- A very important thing to note is that ChatGPT is not aware of the real-time changes in prices and availability of flights, hotels, and attractions.
- Please do your own research and verify the information before finalizing the itinerary.
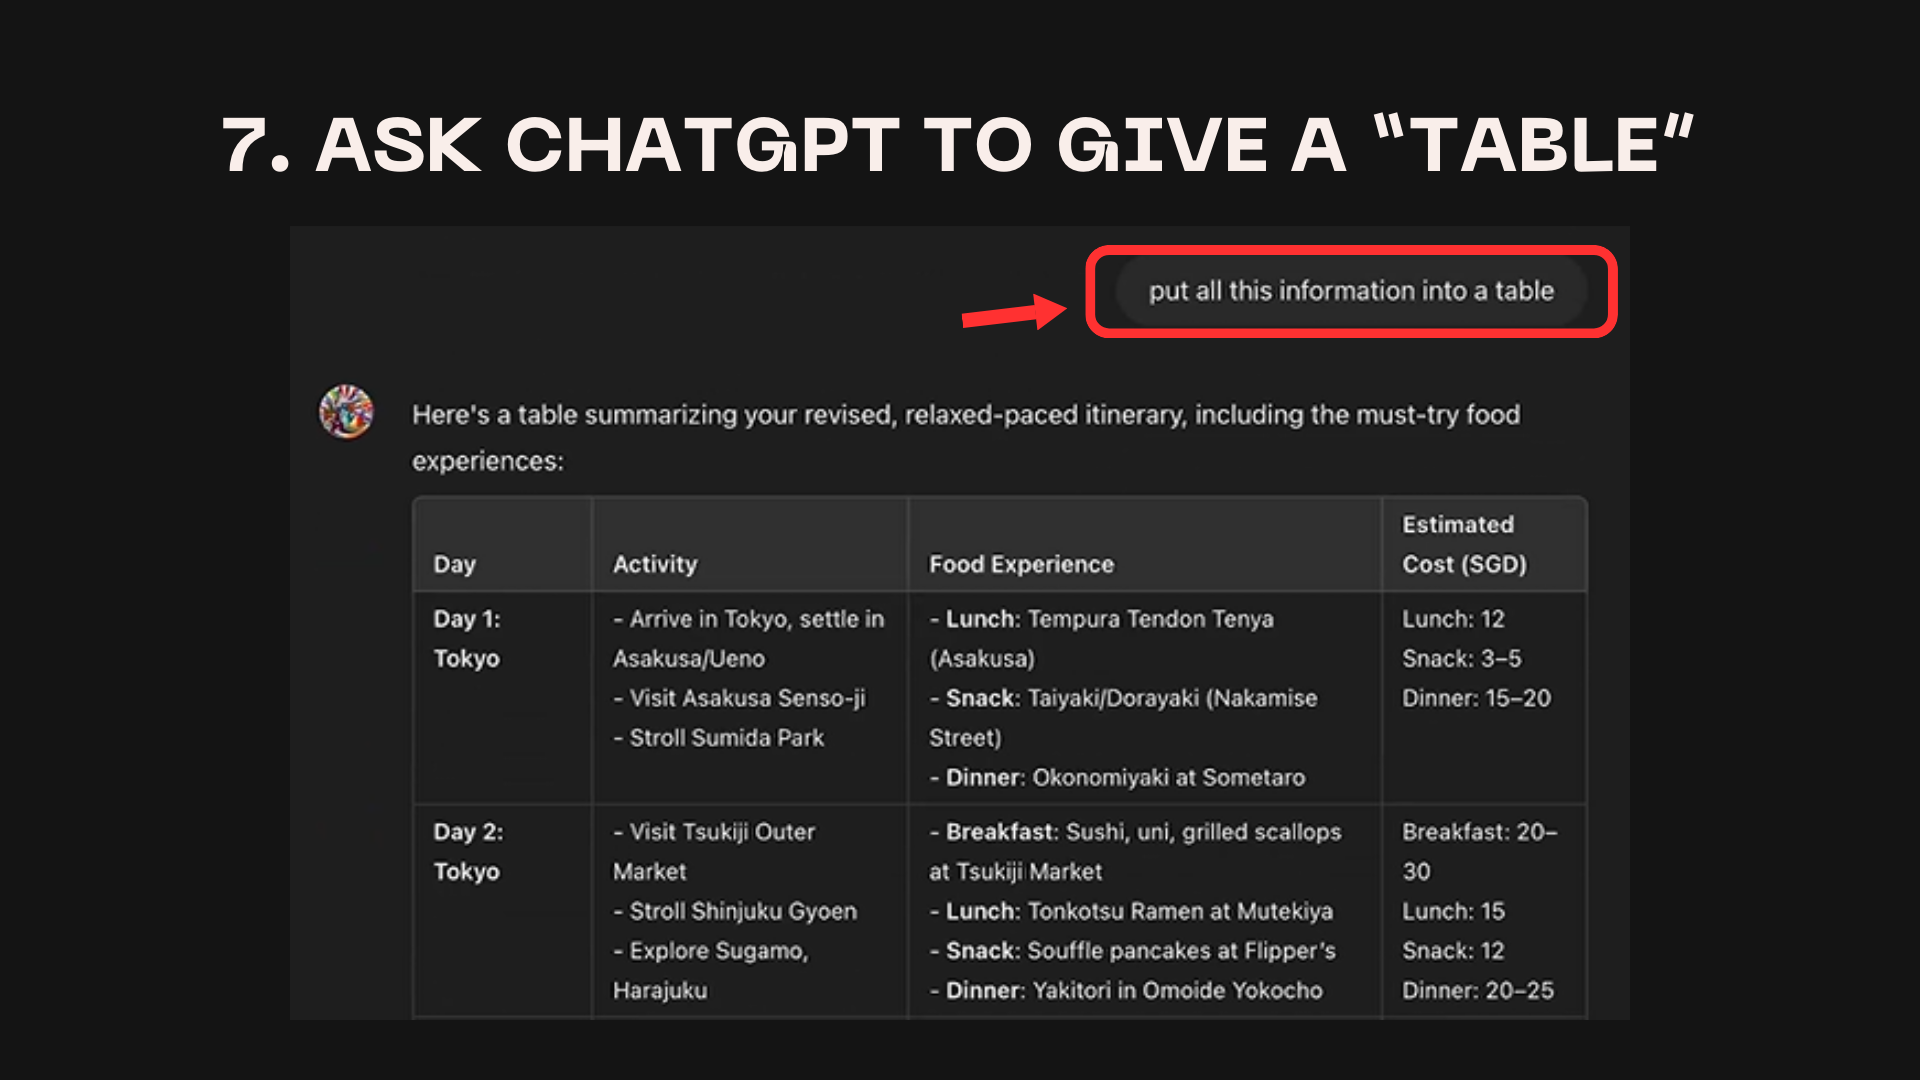
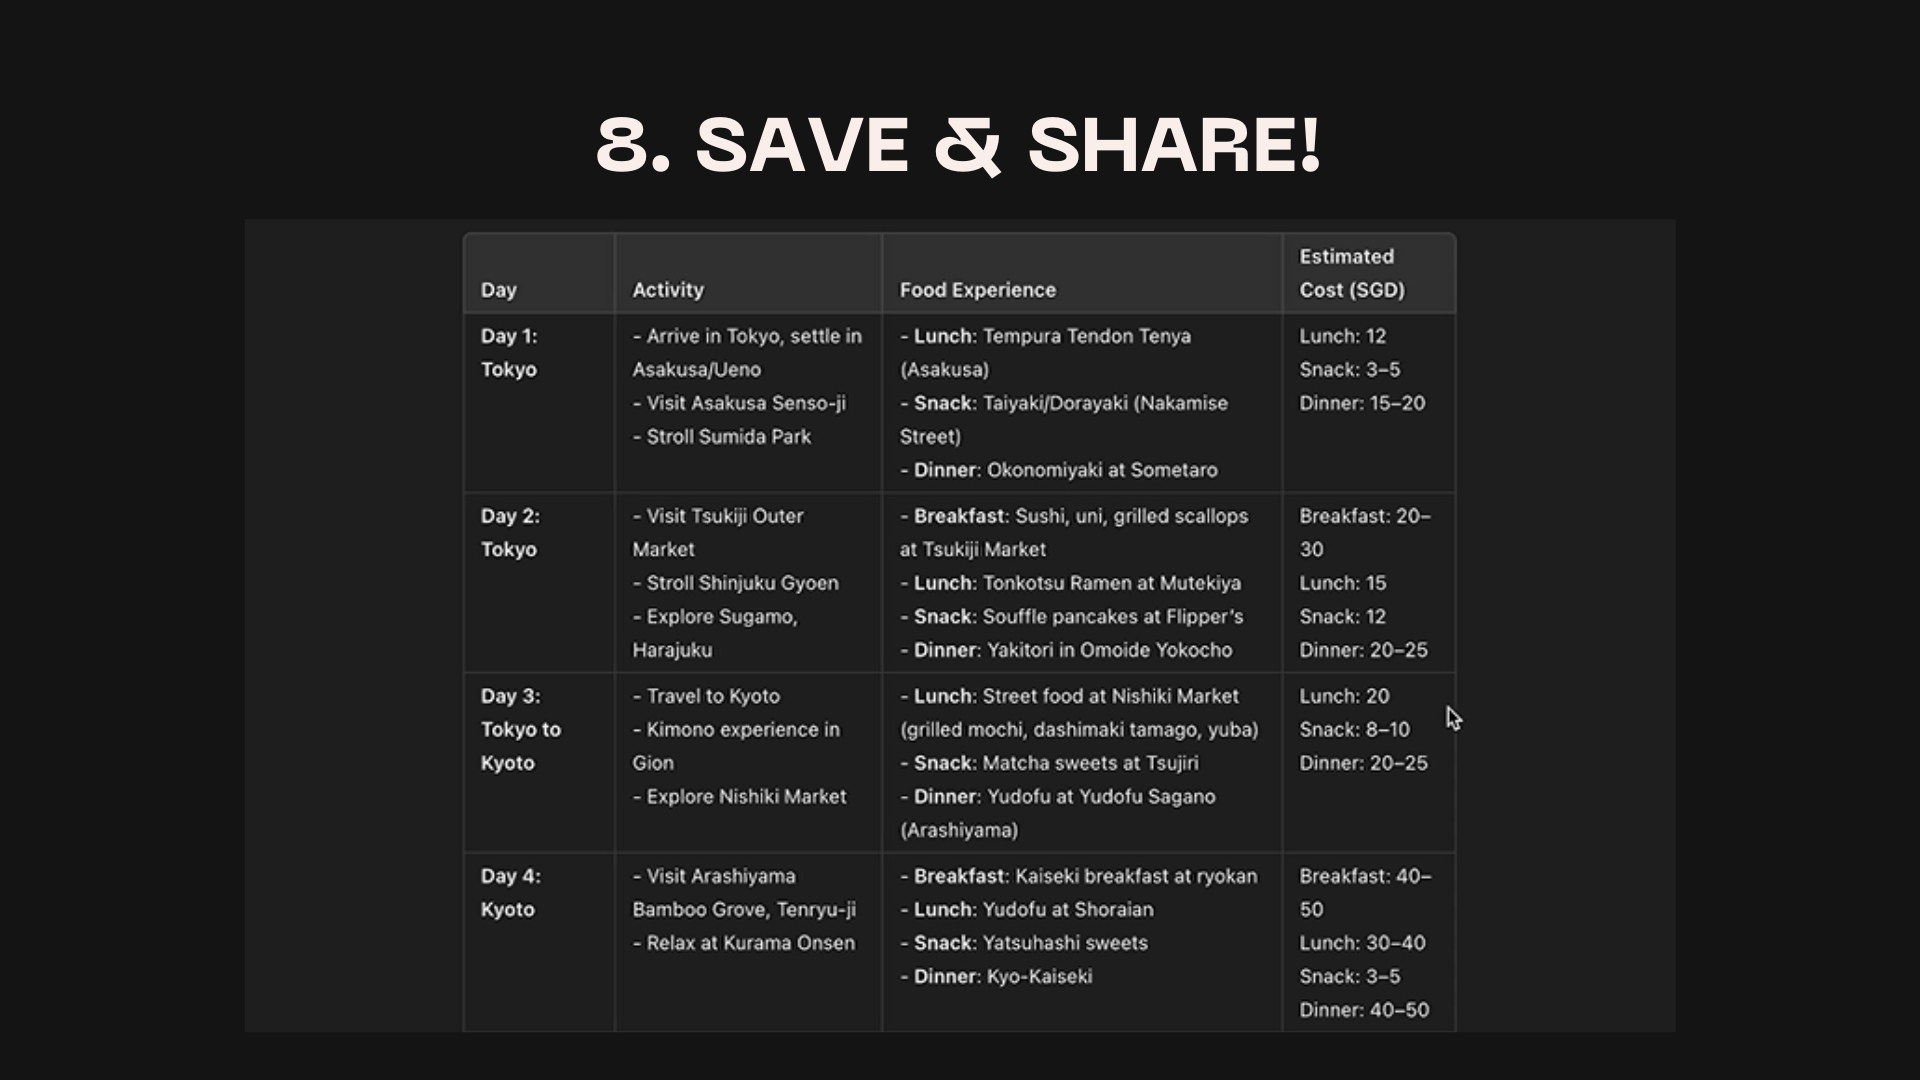
- For a more organized view, ask ChatGPT to present the itinerary in a table format for better readability.
Example flow
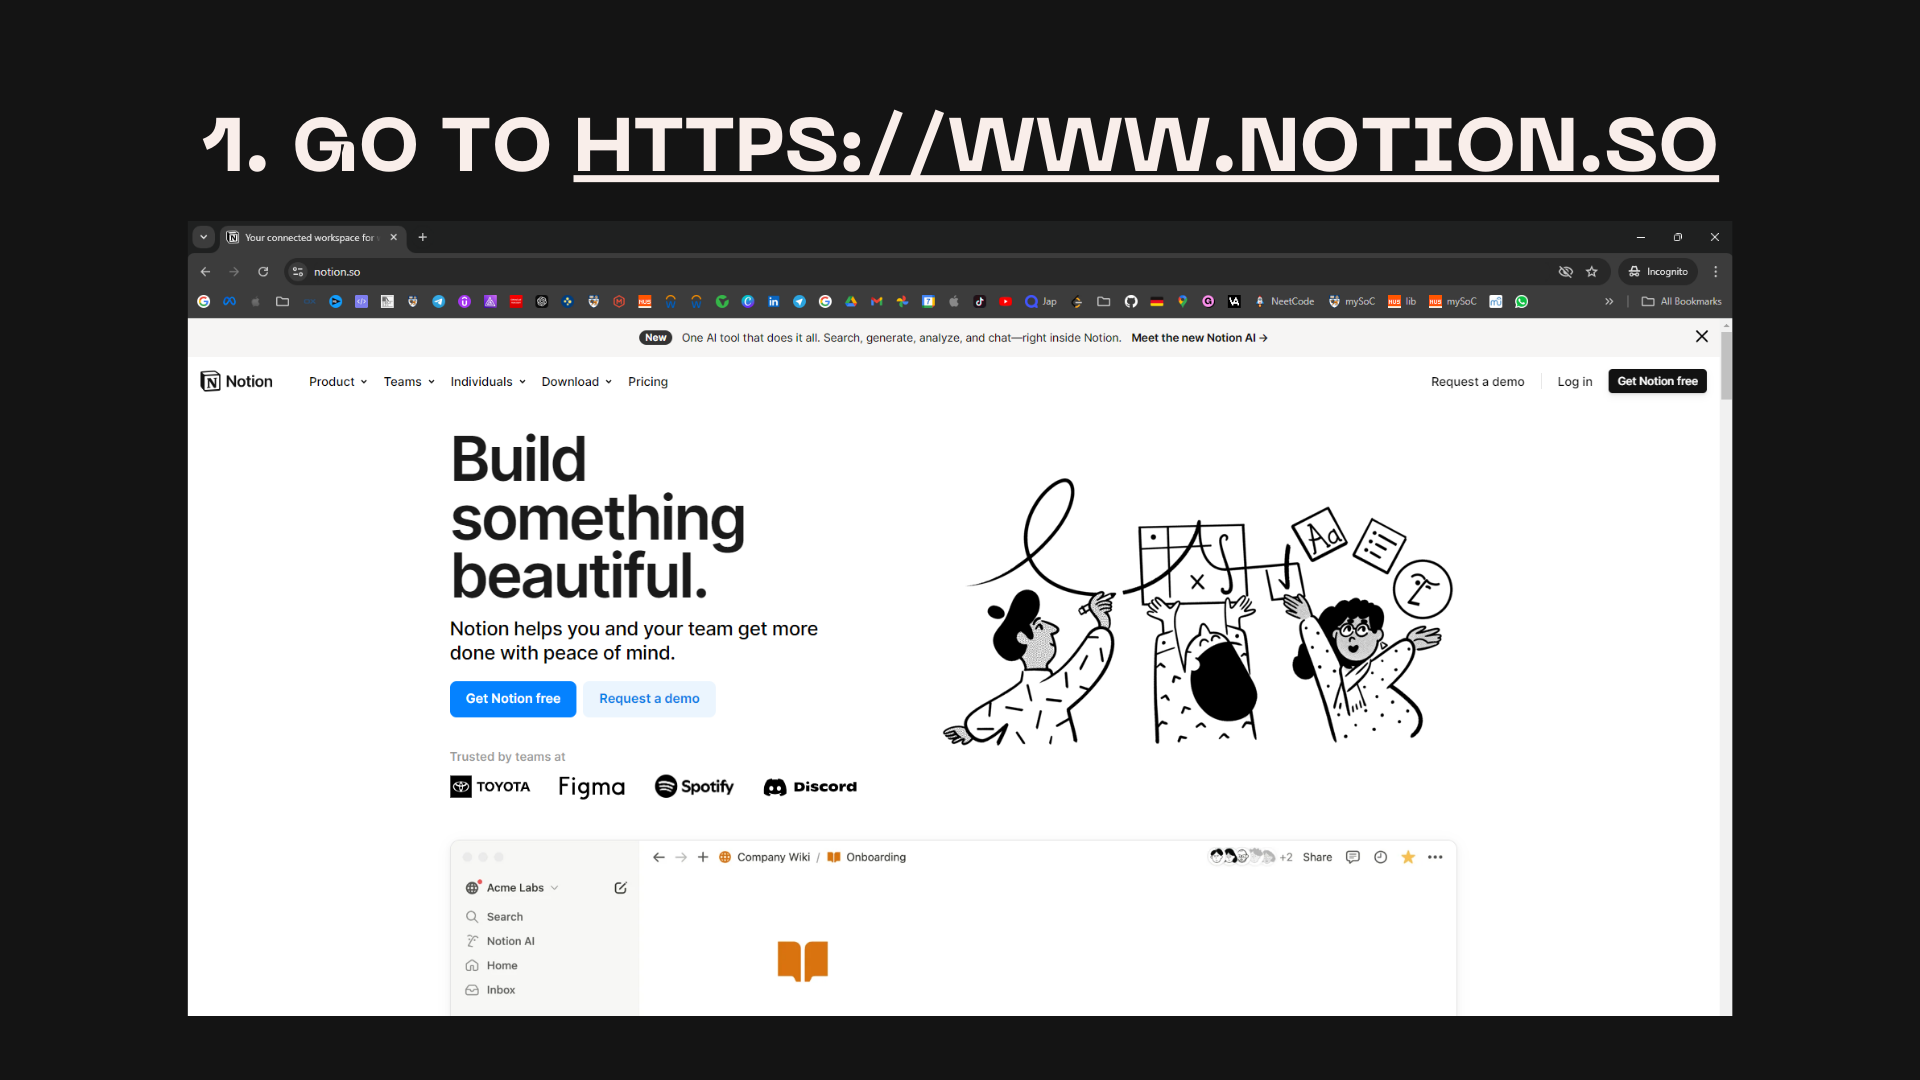
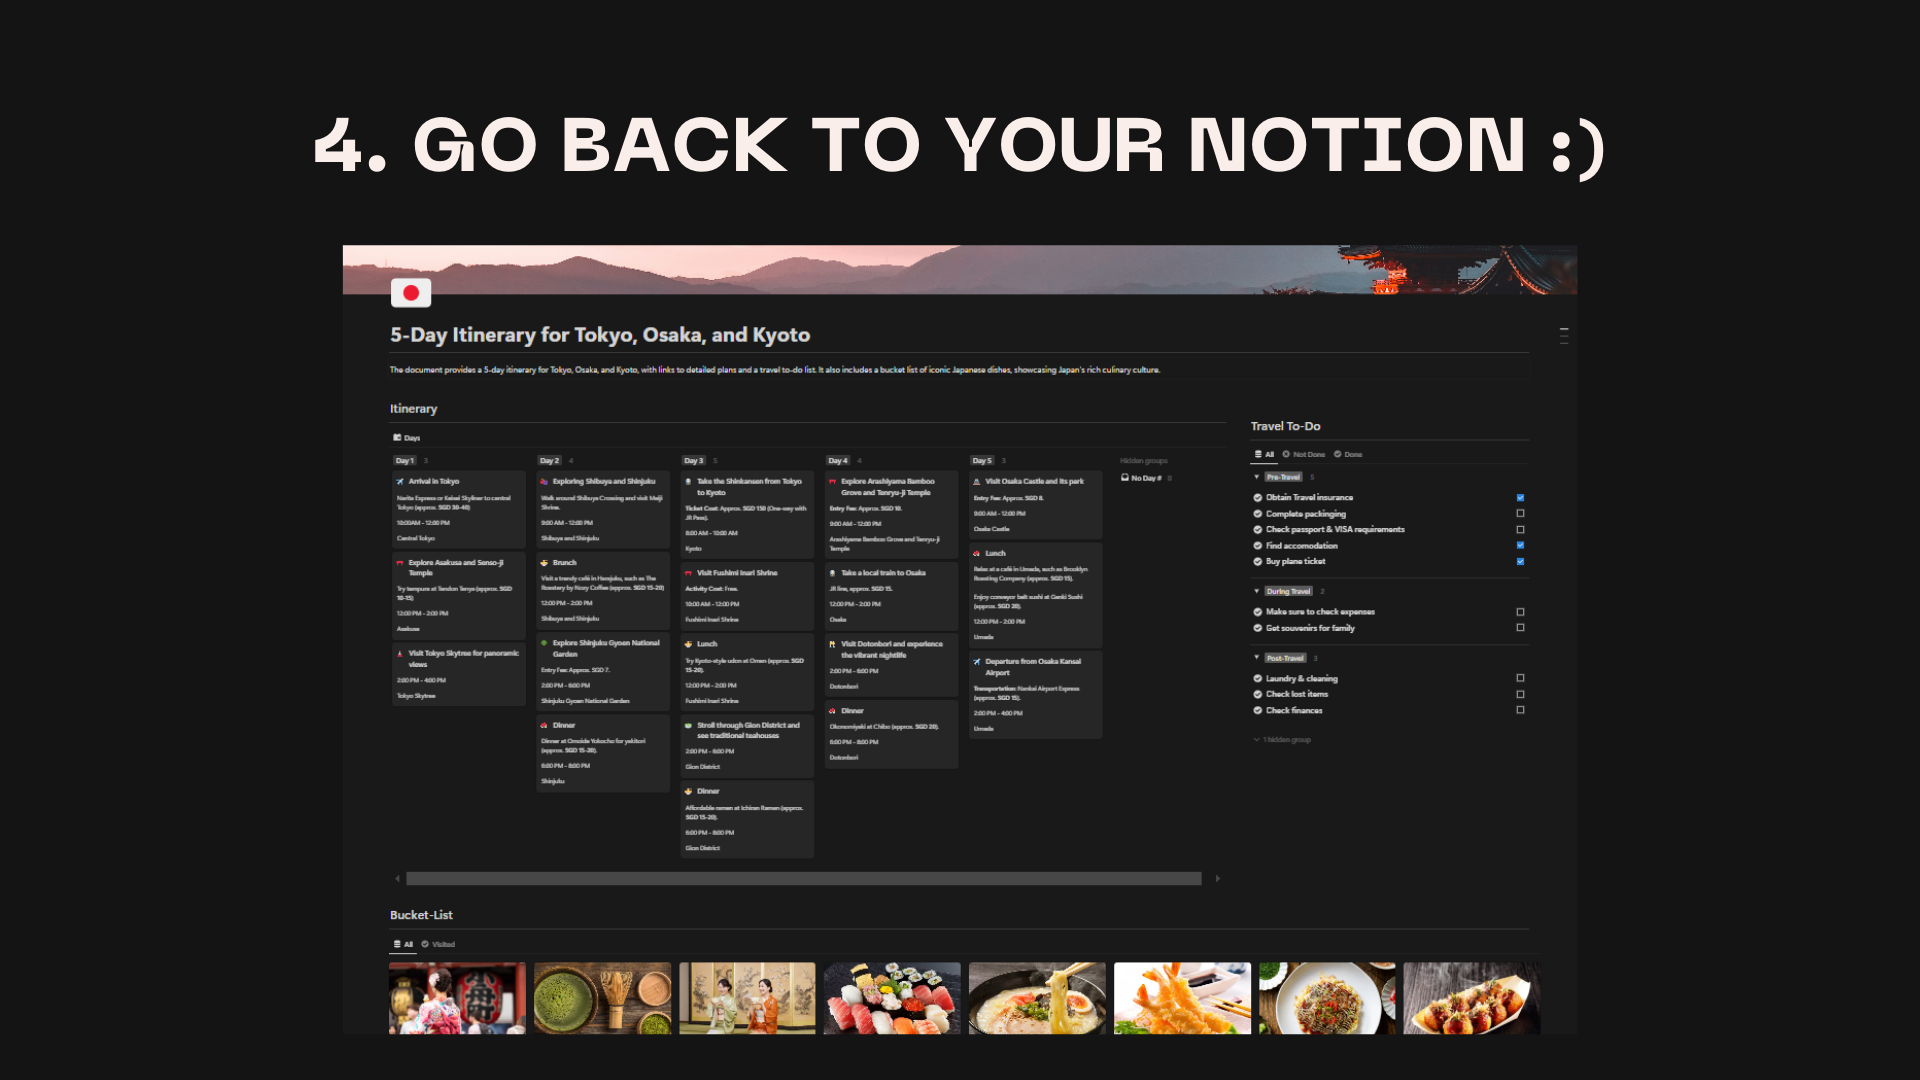
🗓 Step 3: Transfer the Itinerary to Notion
Once you have your AI-generated itinerary, let's import it into Notion to make it visually appealing and easily accessible. You can use Notion or any other note-taking app you prefer.
Setting Up Your Notion Travel Planner:
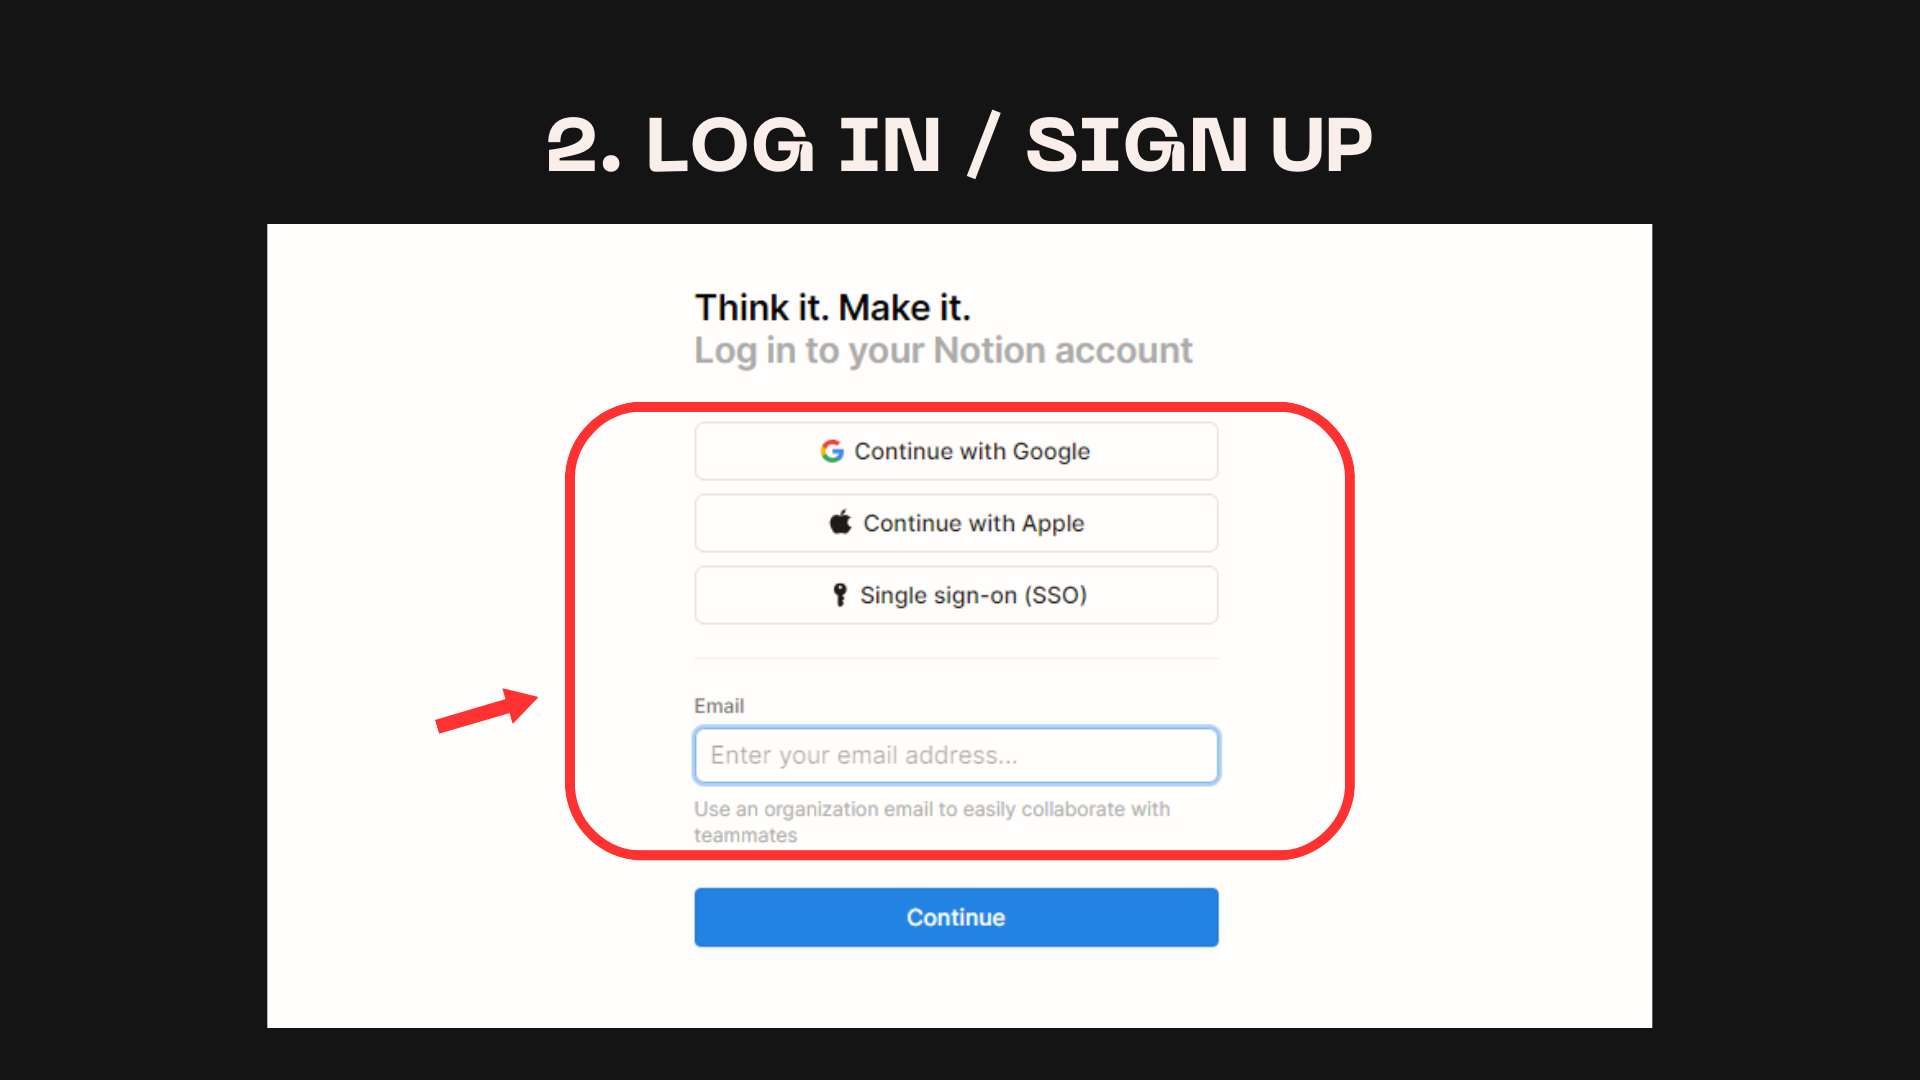
- Open Notion and create a new page.
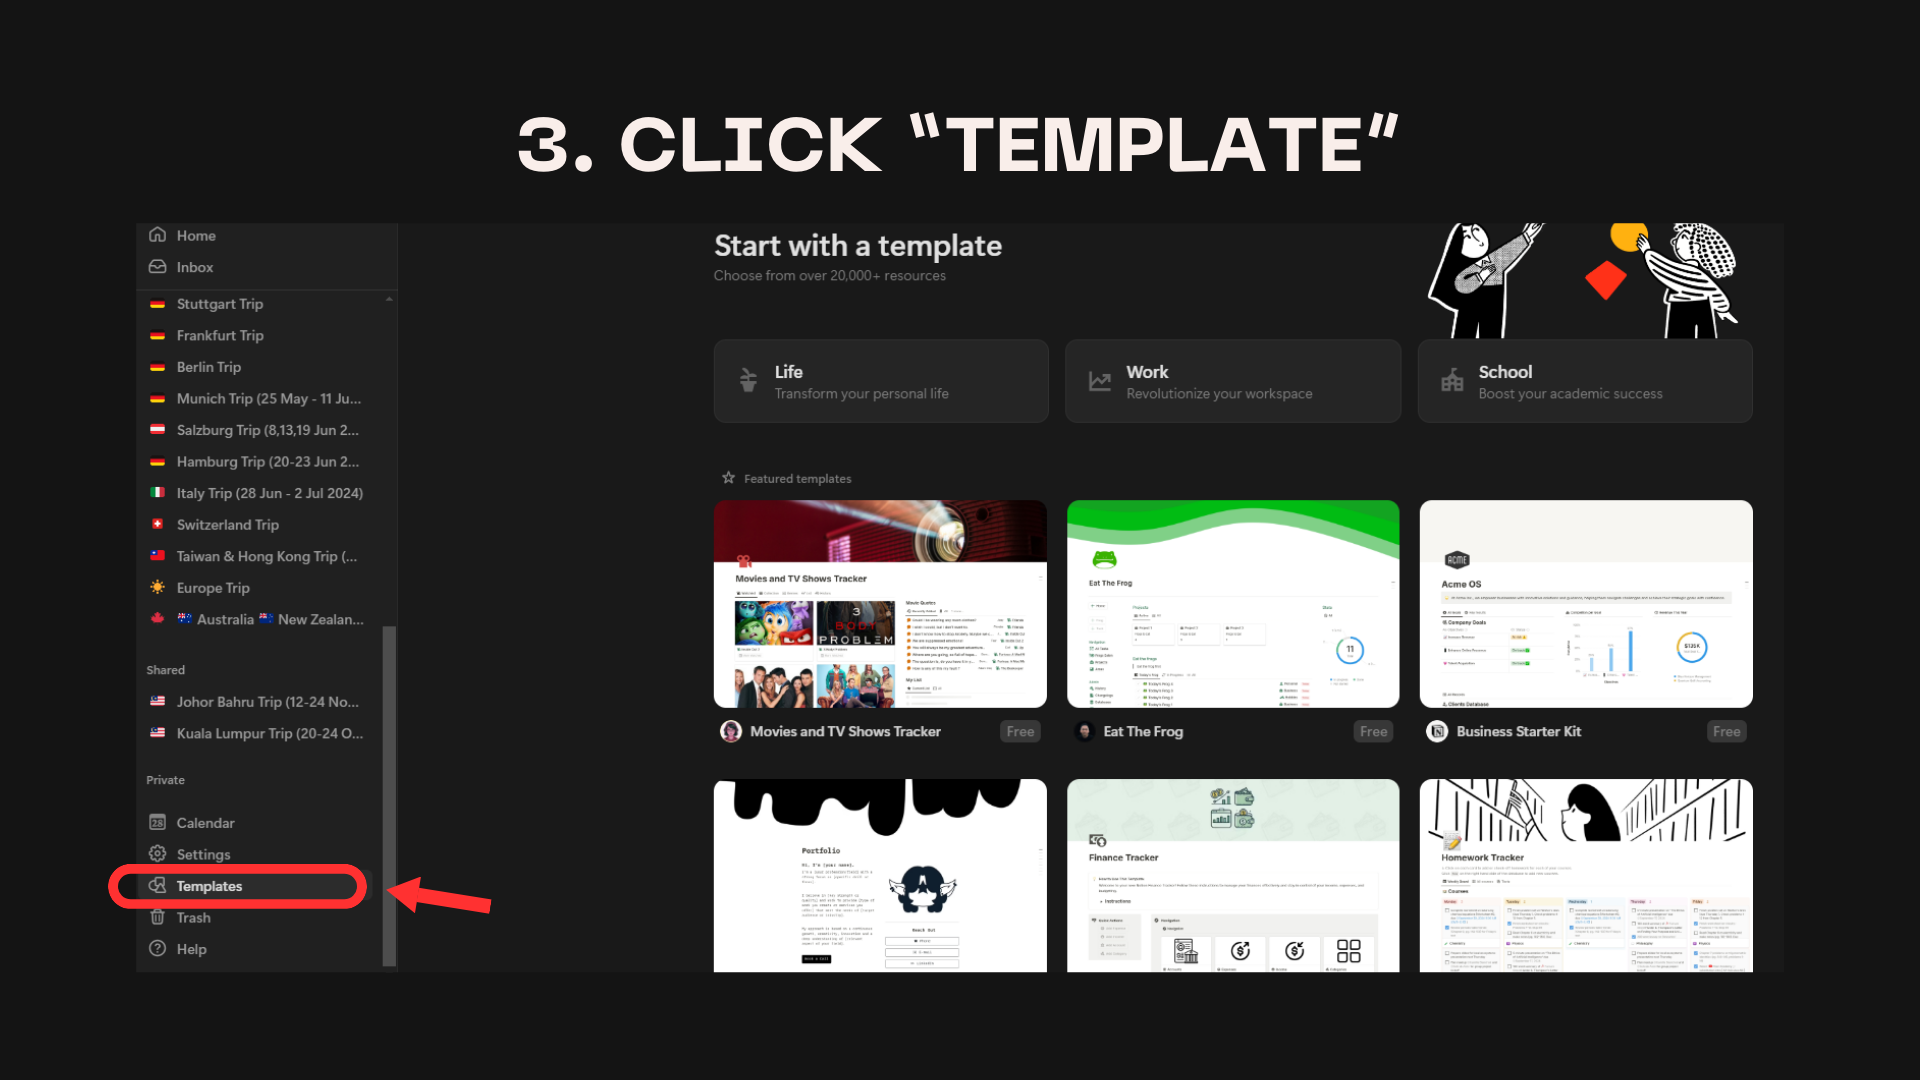
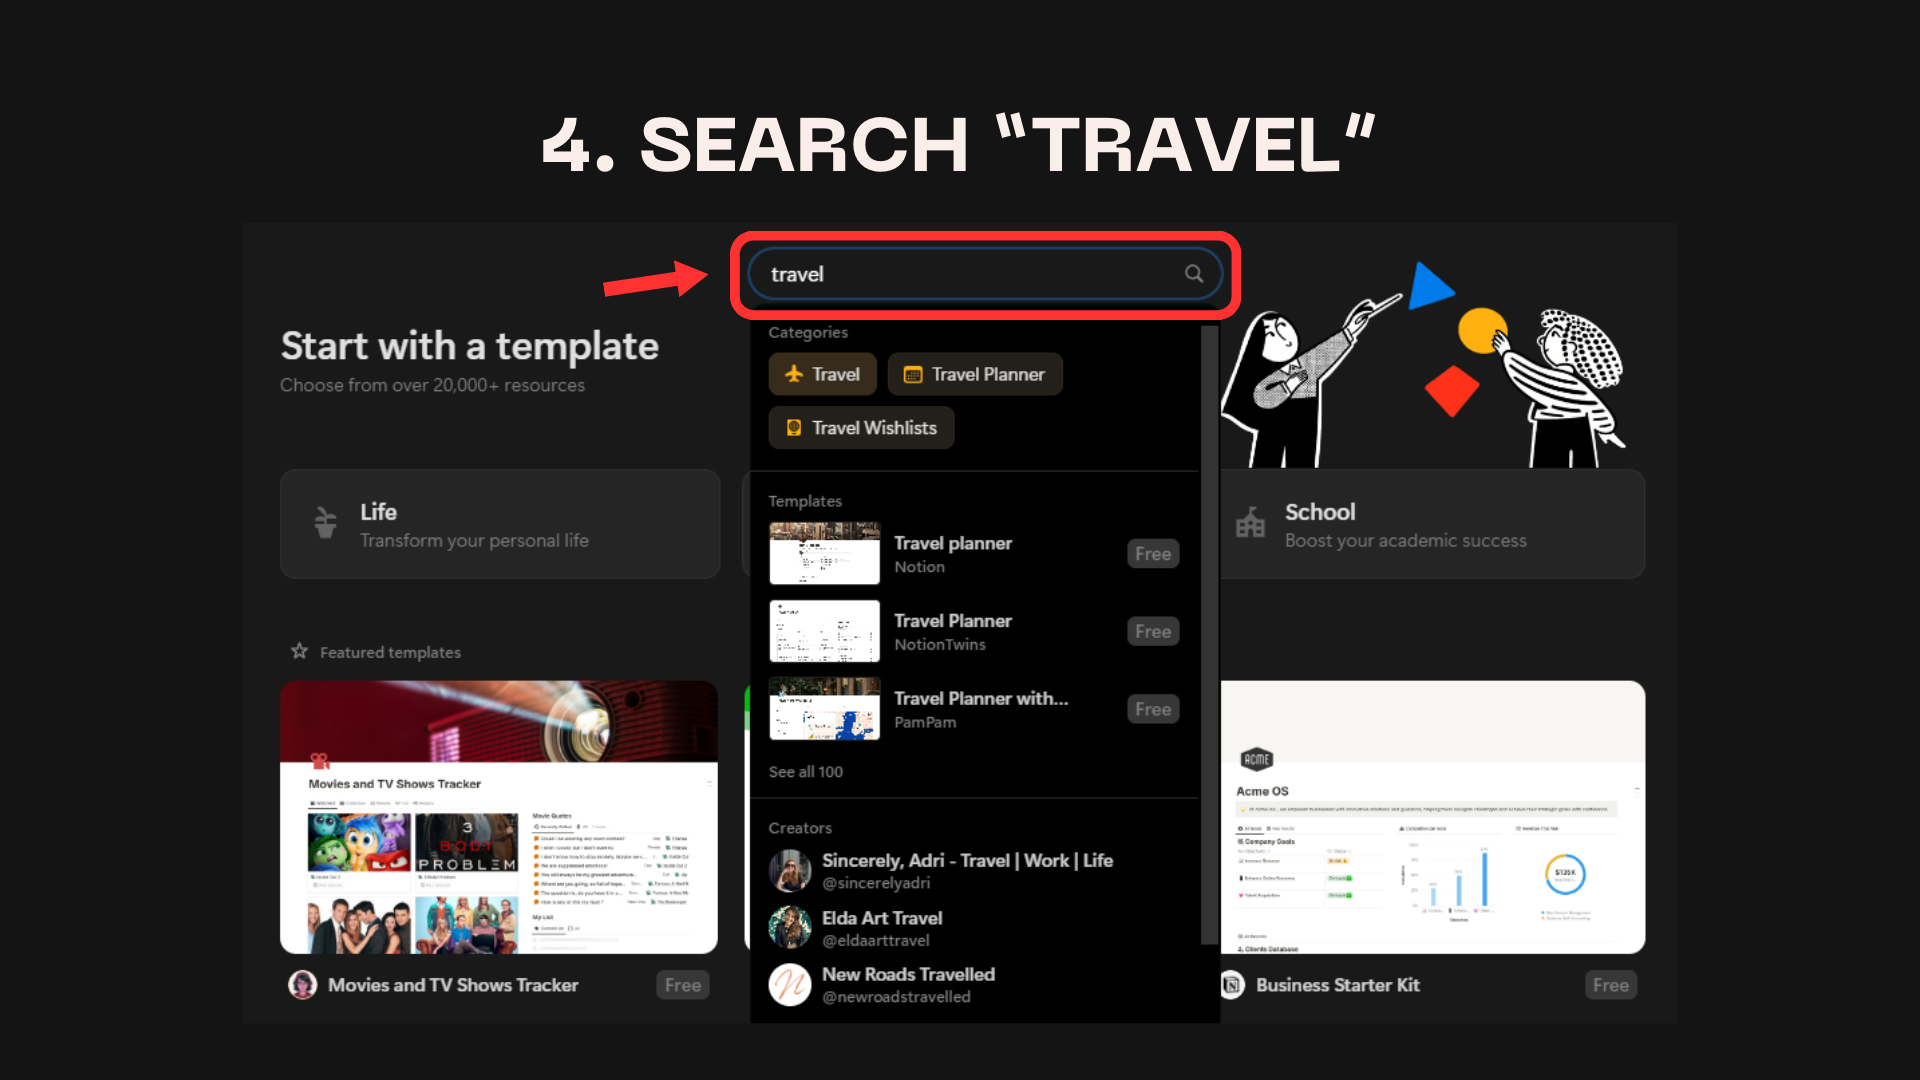
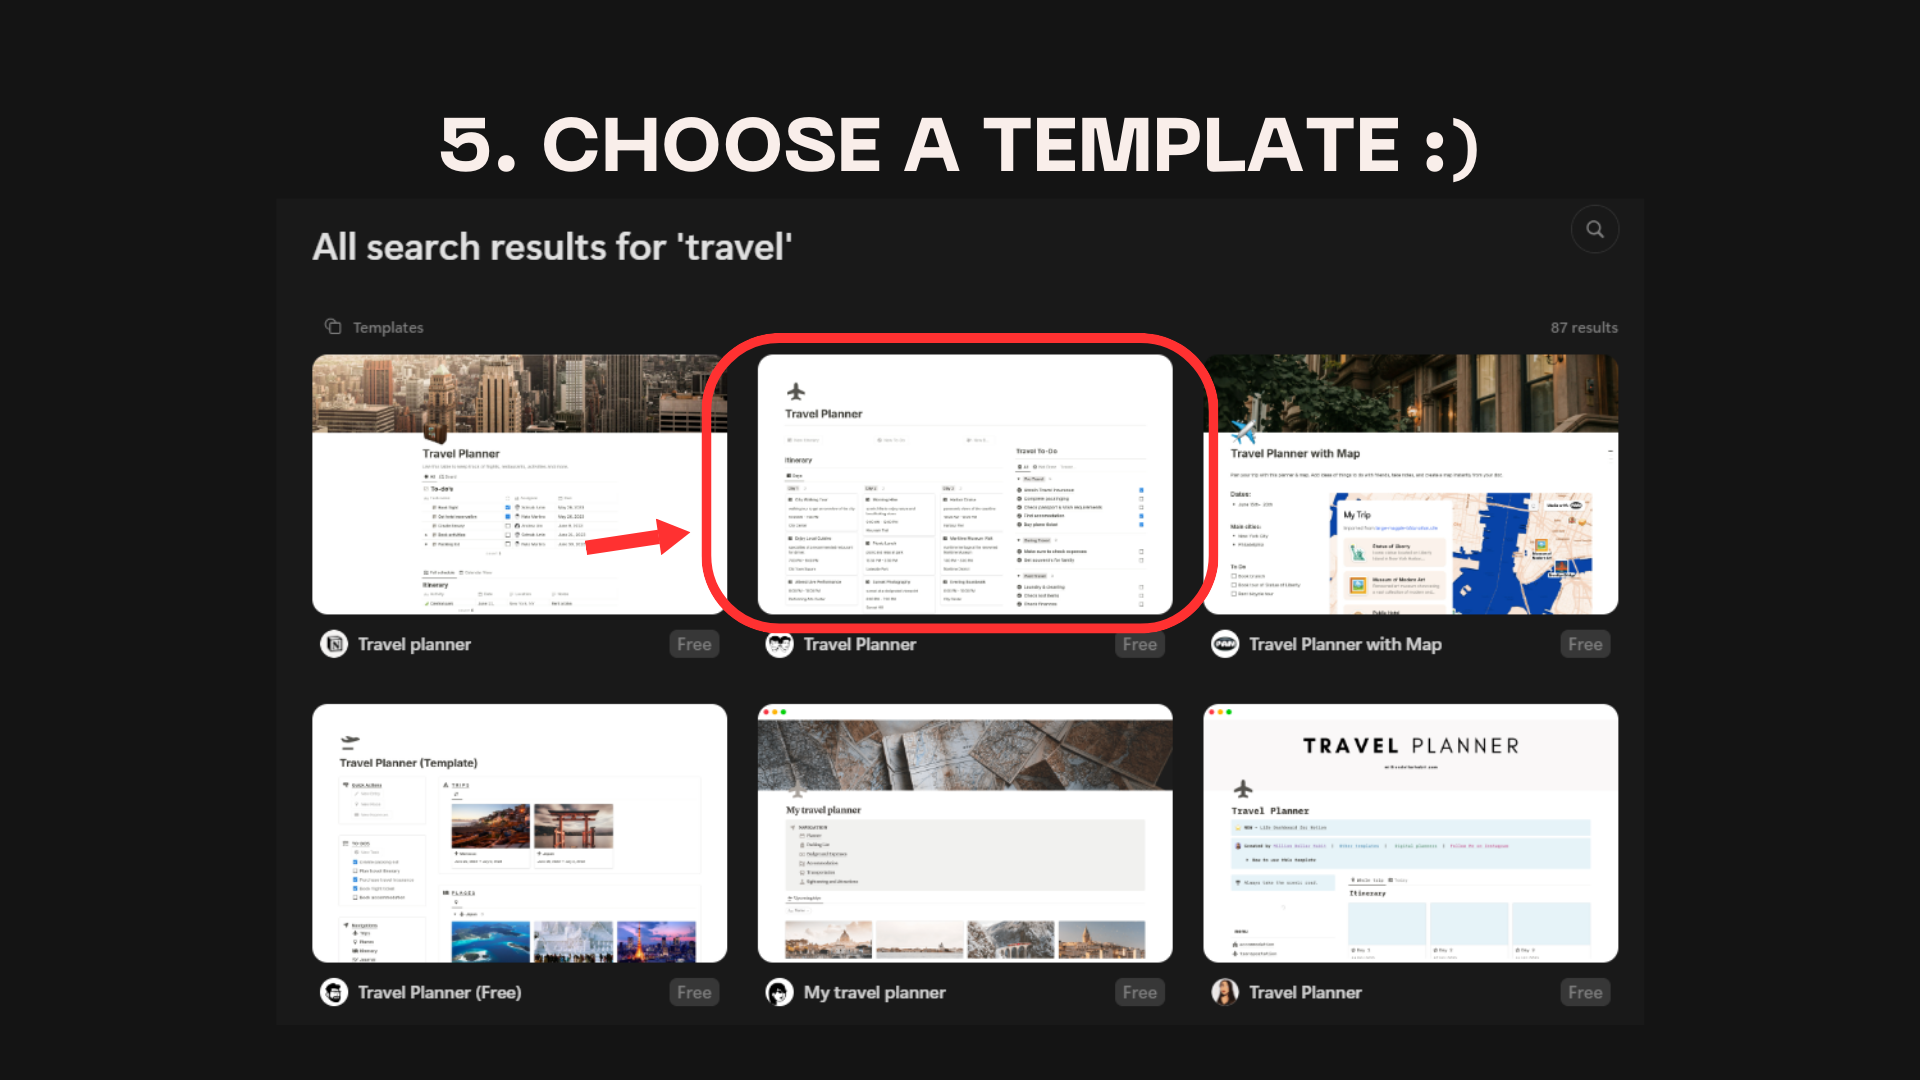
- Click on Templates and search for "travel planner" or "itinerary".
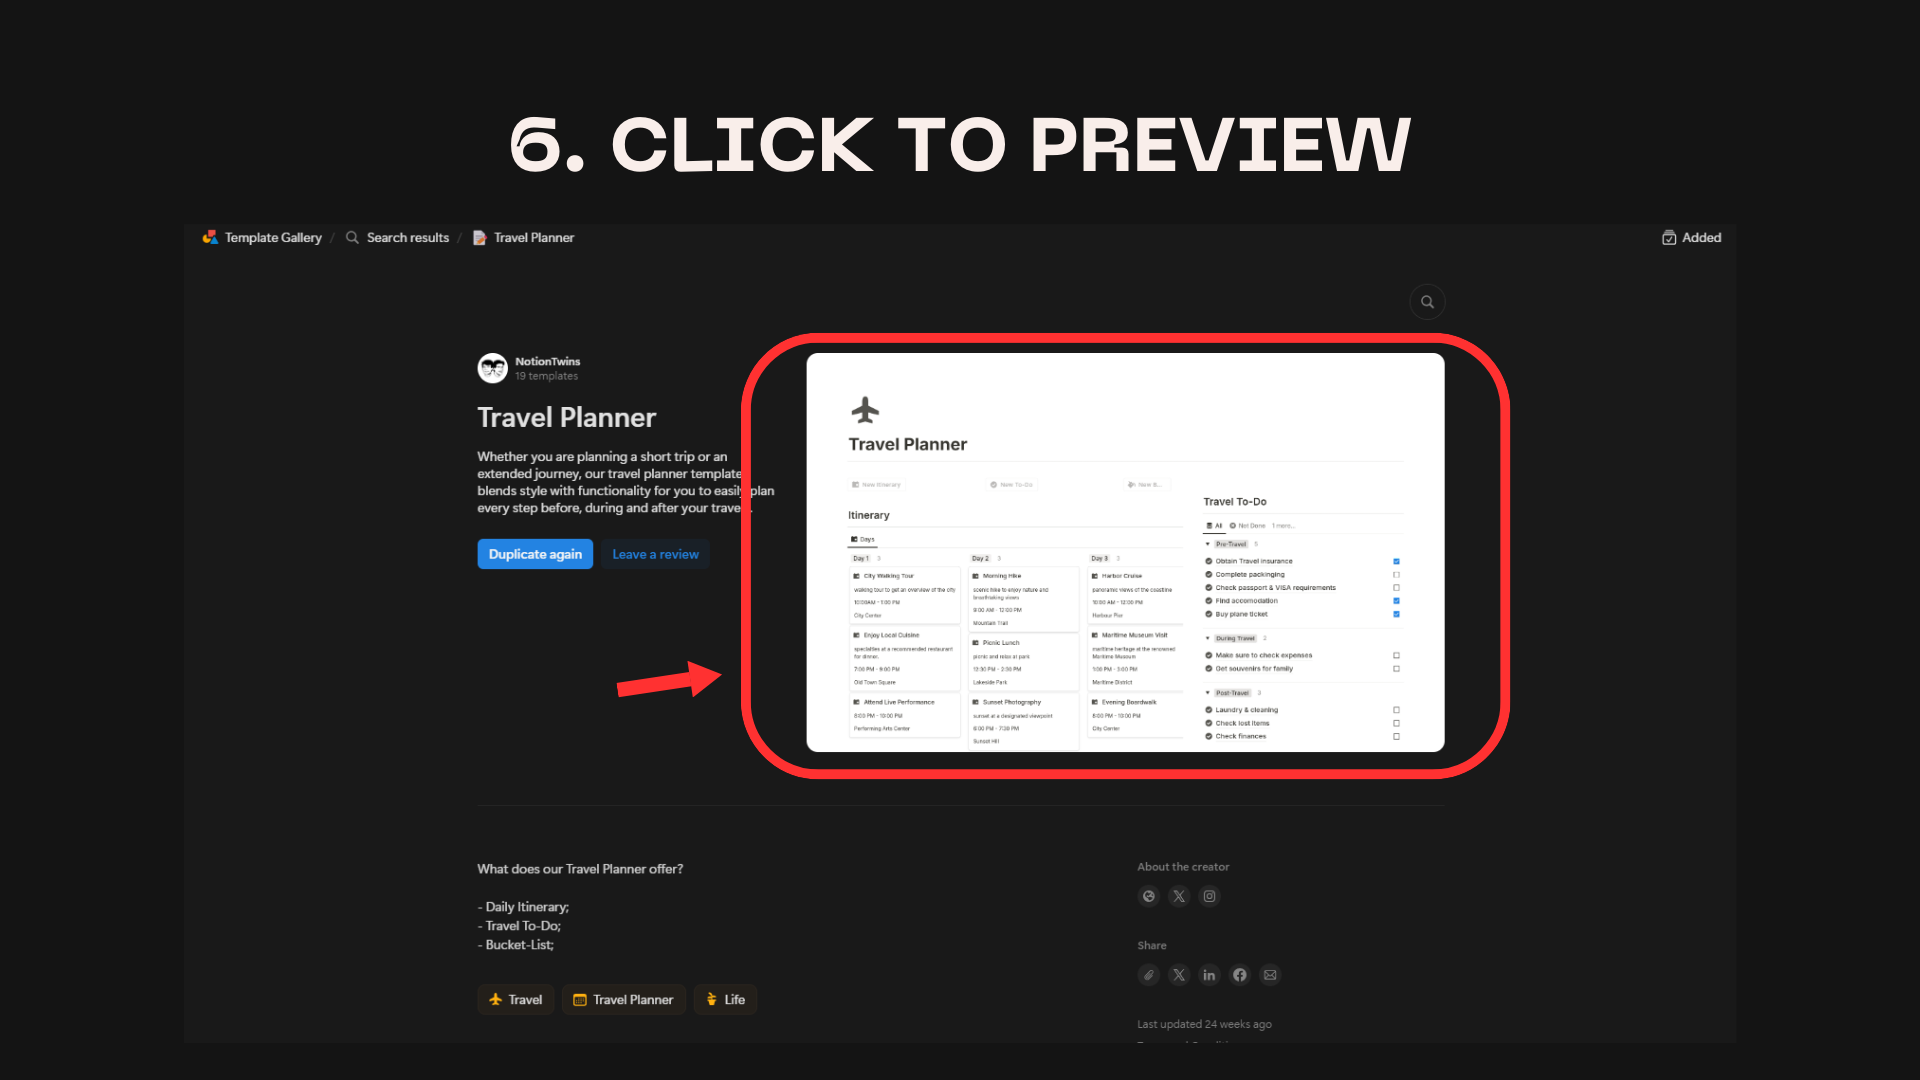
- Choose a template that suits your style (e.g., one with daily breakdowns and a bucket list).
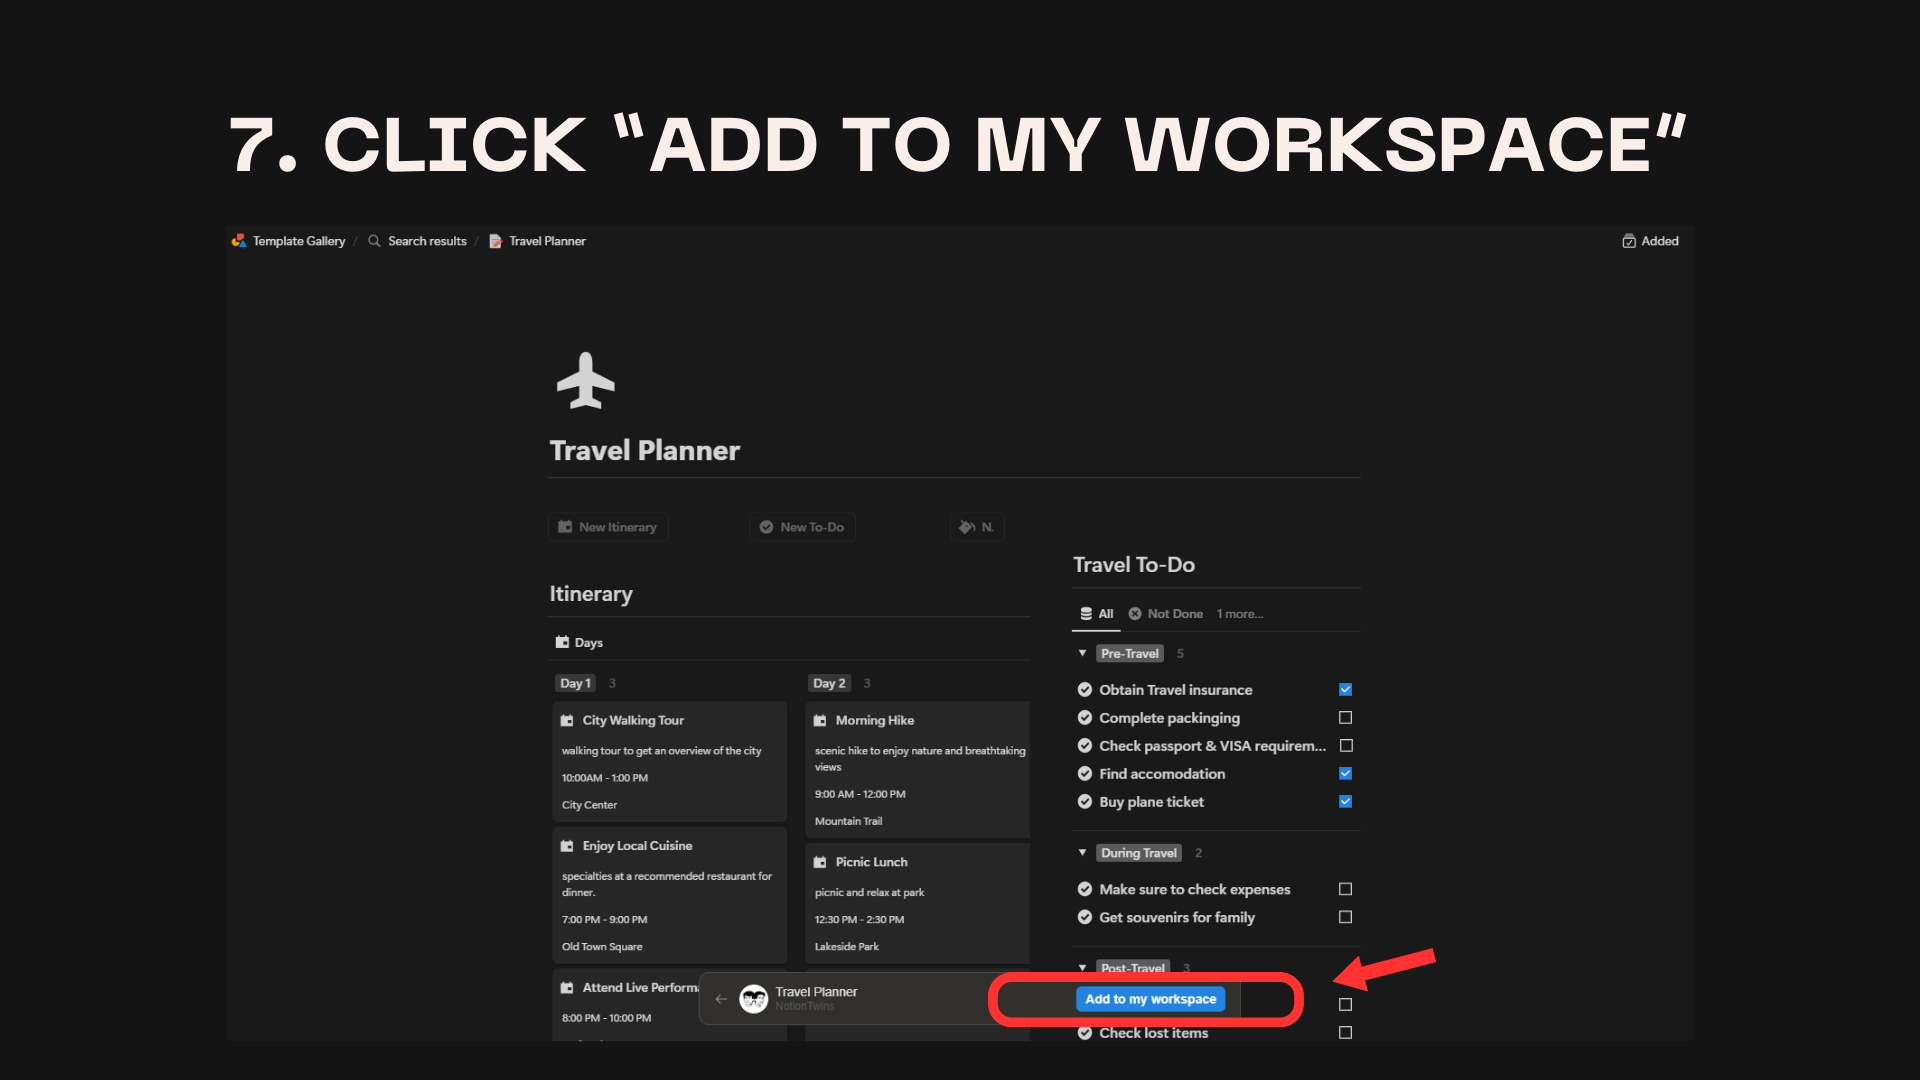
- Copy your ChatGPT-generated itinerary into the Notion template, customizing as you go.
Step by step guide

Final Look
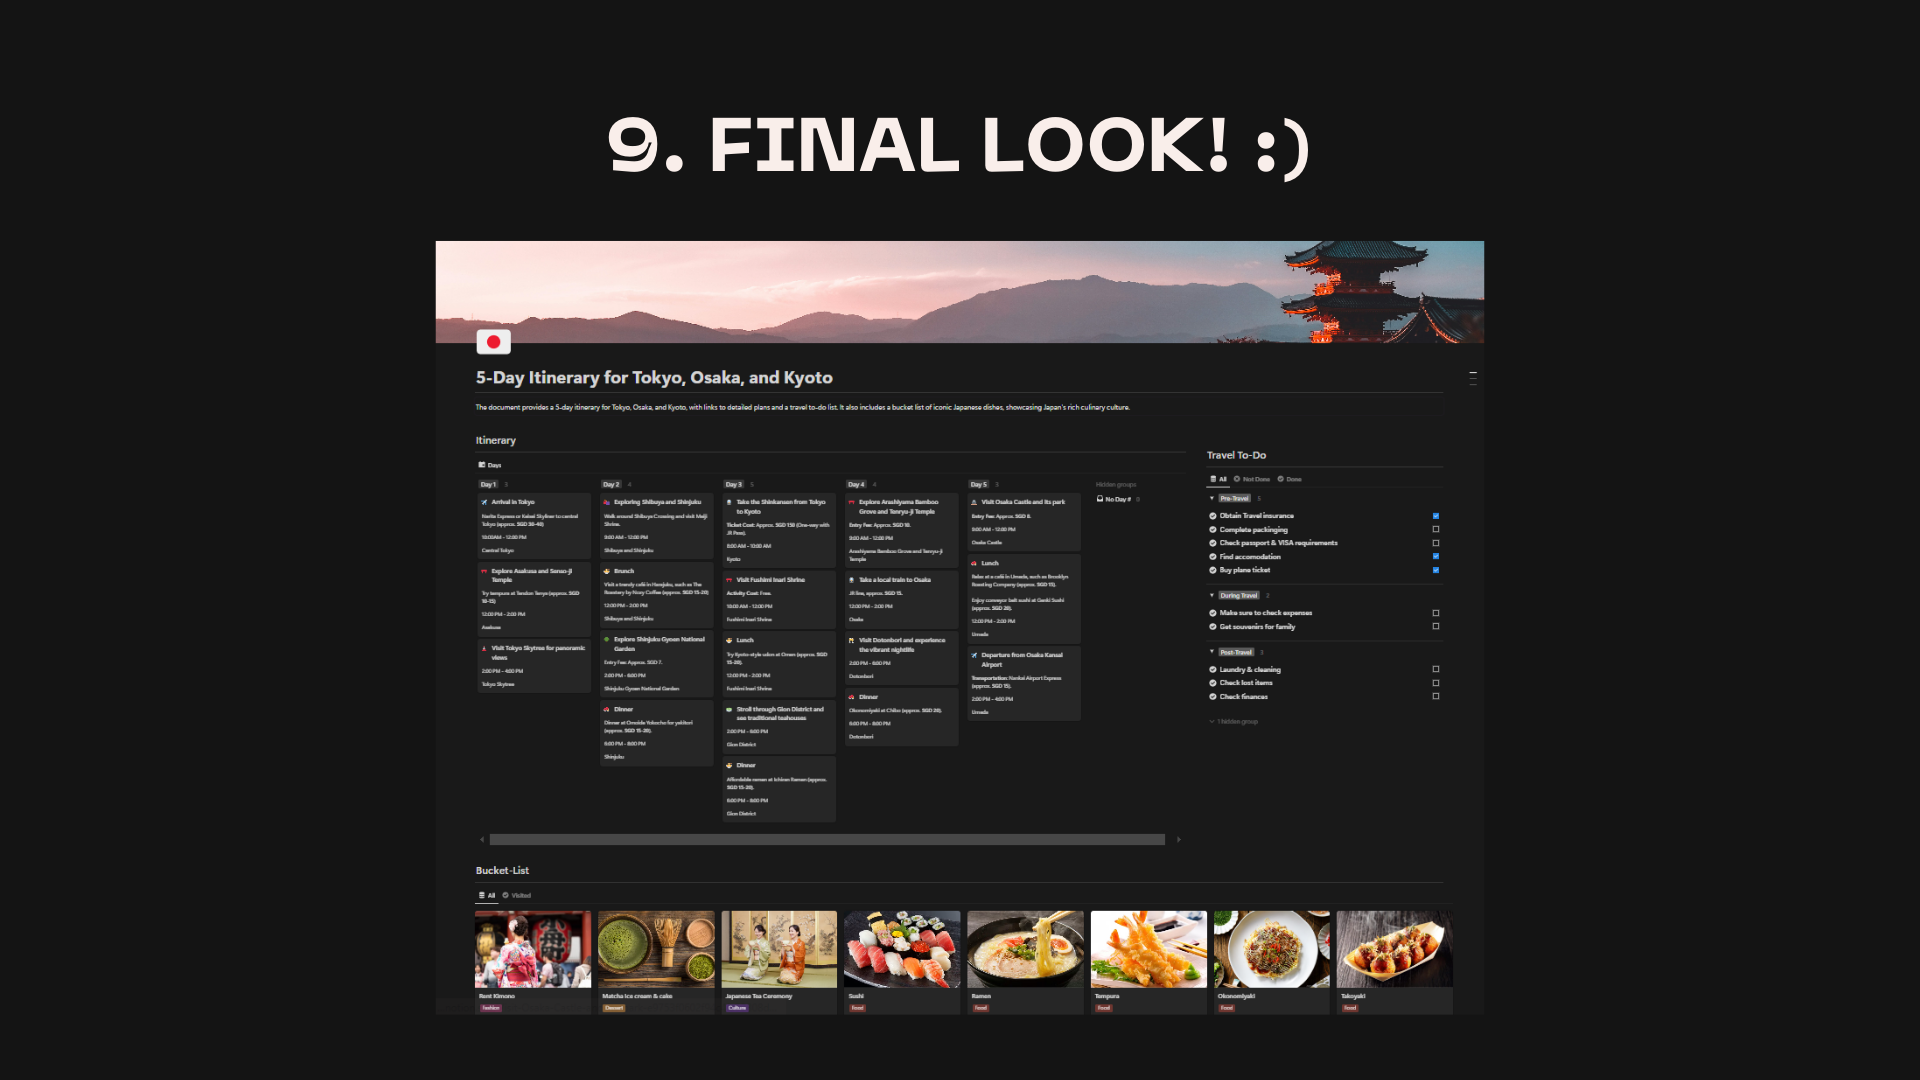
Enhancing Your Notion Travel Guide
- Add Icons: Use emojis or icons to make your itinerary more visually appealing.
- Include Images: Add photos of attractions or dishes to help you recognize them during your trip.
- Create a Bucket List: Use ChatGPT to generate a top 10 list of must-try foods or experiences, and add them to your Notion guide.
- Embed Google Maps: Add a map of your destination with pinned locations for easy navigation.
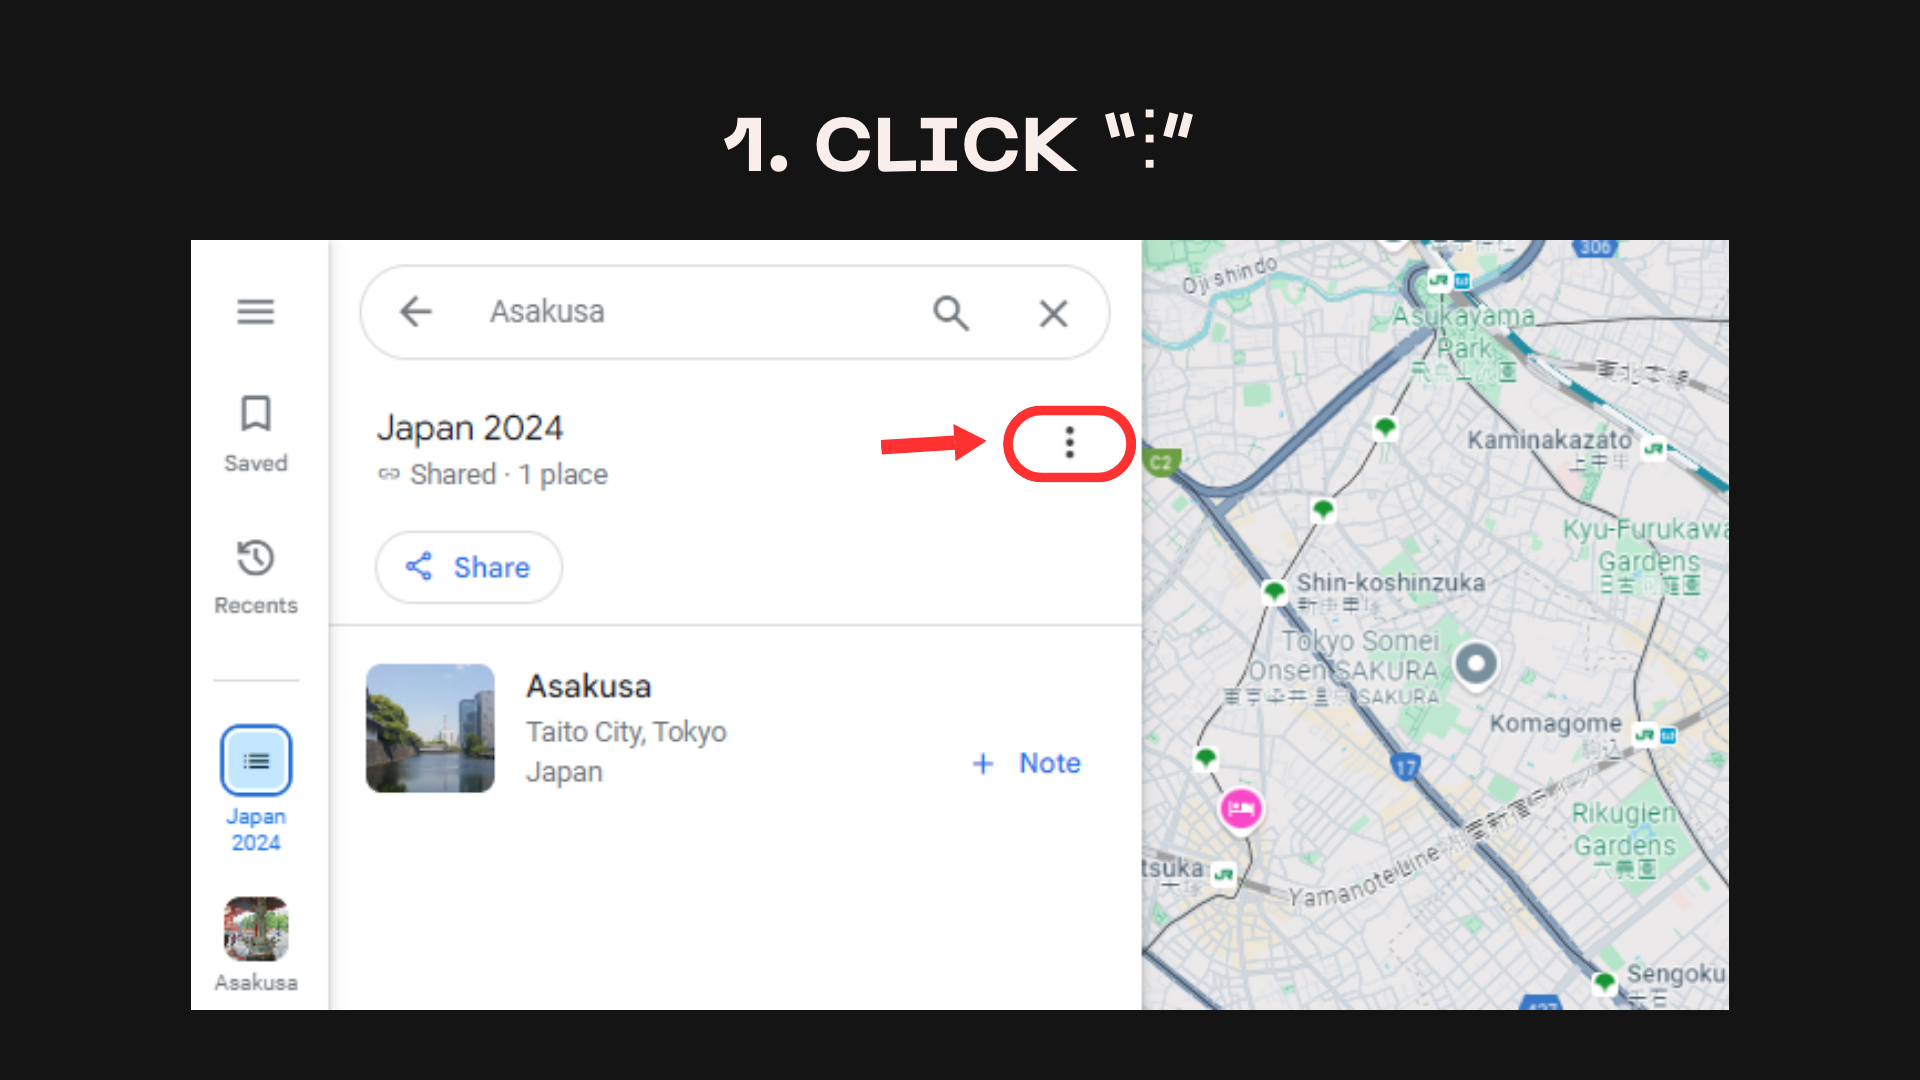
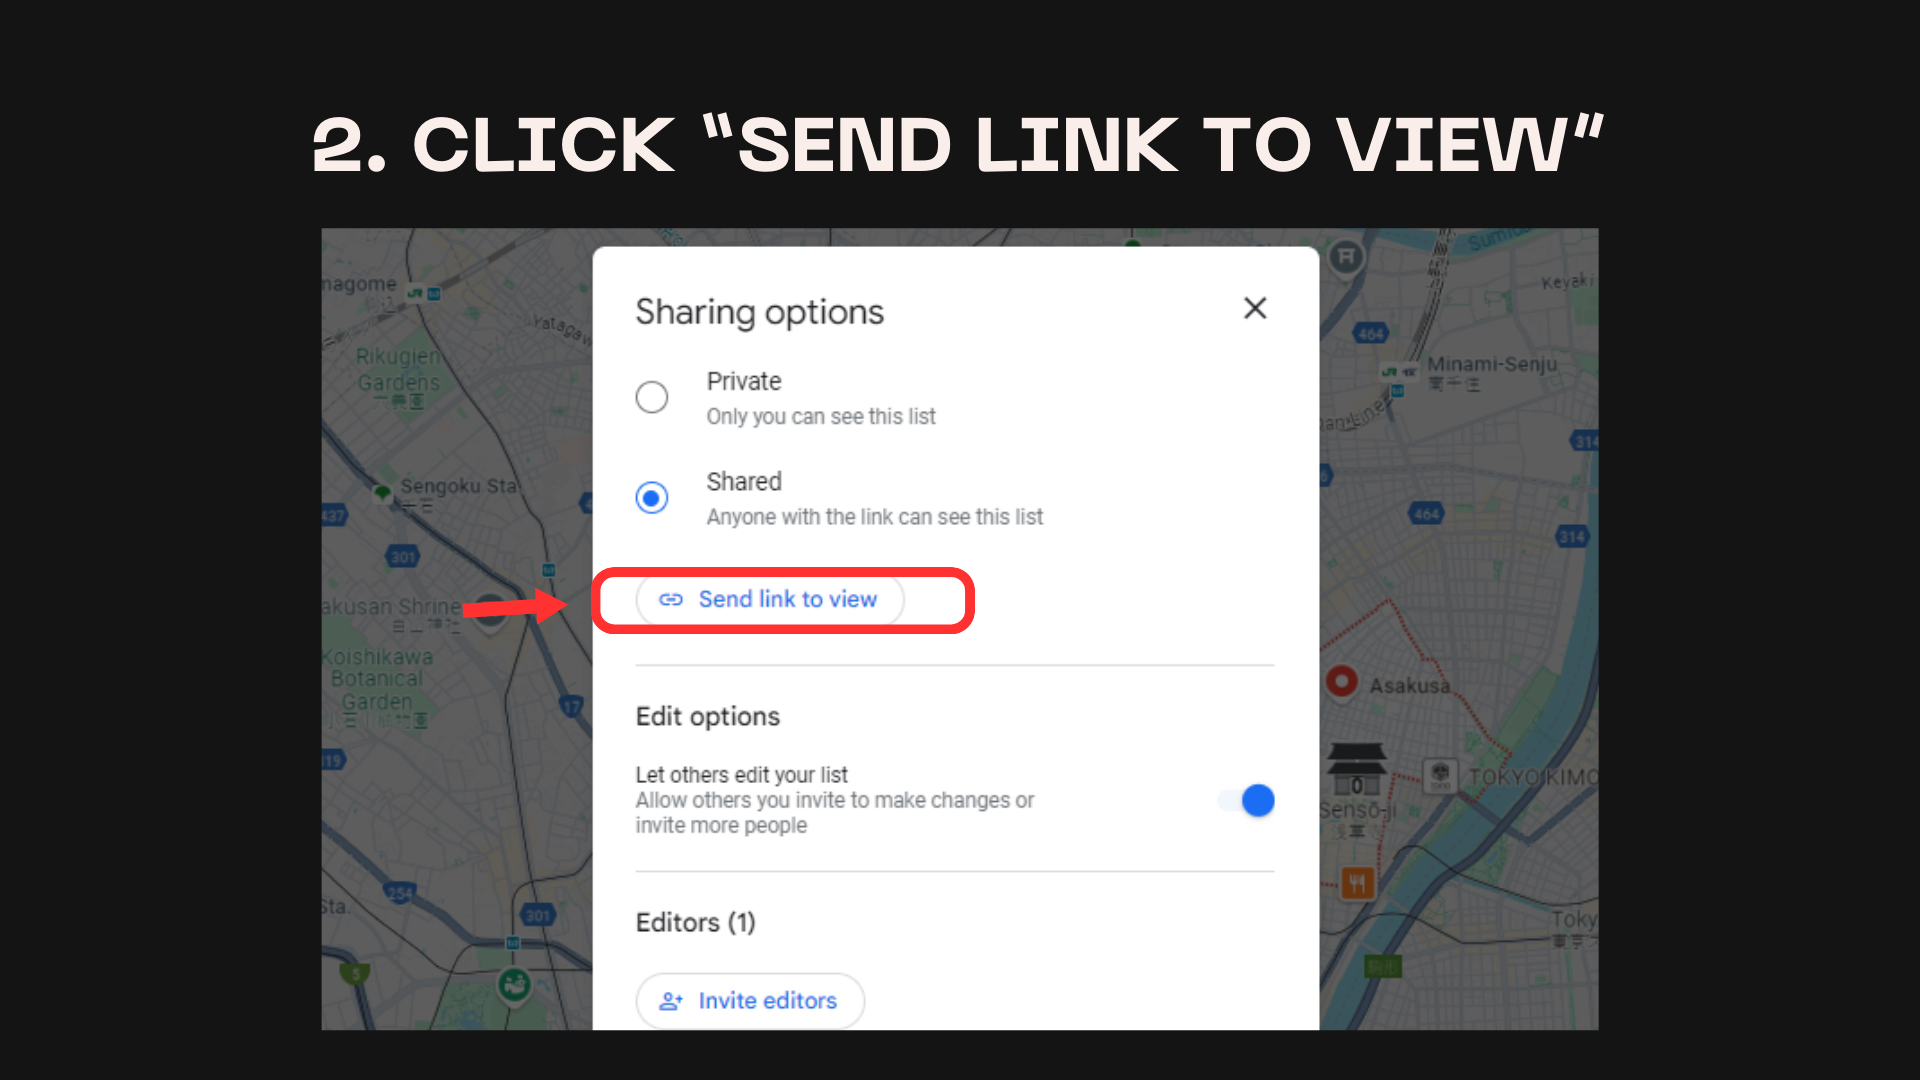
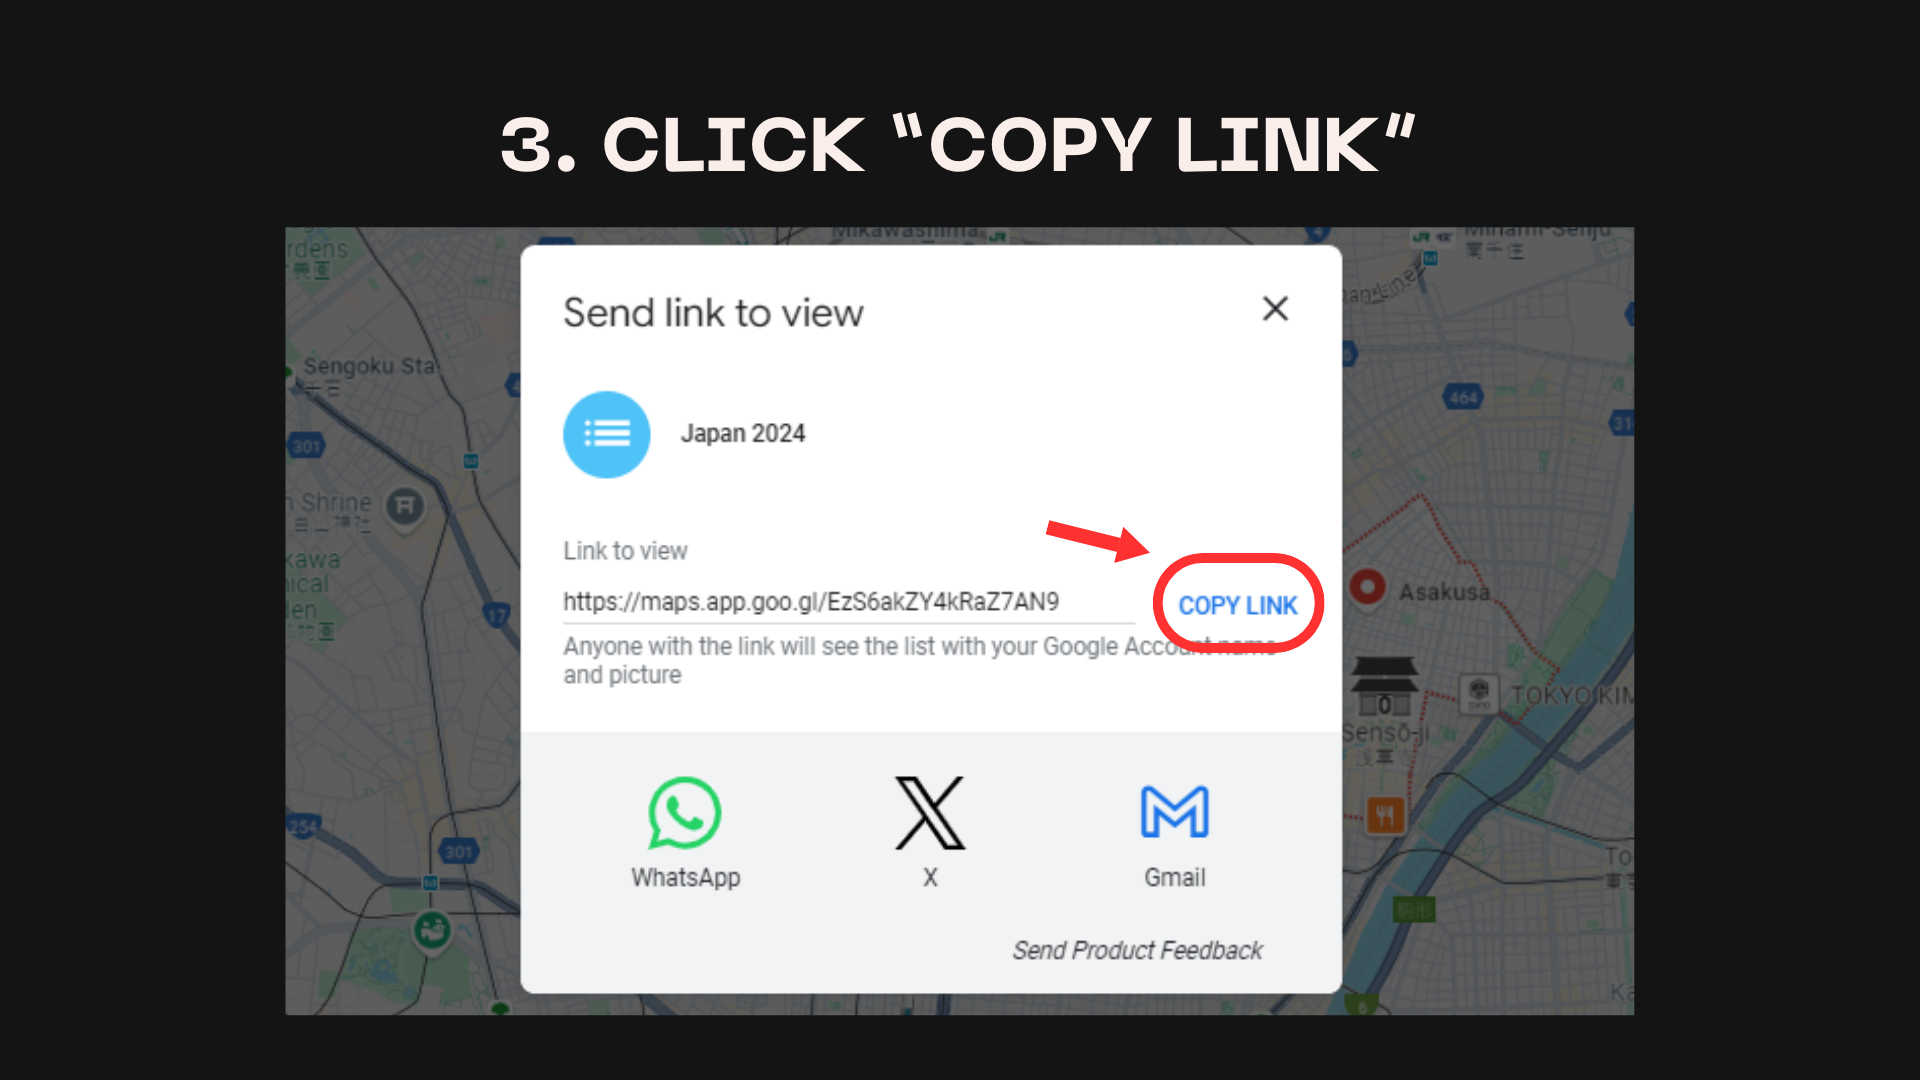
🗺 Step 4: Create a Custom Google Map
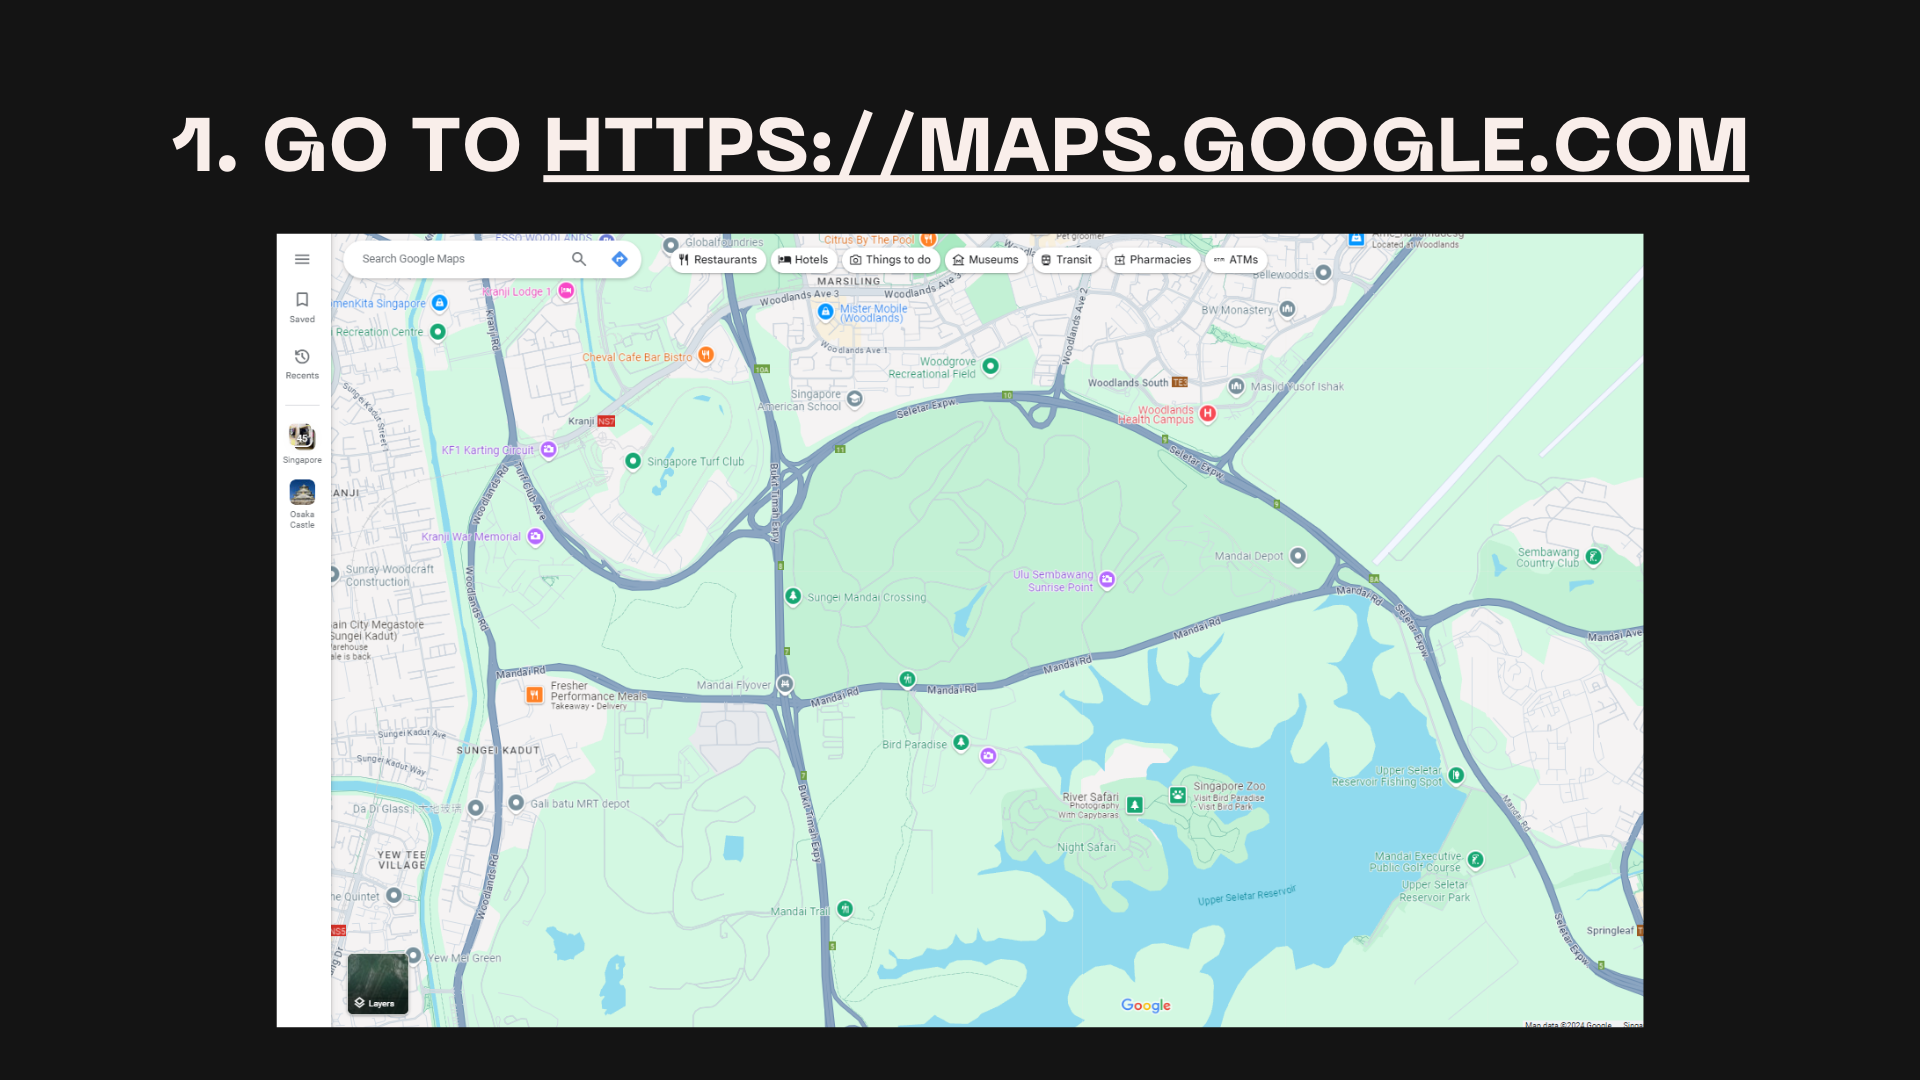
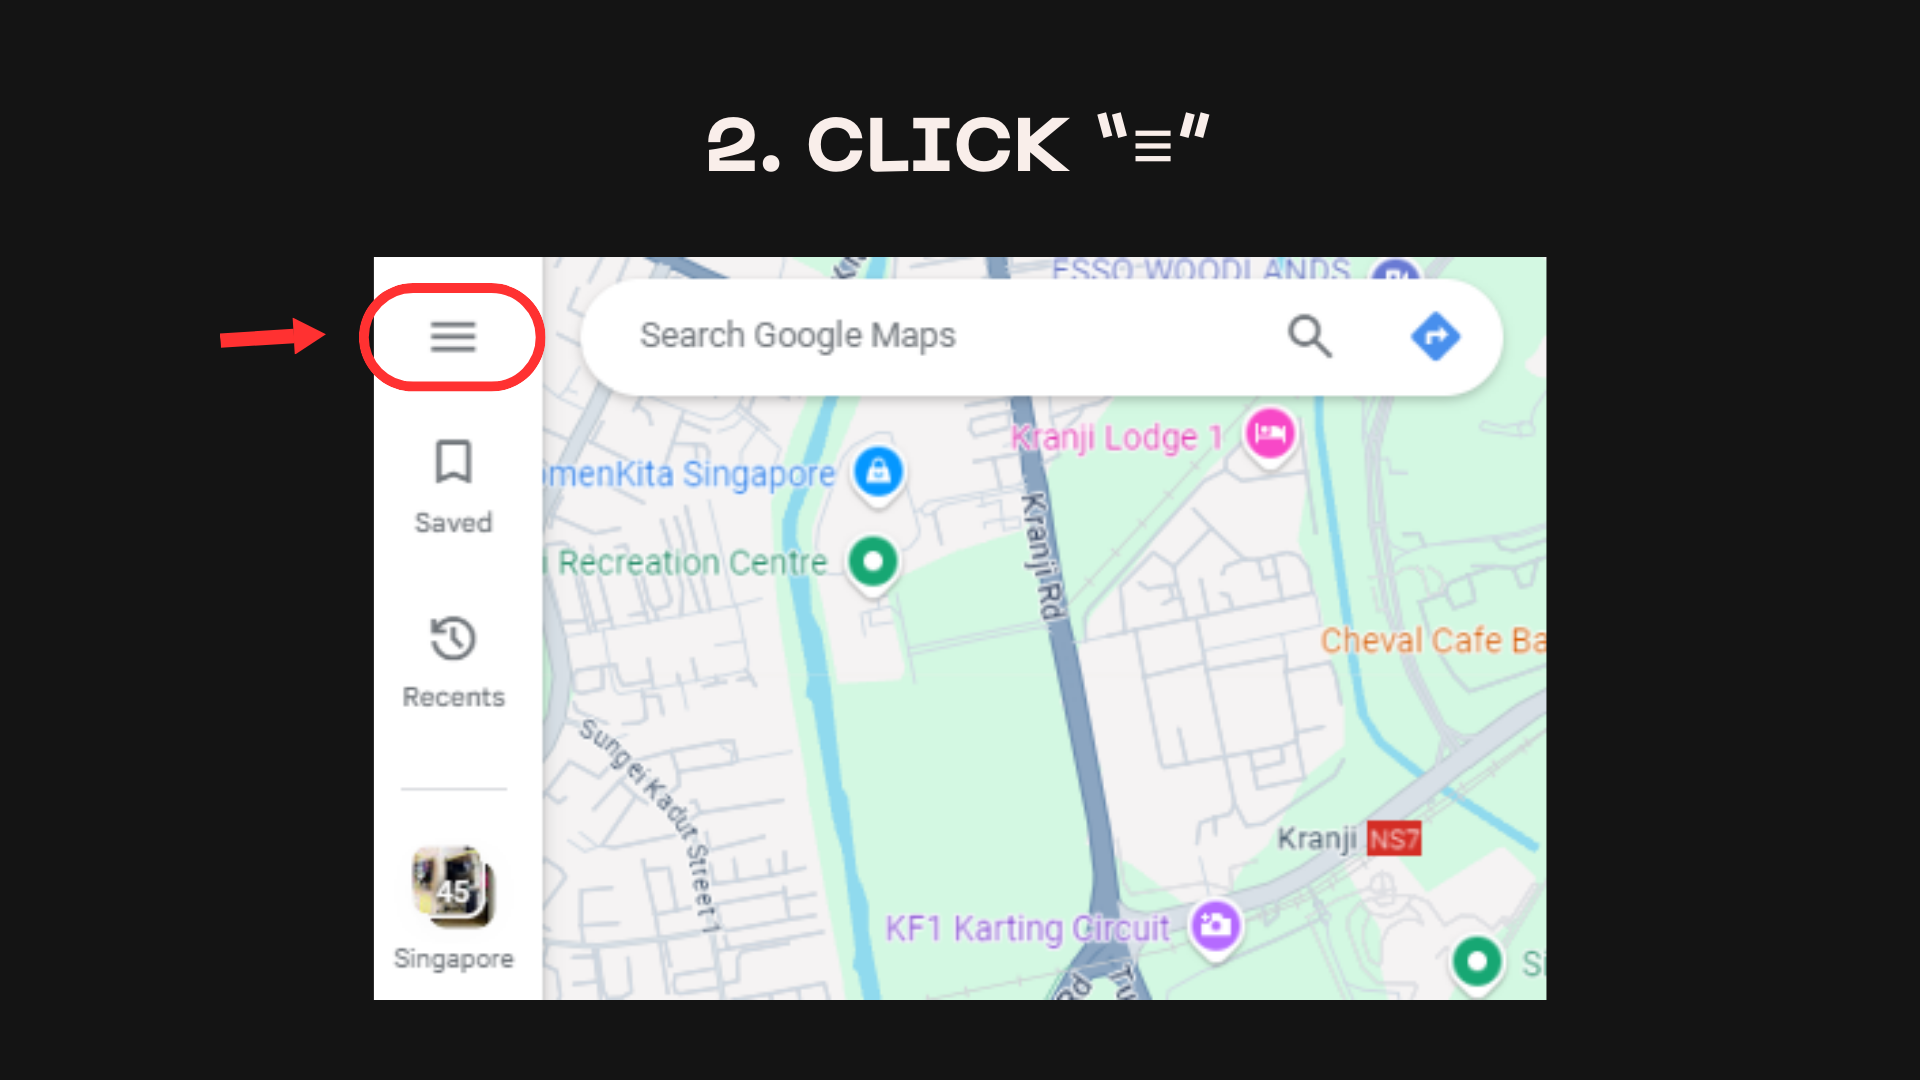
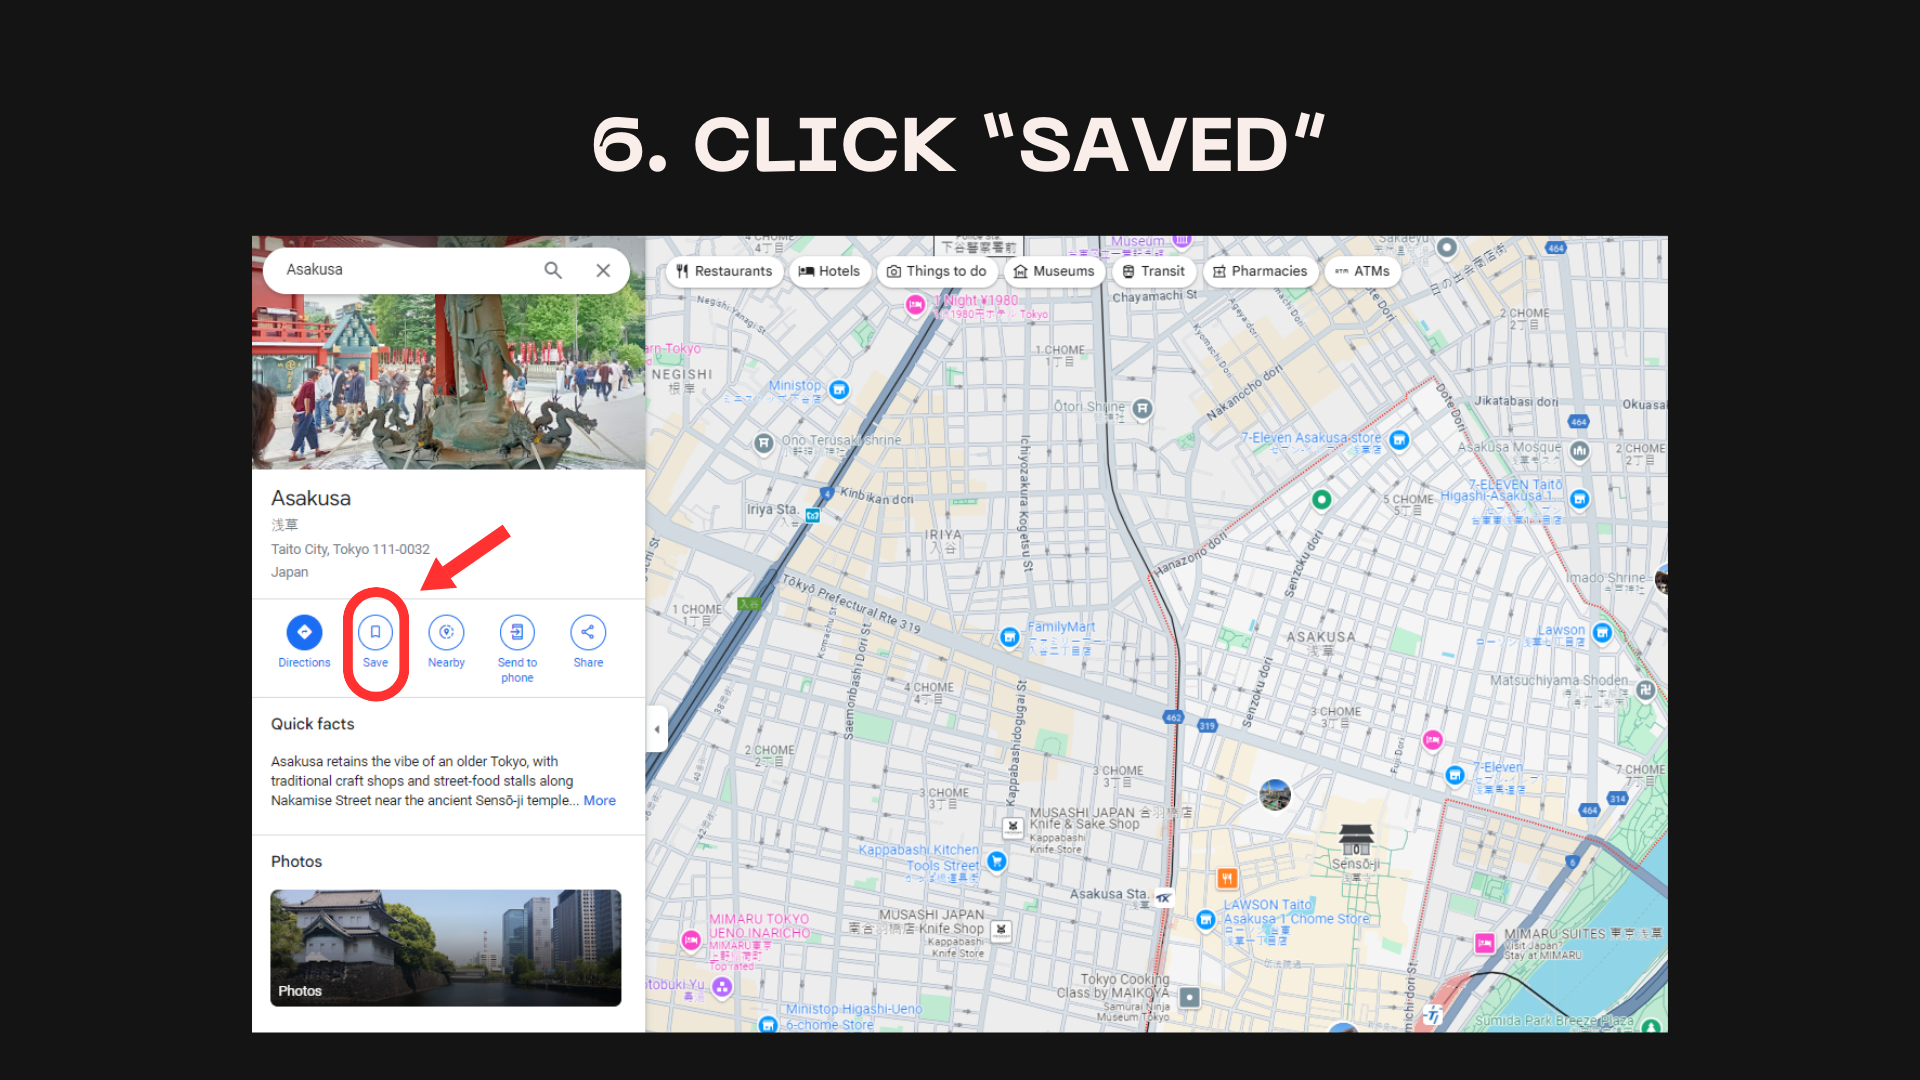
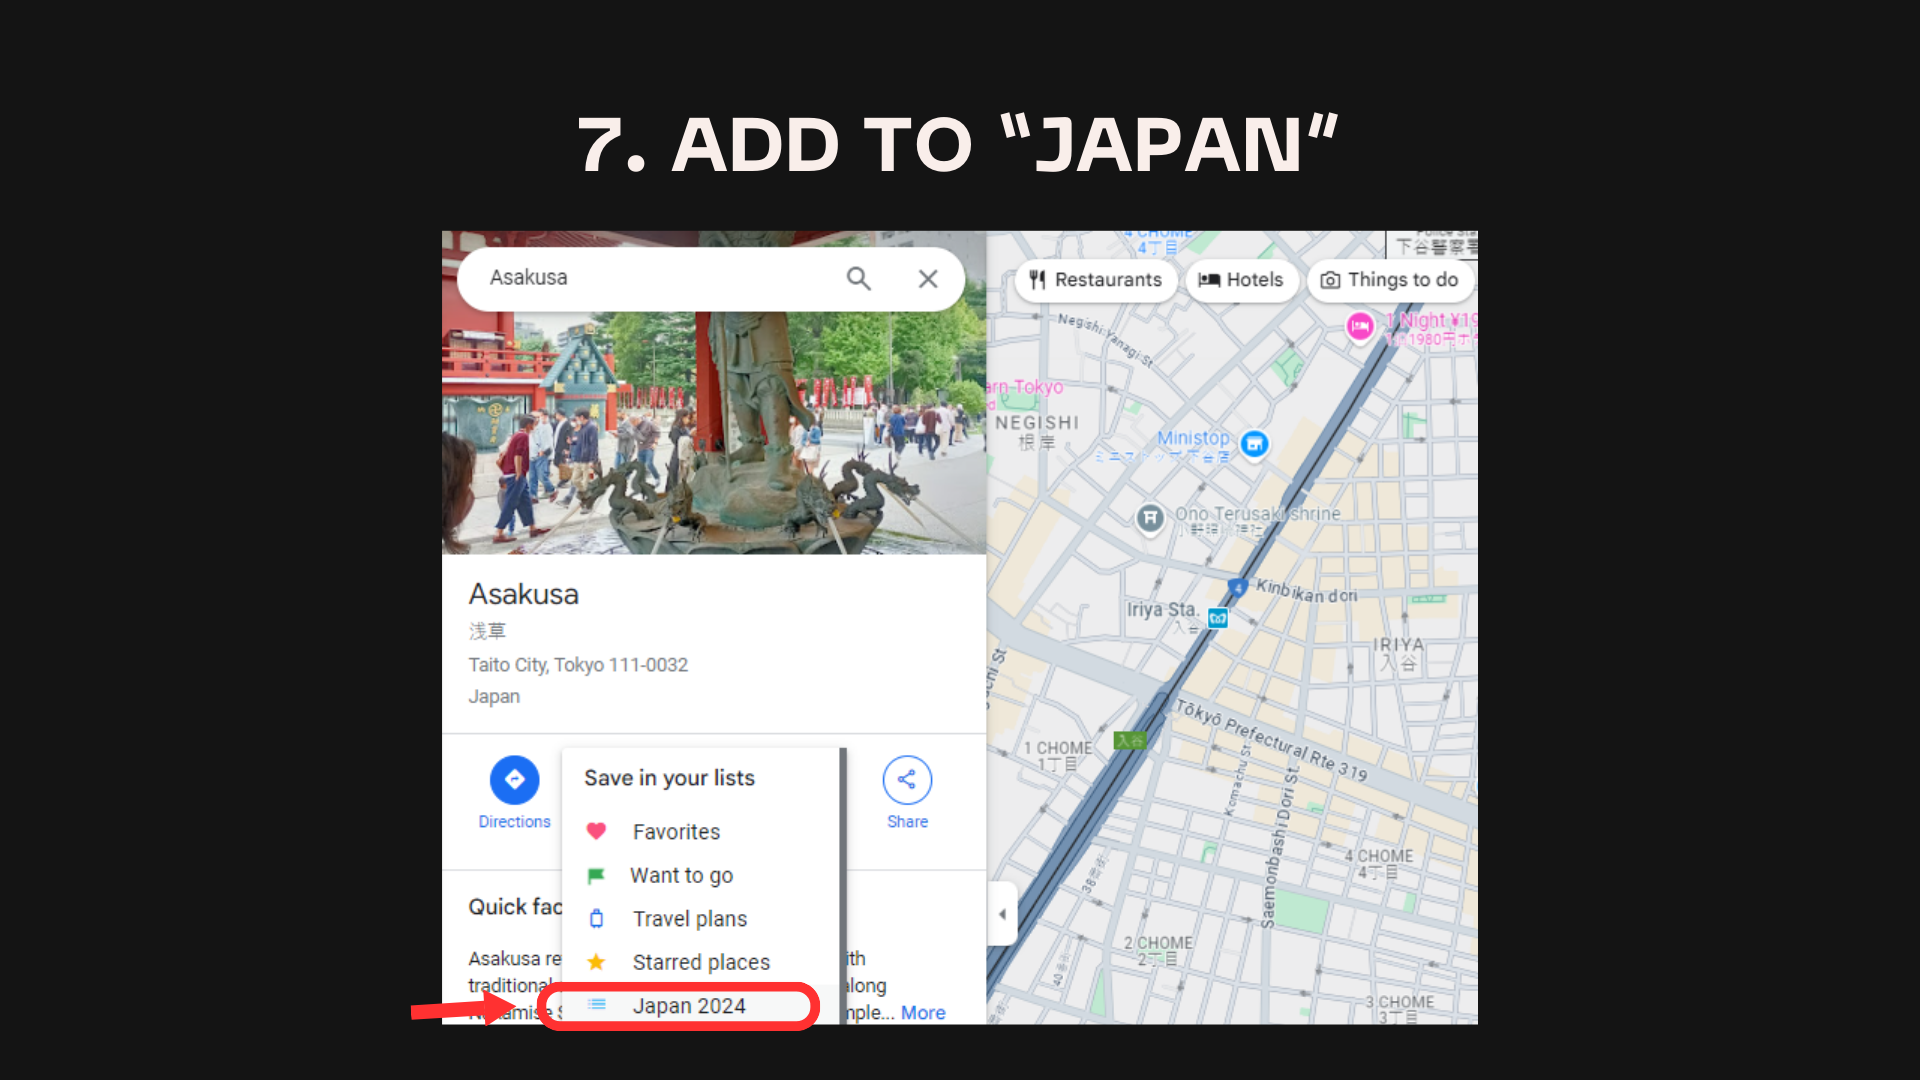
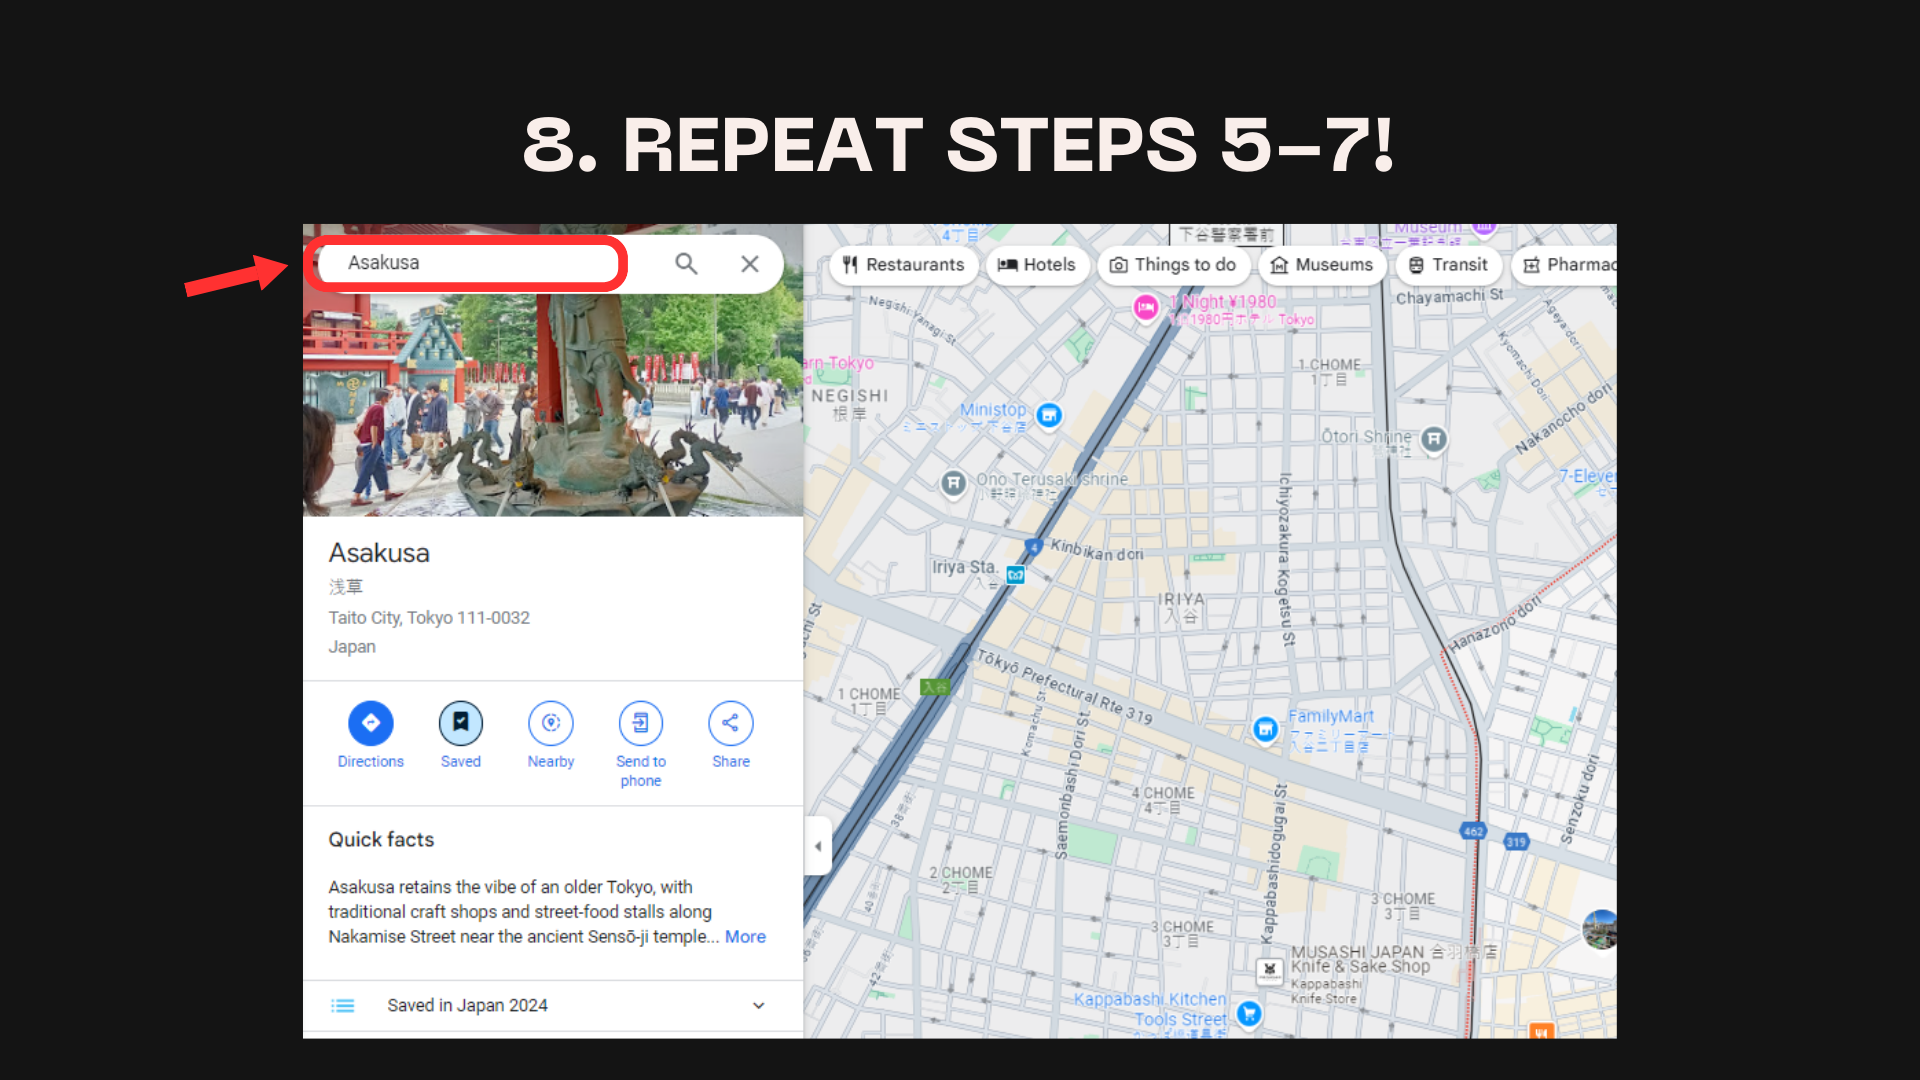
To make navigating your destination easier, create a custom Google Map with all your planned locations:
- Go to Google Maps.
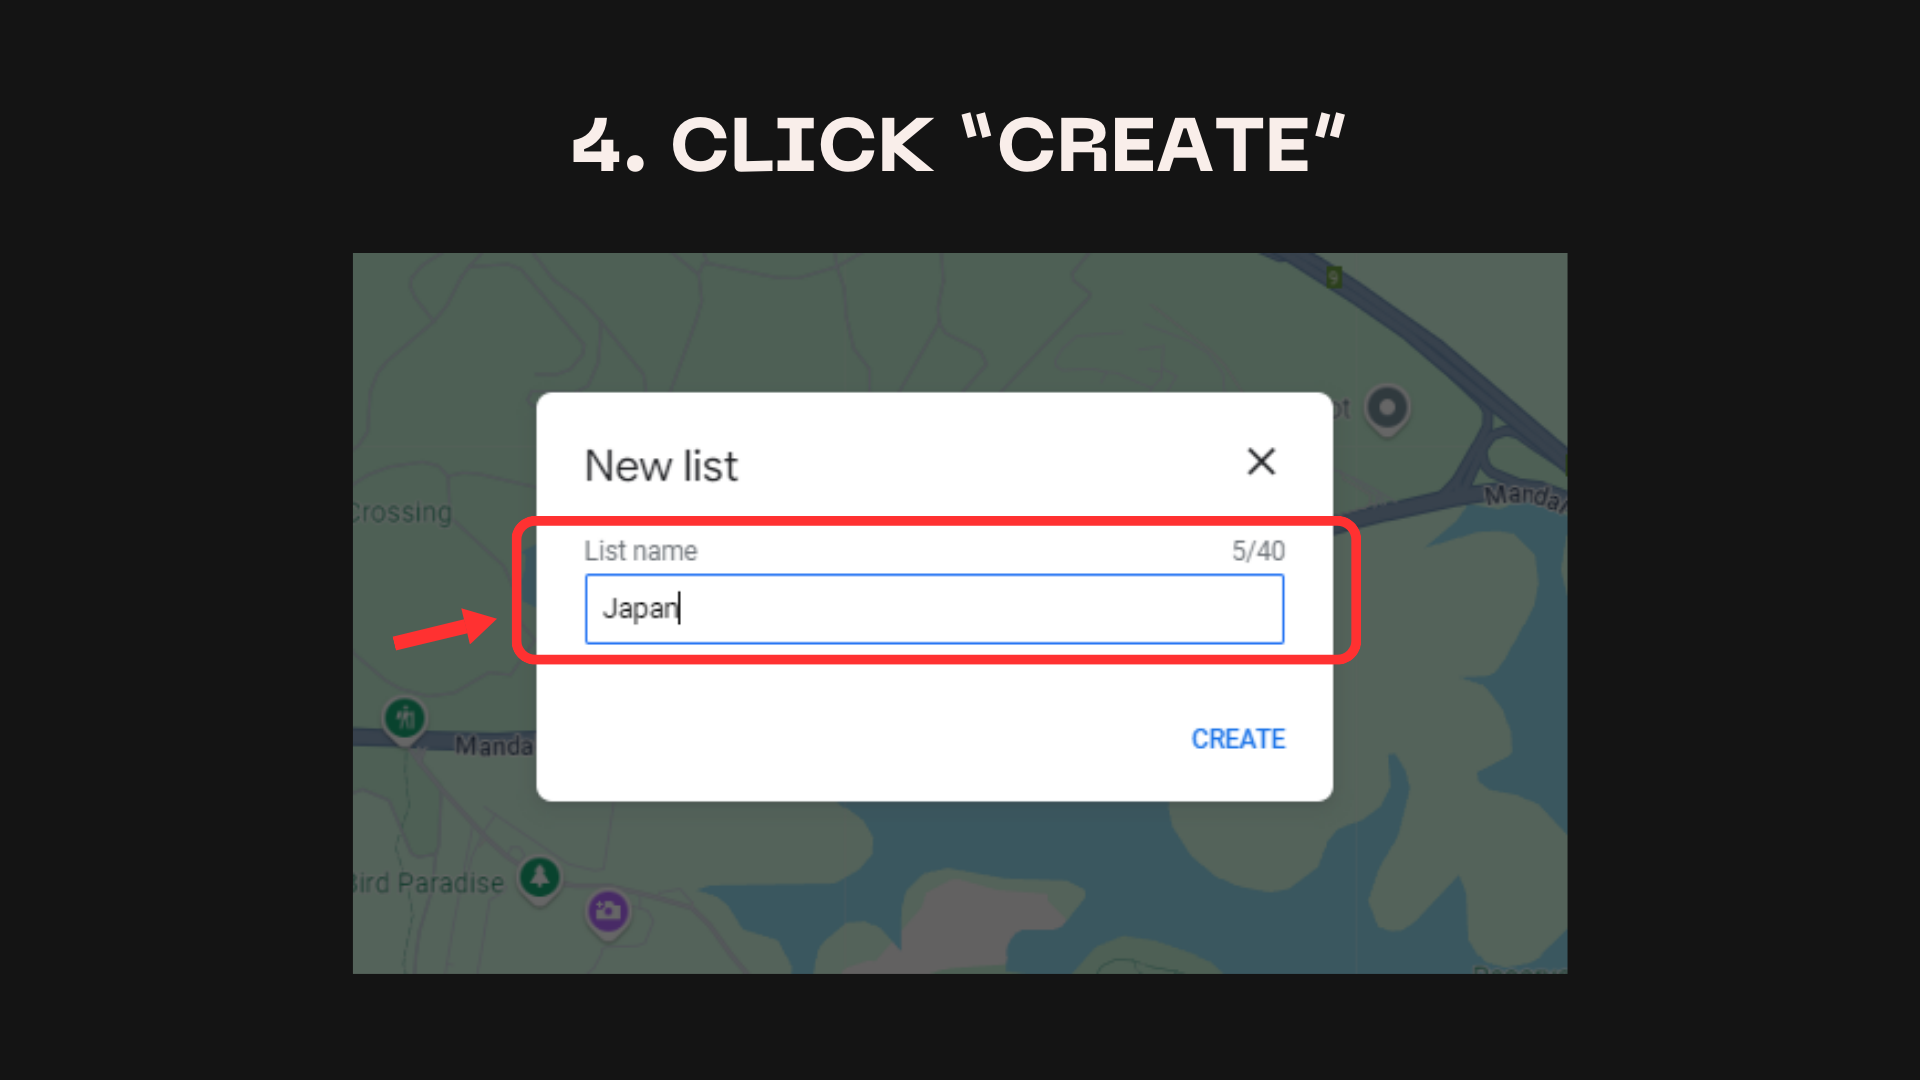
- Click on Menu > Your Places > Maps > Create Map.
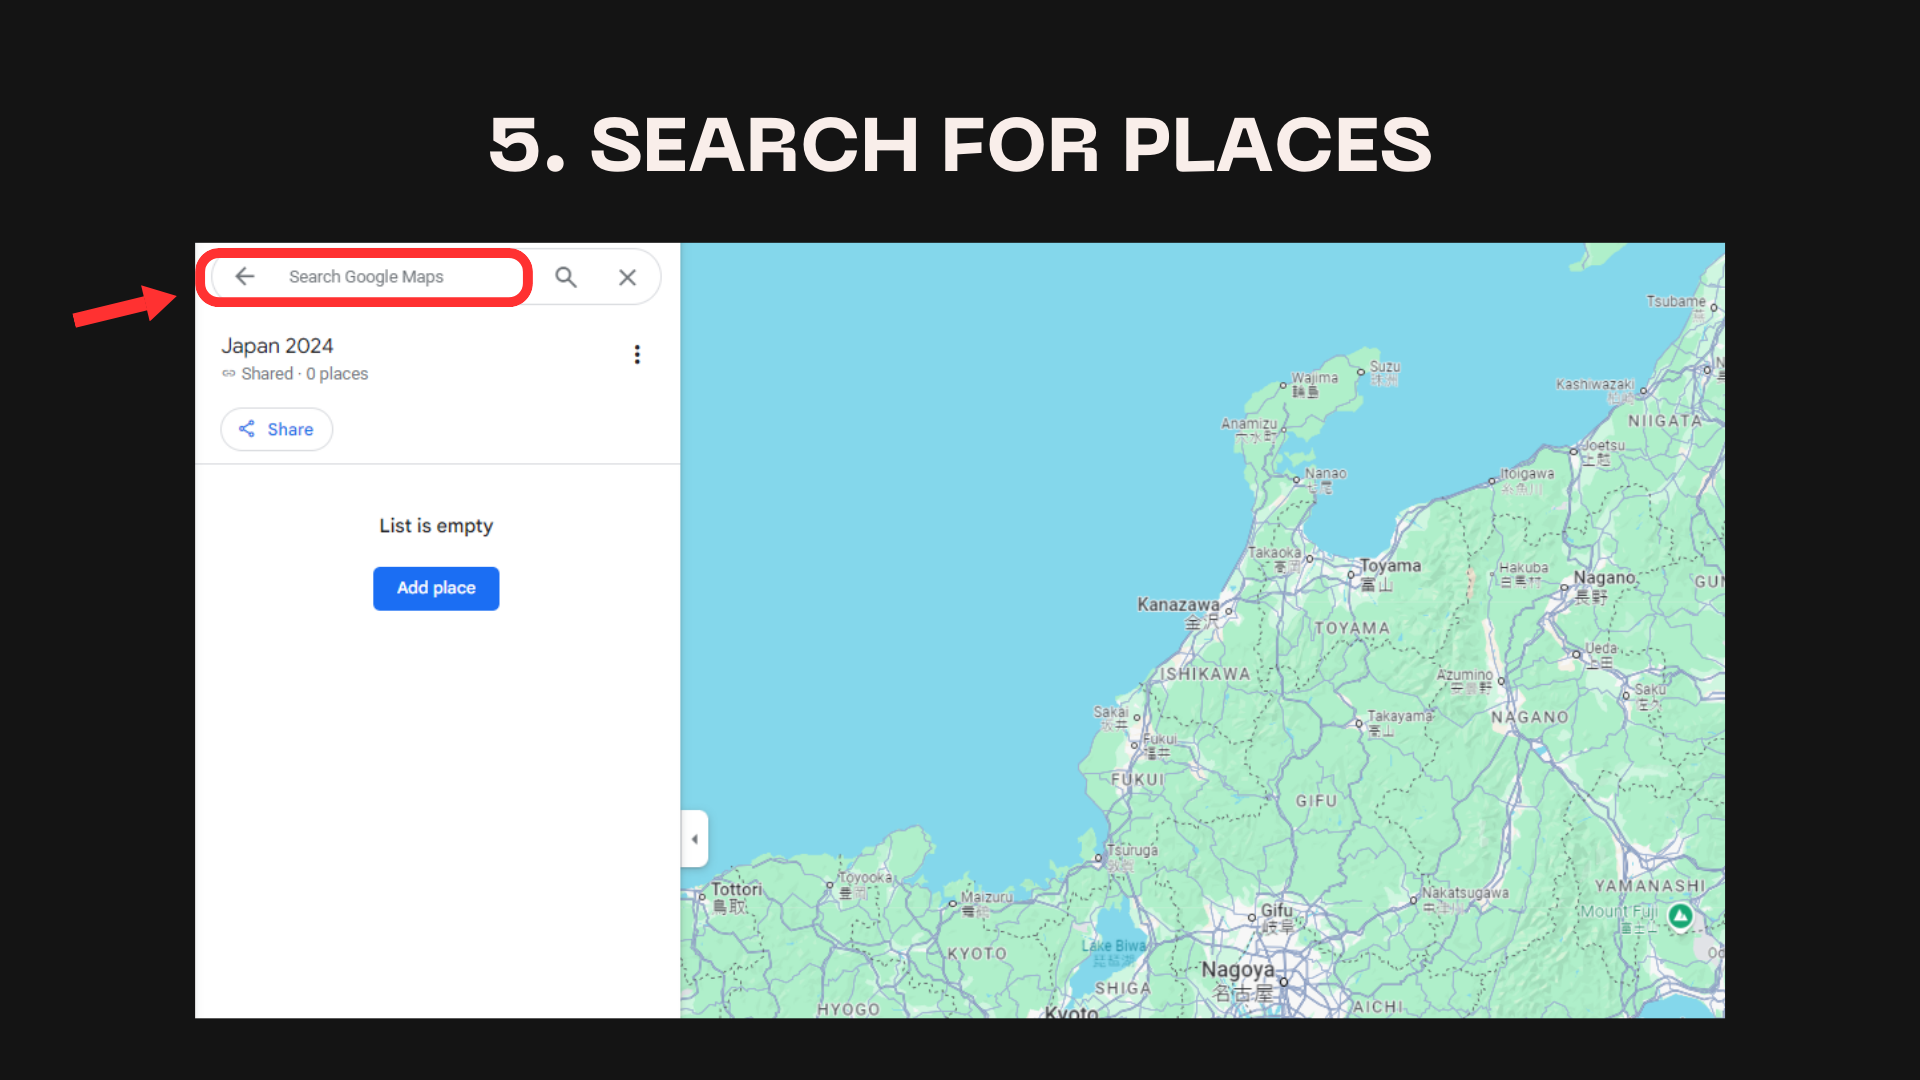
- Add pins for all the locations in your itinerary.
- Customize pins with different colors or icons for easy identification.
- Save and share your custom map.
How its done

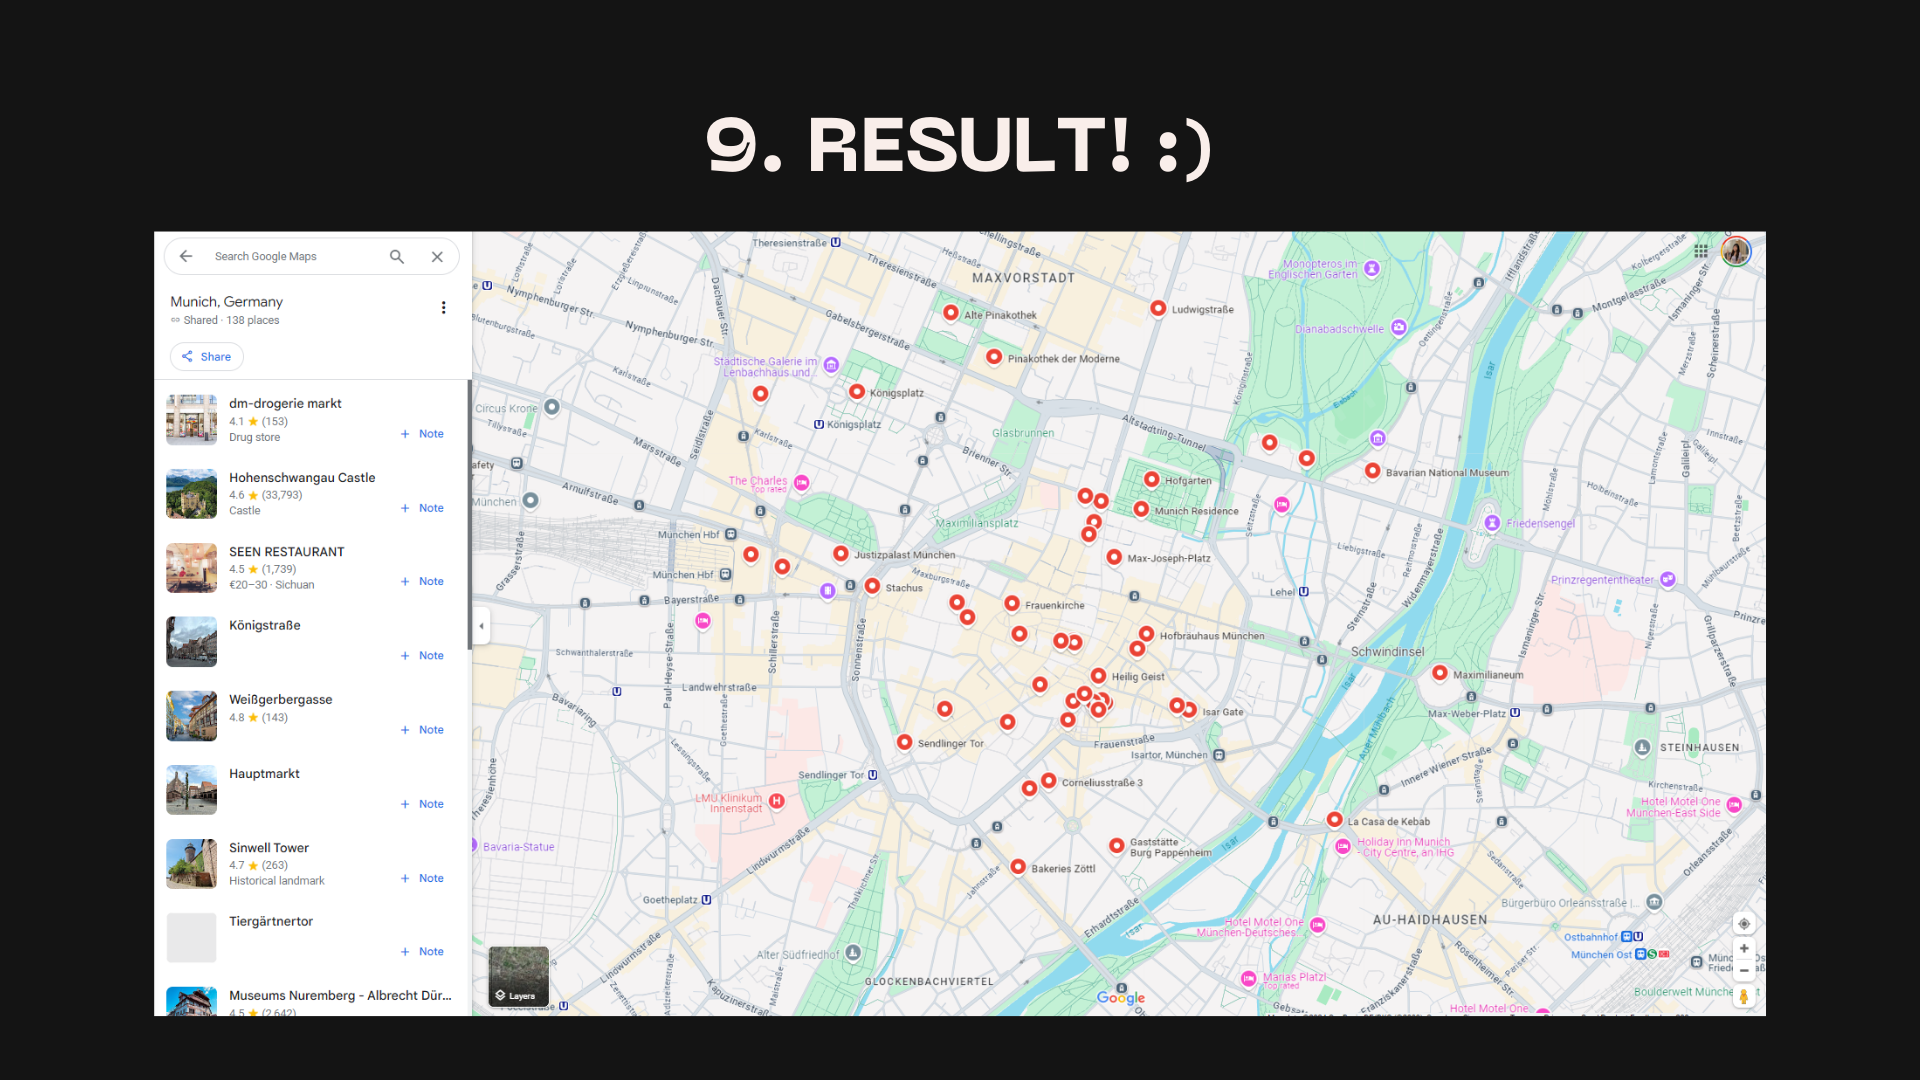
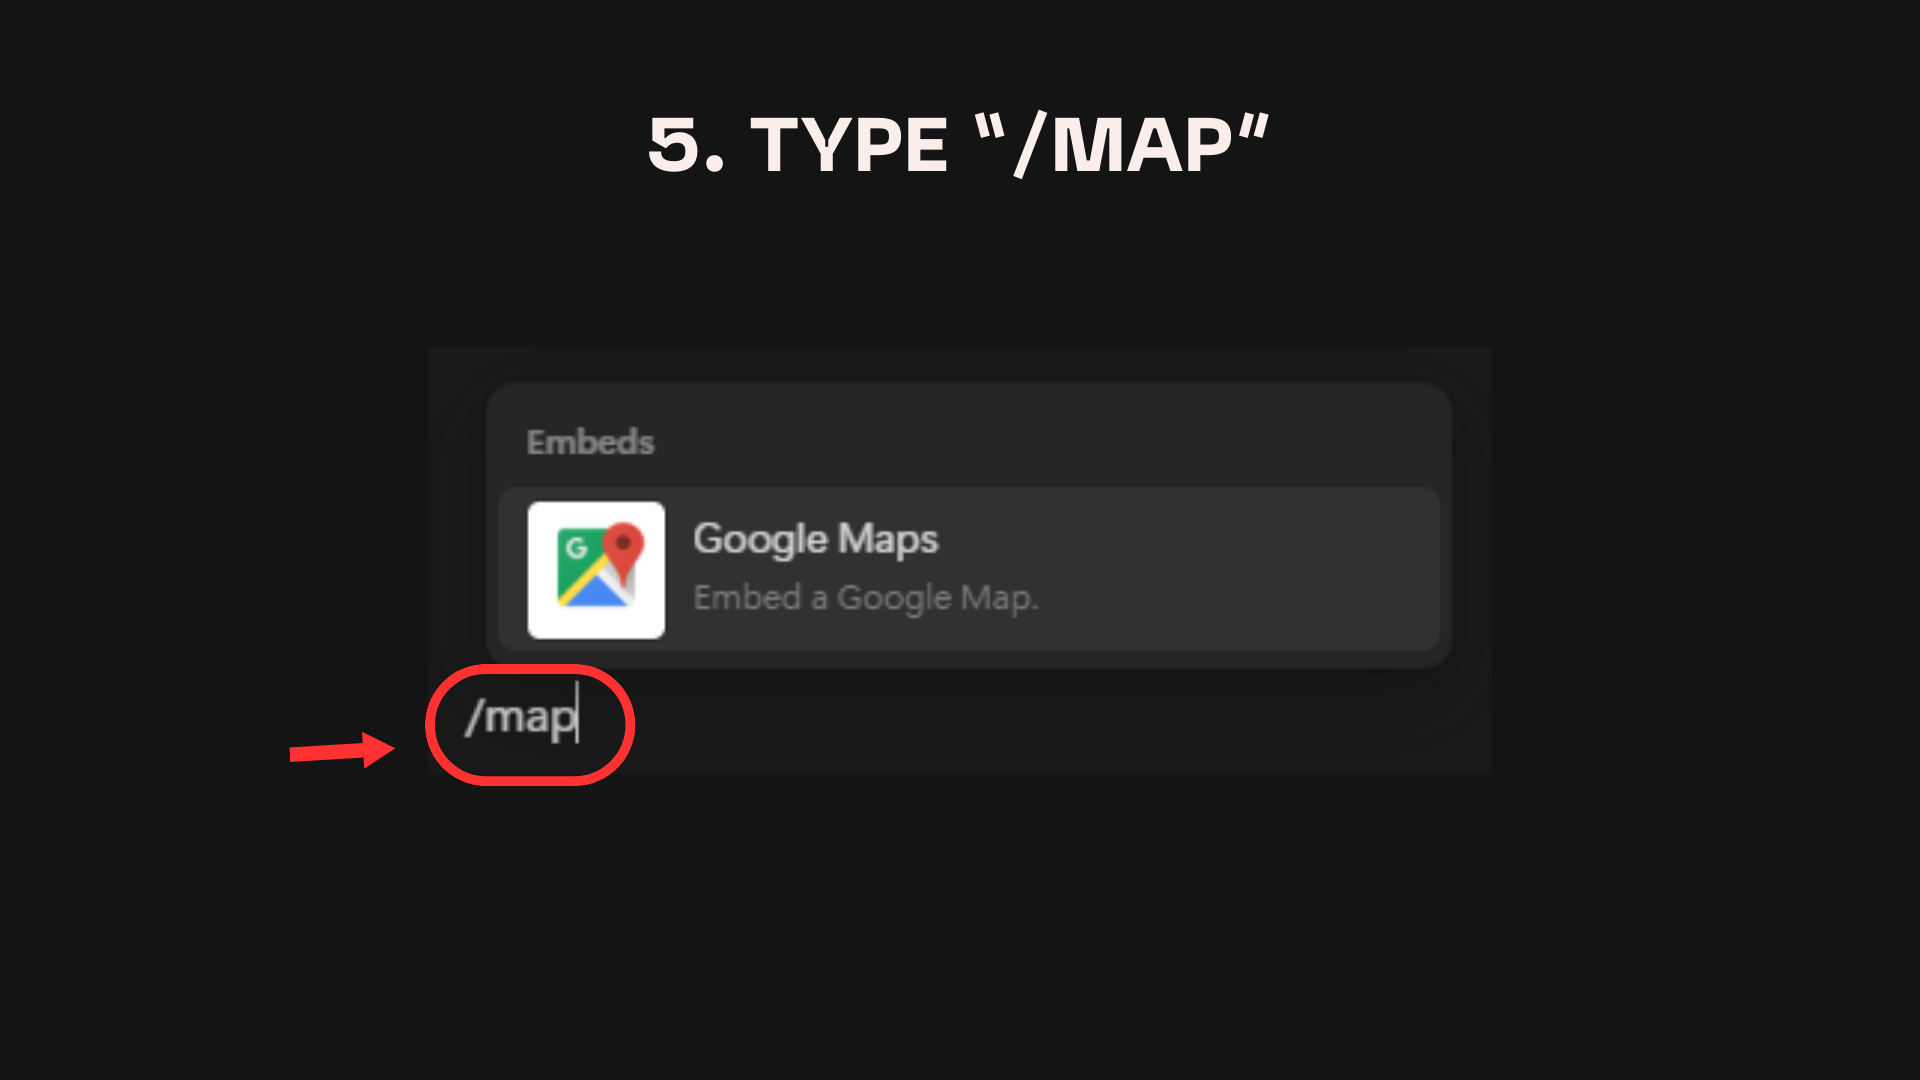
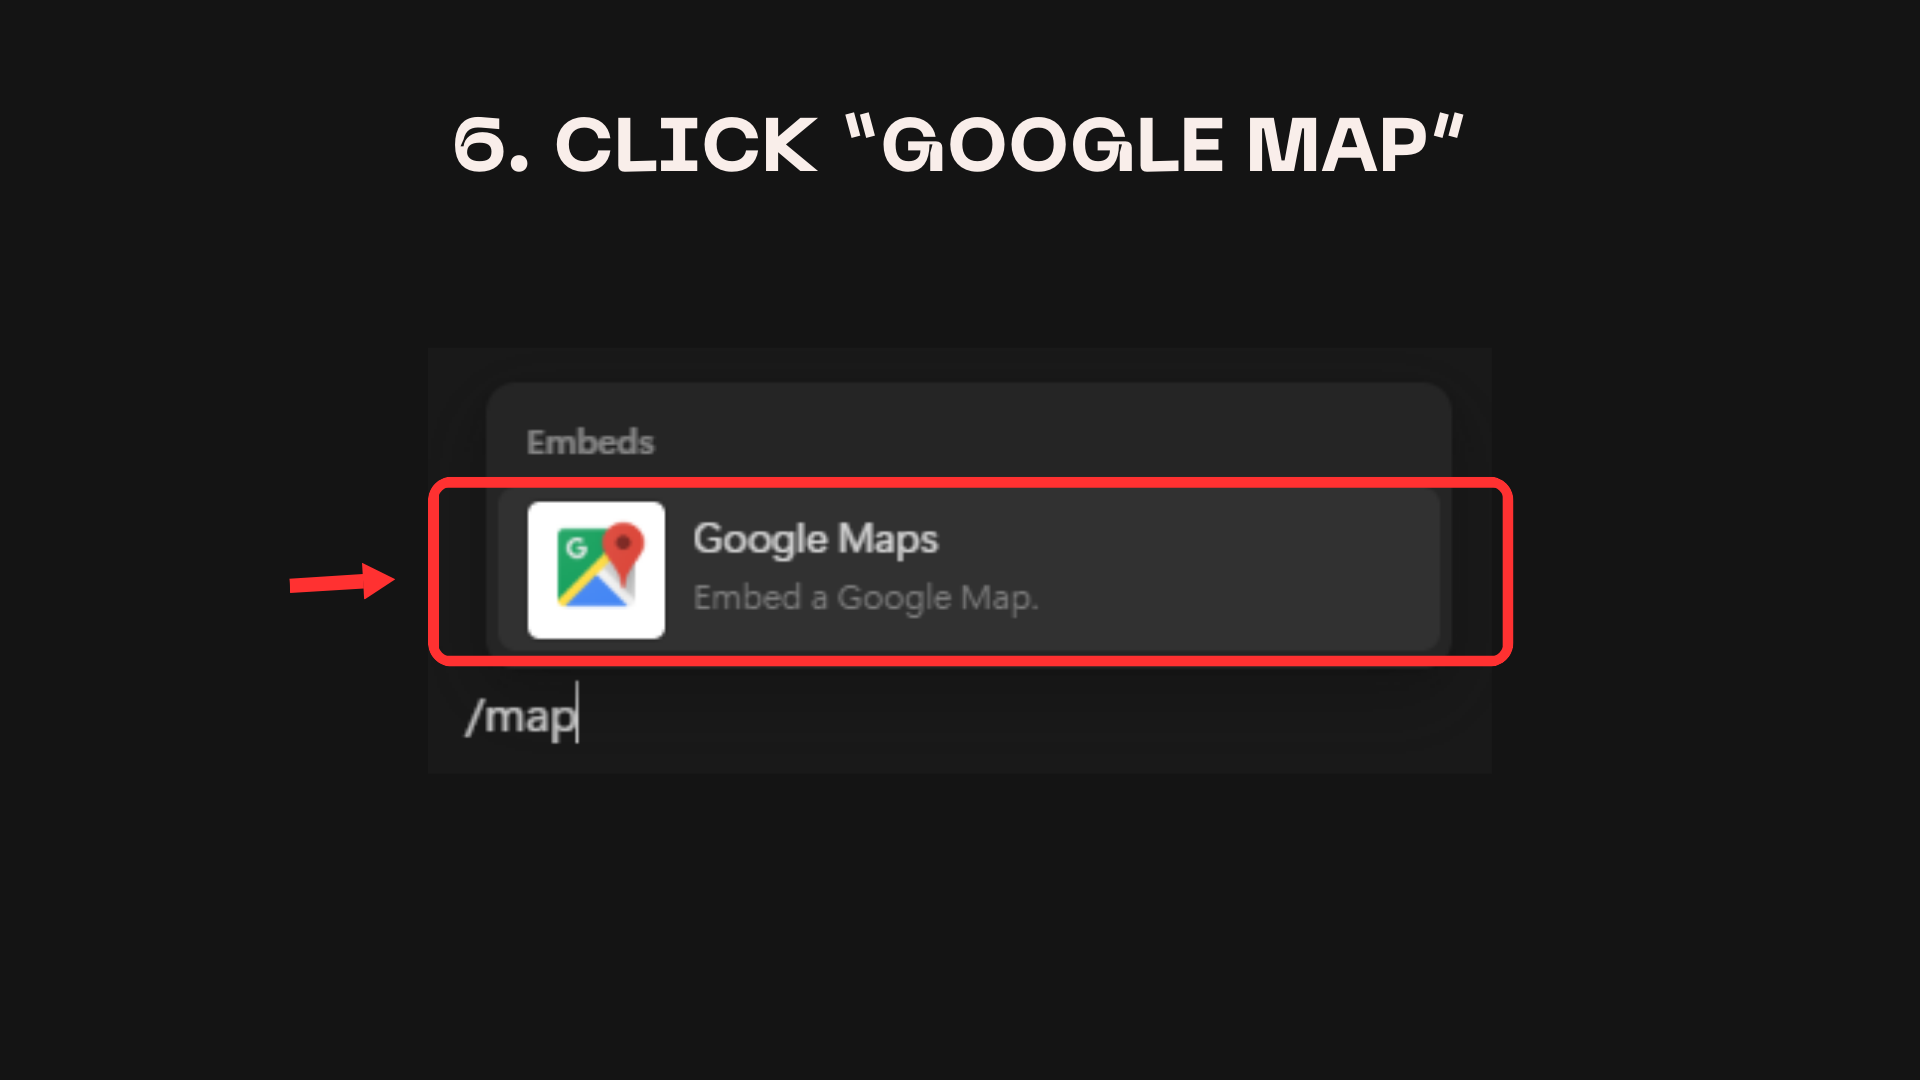
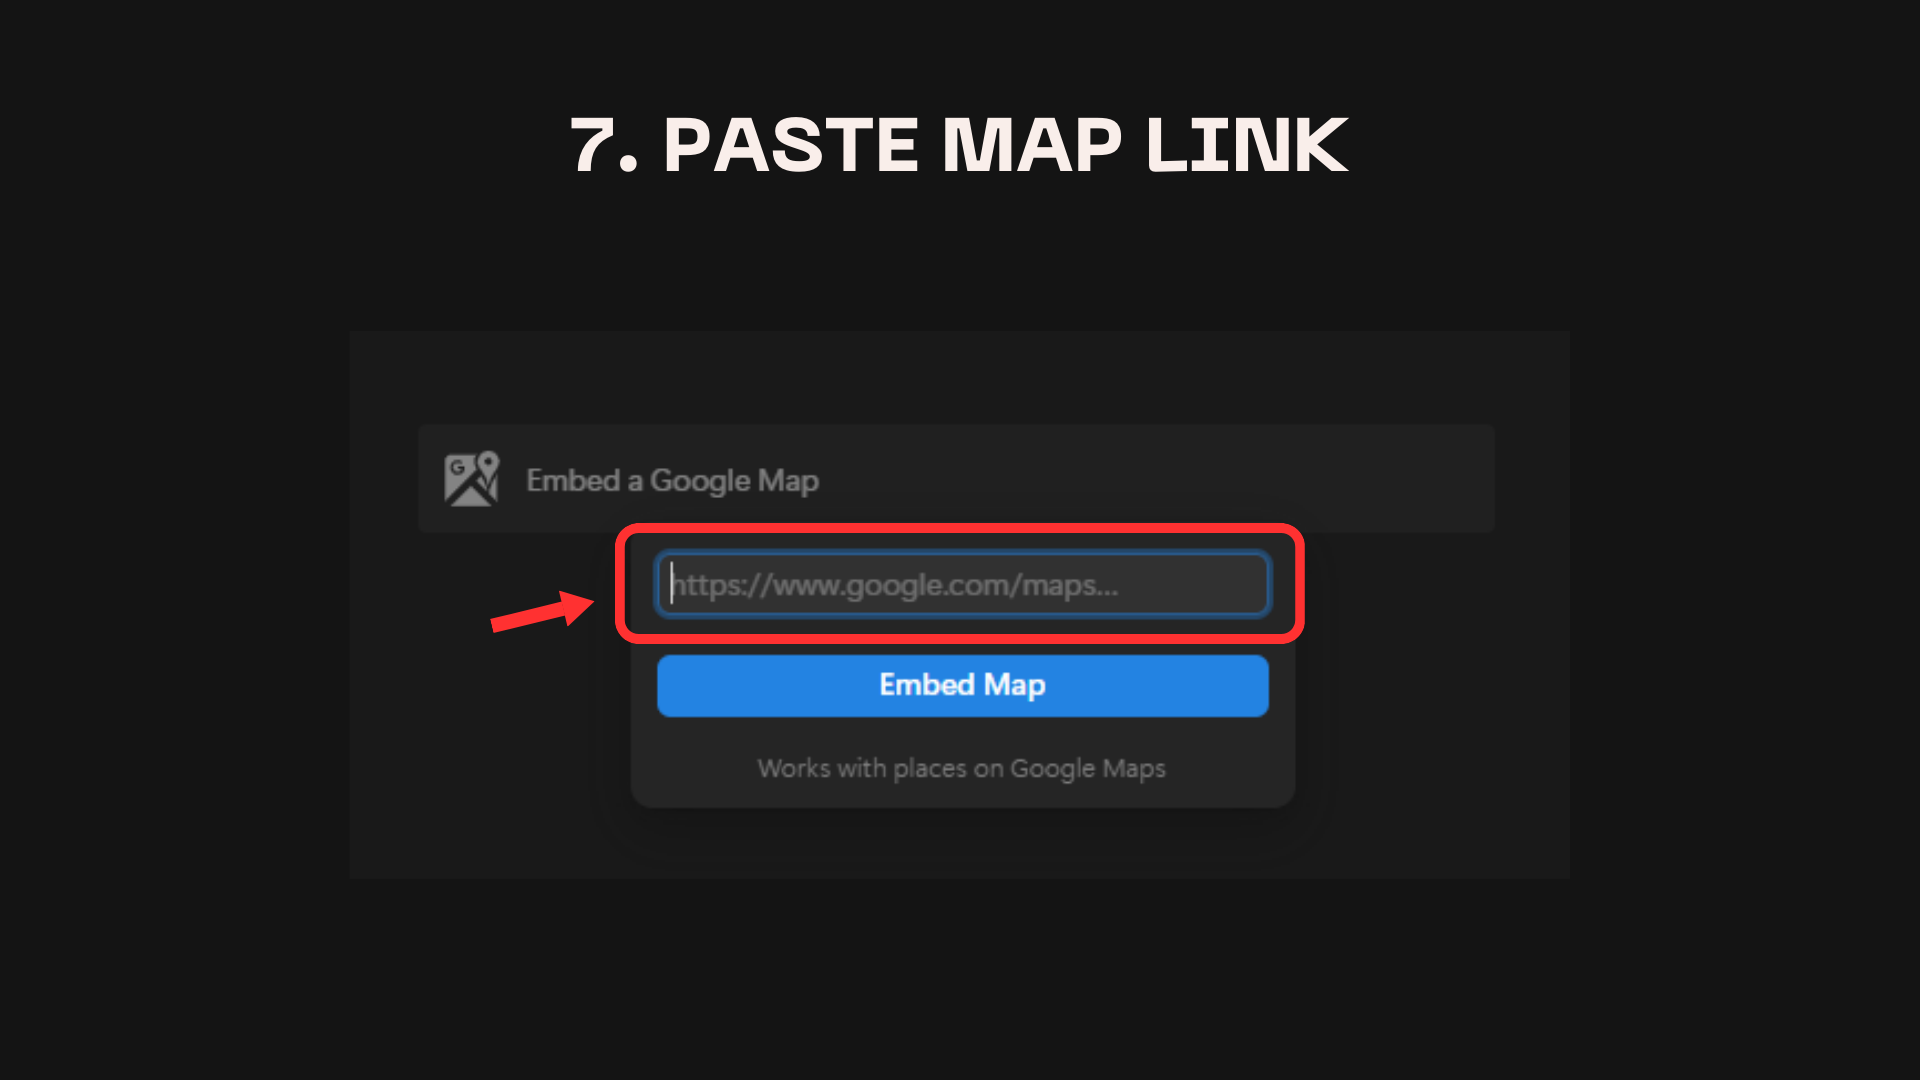
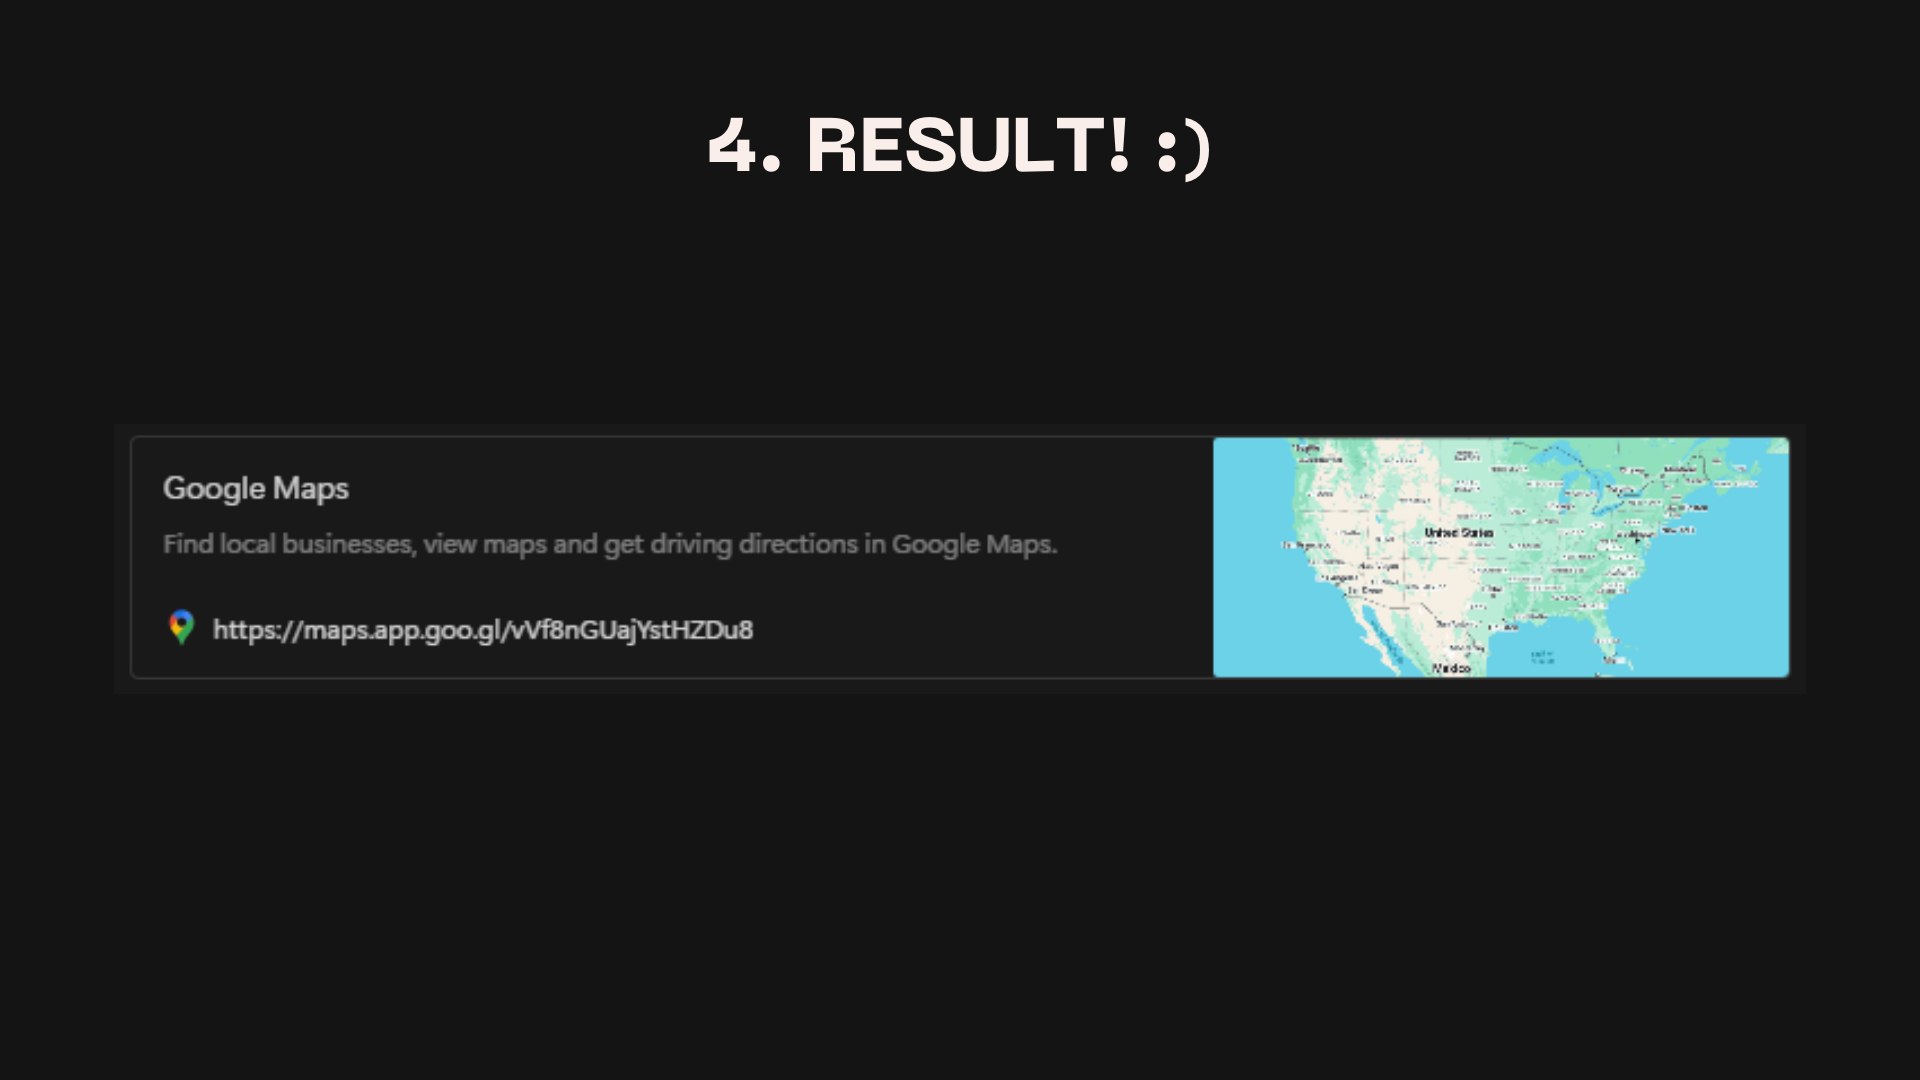
Save the map in Notion
After creating your map, you can easily embed it in your Notion travel guide, and interact with it while you're on the go in Notion.
🔄 Step 6: Stay Flexible
Remember, the best travel experiences often come from unexpected discoveries! The beauty of this system is its flexibility. You can easily adjust your itinerary if you find an exciting new opportunity or if something doesn't go as planned.
At the end of each day, review your experiences:
- Did you enjoy everything as much as you anticipated?
- If not, adjust the next day's schedule accordingly.
- Add notes about your favorite experiences or places you'd like to revisit.
💡 Summary
- Set your travel goals (destination, interests, budget, etc.).
- Use ChatGPT to create a detailed travel itinerary.
- Import the itinerary into Notion or your preferred note-taking app.
- Create a custom Google Map with all your planned locations.
- Customize your travel guide with colors, tags, and checklists.
- Stay flexible and adjust your plans as needed during your trip.
Now you're ready to embark on your AI-planned dream vacation! 🌴✈️
If this guide helped, leave a comment or like on the video. For more beginner-friendly AI tutorials, subscribe to the channel!