Chapter 2: Setting Up Copilot in Word 🚀
Welcome back to Day Tech, where we break down AI tools to boost your everyday life! 🎉 Now that we've talked about the different Copilot versions and what each offers, let's move on to setting up Copilot in Word.
Whether you're using the free version or one of the paid options, the setup process is straightforward and quick. In this guide, I'll walk you through the steps to get started in no time—and we'll also make sure your document is saved to the cloud with AutoSave turned on. 🌐
Step-by-Step Guide to Setting Up Copilot 🛠️
Step 1: Check Your Subscription ✅
First, make sure you're subscribed to the correct Microsoft 365 plan. If you're using Copilot Free, you don't need any additional subscription. But if you're using Copilot Pro or Copilot for Microsoft 365, ensure your subscription is active and linked to your Microsoft account.
Step 2: (Desktop Users Only) Update Your Microsoft Office Apps 🔄
If you're using the desktop application, you'll need to update your Office apps to the latest version. Copilot is only available in the most recent releases. Open Word, click File > Account > Update Options, and make sure everything is up-to-date. This ensures you have access to the full suite of Copilot features. ✨
If you're using Word Online via your browser, you can skip this step since updates are automatic! 🚀
Step 3: Accessing Copilot in Word Online or Desktop 📝
Option A: Using Word Online via Browser 🌐
Good news! You can access Word Online directly from your browser at www.microsoft365.com. Simply log in with your Microsoft account, and you'll have access to Word with Copilot automatically enabled based on your subscription. No installation or updates needed! 🎉
- Log In: Go to www.microsoft365.com and sign in with your Microsoft account.
- Open Word Online: Click on the Word icon to start a new document or open an existing one.
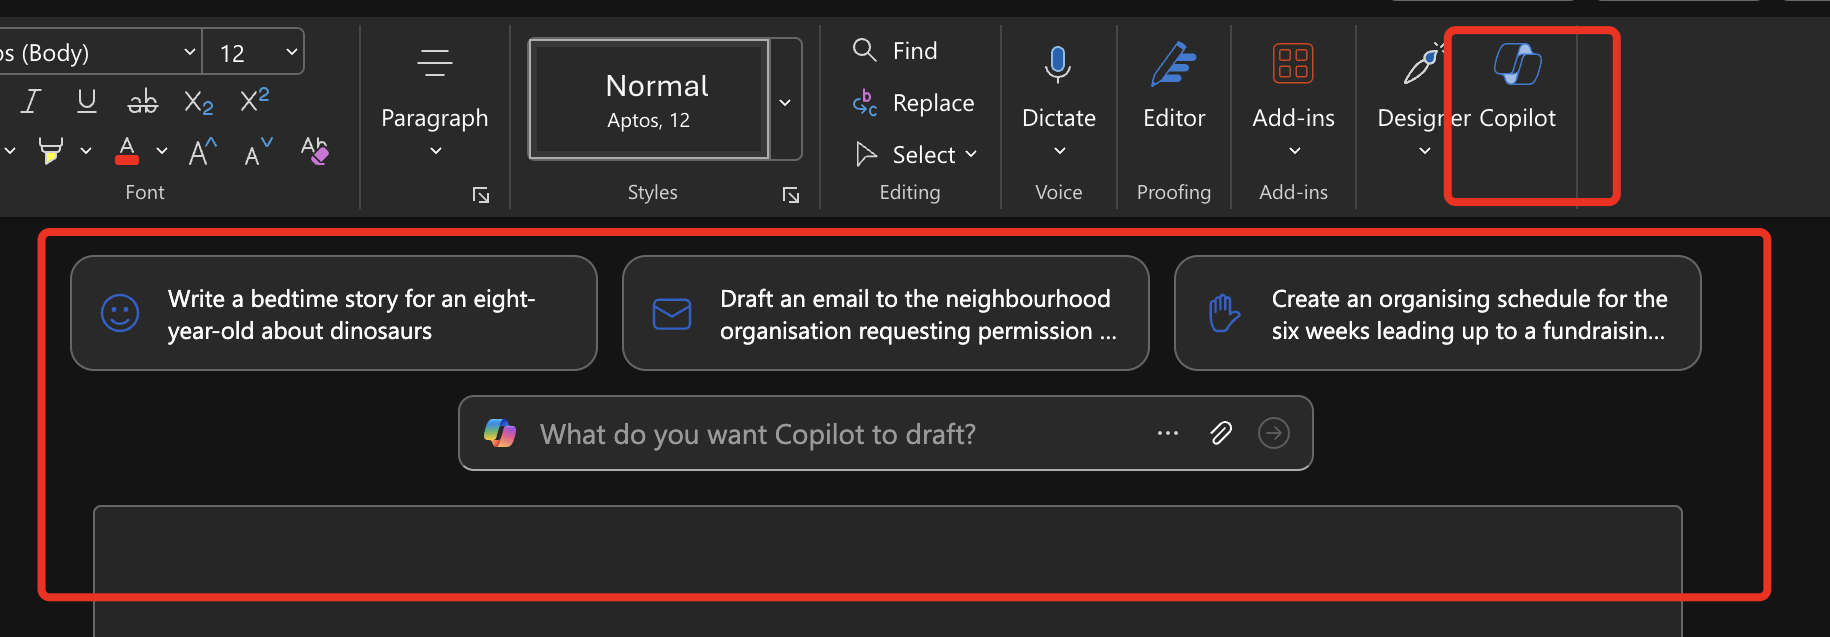
- Access Copilot: You'll find the Copilot icon on the right-hand side toolbar. Click it, and you're all set to start using Copilot! 🚀
Option B: Using Word Desktop Application 💻
If you prefer the desktop application, open Word on your computer. After updating (as mentioned in Step 2), you should see the Copilot icon in the toolbar on the right-hand side. If you're using Copilot Pro or M365, it will also appear in Excel, PowerPoint, and Teams.
Click on the Copilot icon, and you're ready to start using it! You can interact with Copilot by asking it to generate content, make suggestions, or summarize your document. 🧠
Step 4: (Desktop Users Only) Enable AutoSave and Save to Cloud ☁️
Before you begin working with Copilot, it's a good idea to ensure that AutoSave is turned on and that your document is being saved to the cloud. Here's how to do it:
-
Turn on AutoSave: You'll see the AutoSave toggle in the top-left corner of your Word window. Make sure it's switched on so that your work is automatically saved as you make changes.
-
Save to OneDrive or SharePoint: If you haven't already, click
File > Save As, and chooseOneDriveorSharePointas your storage location. This will save your document to the cloud, ensuring your work is backed up and accessible from anywhere. 🌍
Step 5: Test Copilot by Generating Content 🖊️
Let's test it out! Start by giving Copilot a prompt, and watch as it generates content based on your instructions. You can also ask it to "Improve this section" or "Summarize this paragraph." Watch how Copilot refines your content instantly, giving you suggestions to enhance your writing. 🚀
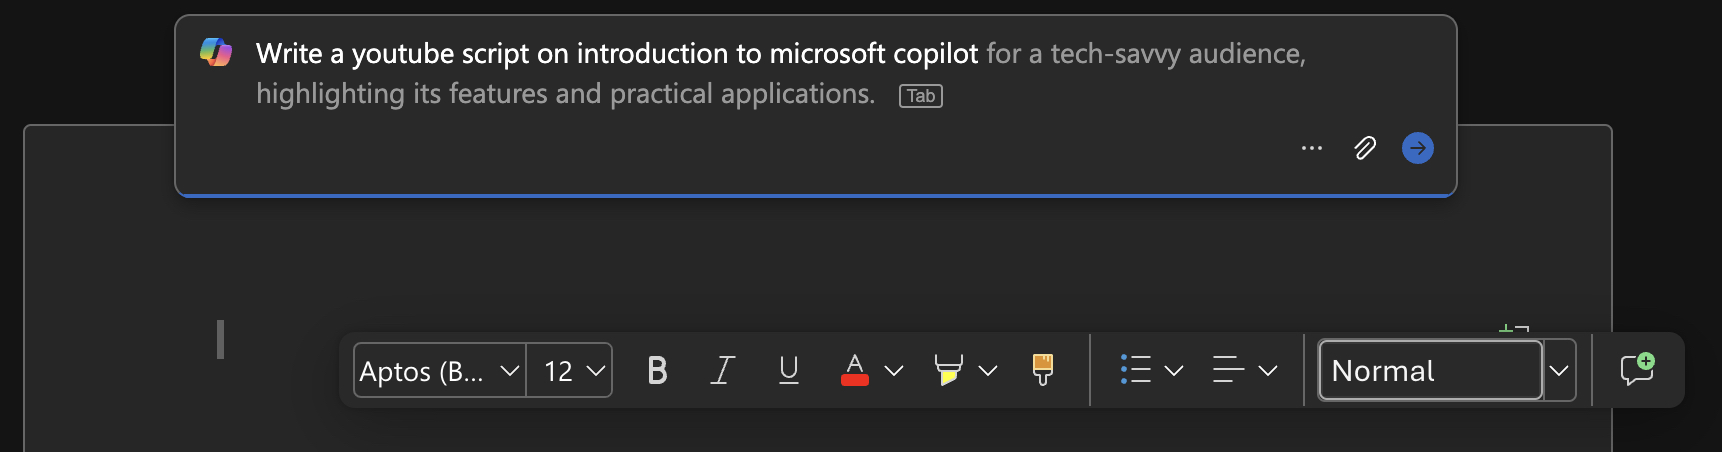
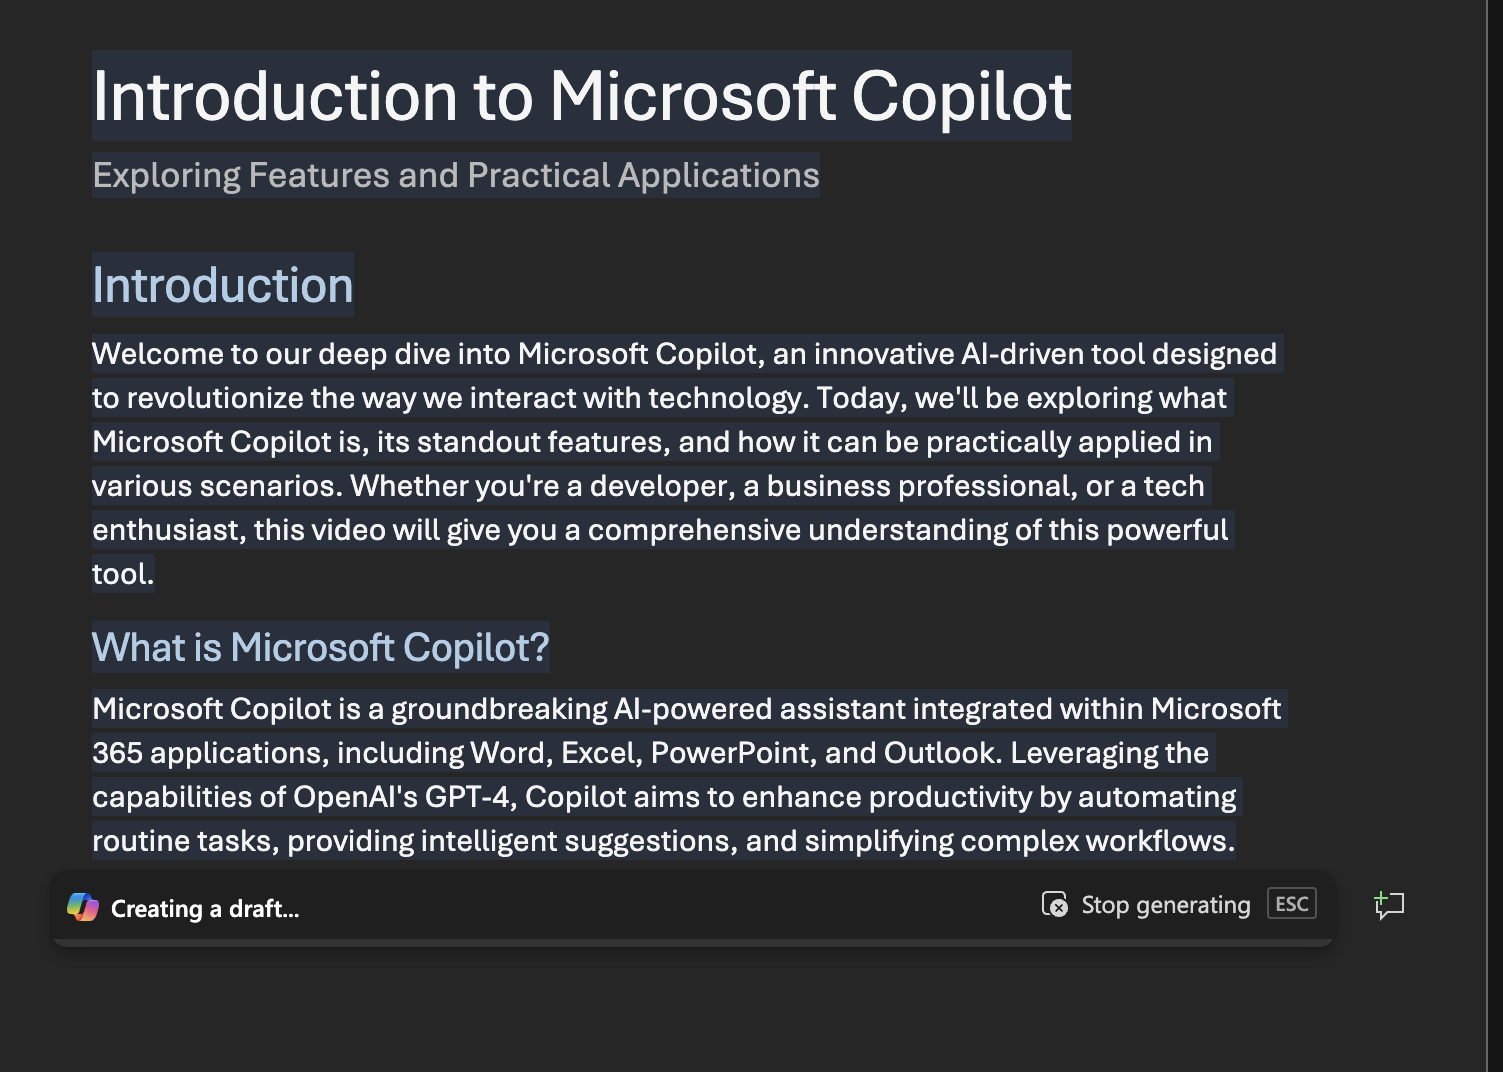
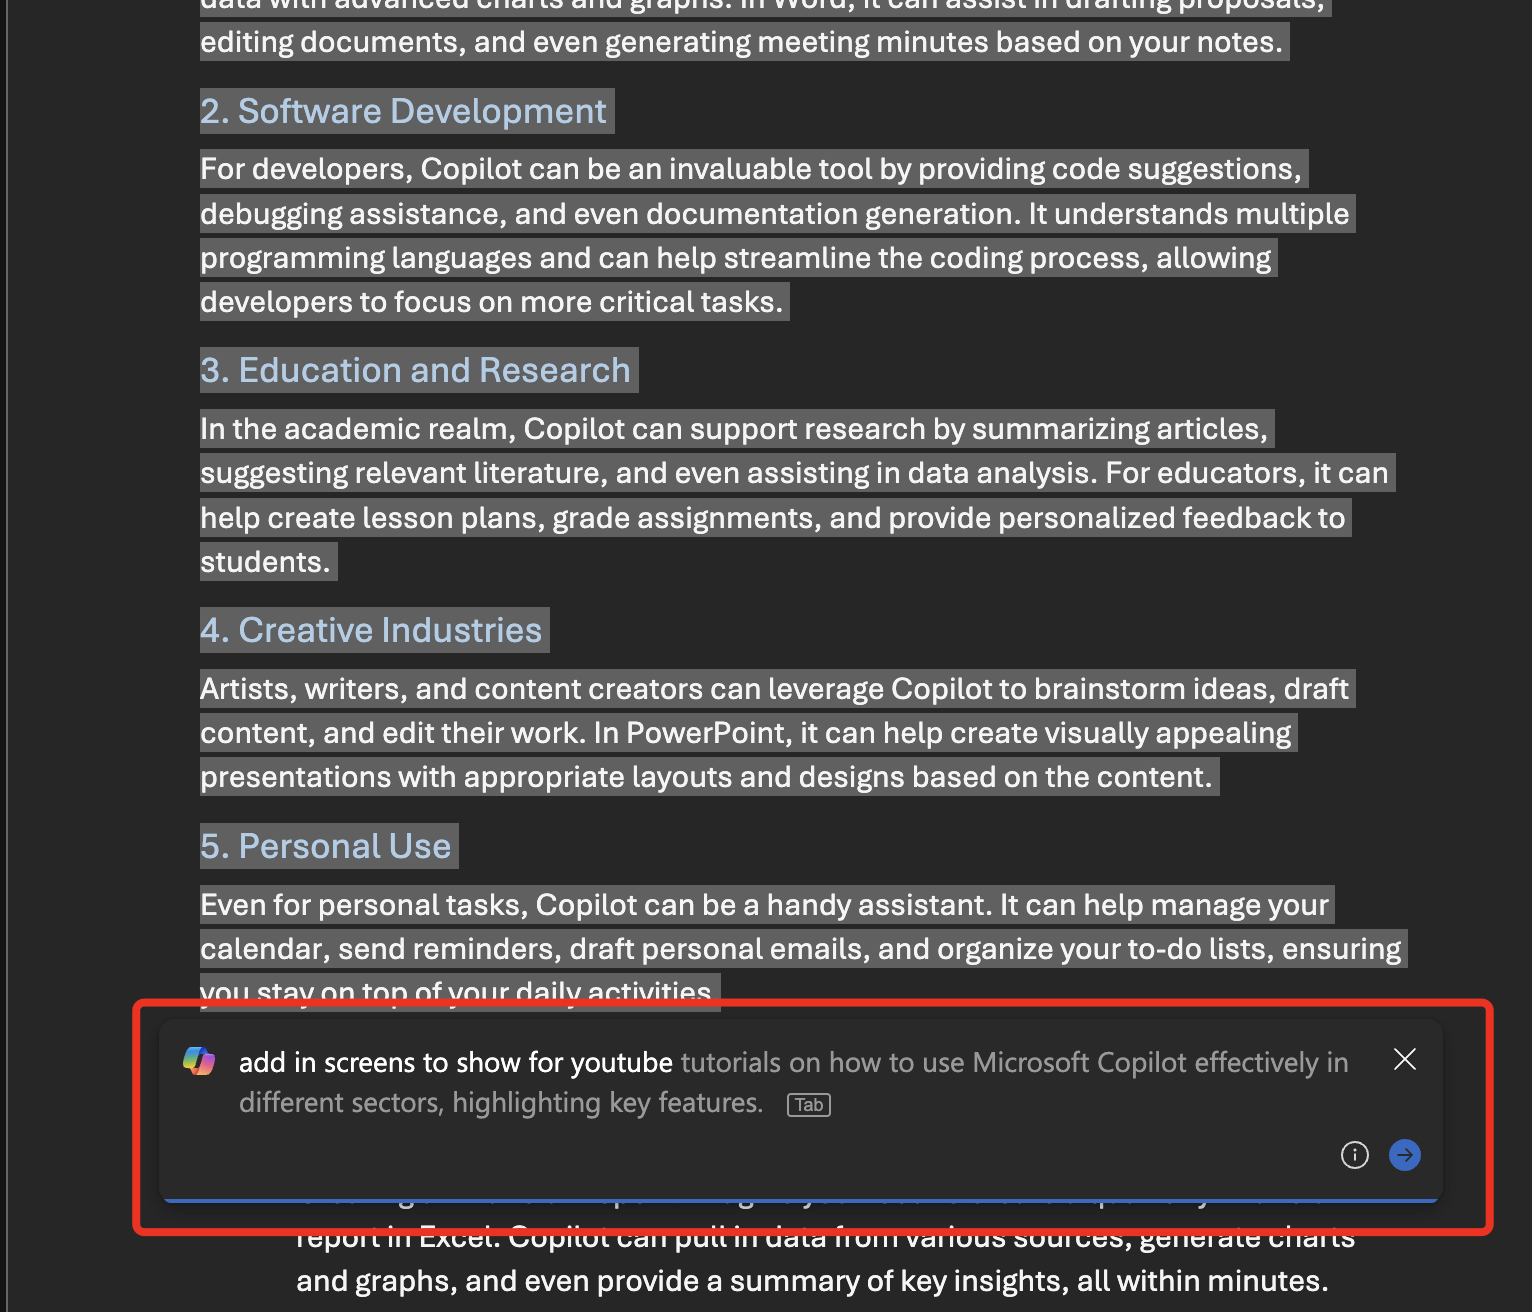
It's so amazing how fast Copilot can generate content! They can even try to generate the prompt that you have in mind.
Summary of Copilot Setup 📋
To recap, here are the steps to get Copilot up and running:
-
Check your subscription and make sure you're on the correct Microsoft 365 plan.
-
Update your Office apps to ensure you're using the latest version.
-
Access Copilot through the toolbar in Word, Excel, or other Microsoft apps.
-
Enable AutoSave and ensure your documents are saved to OneDrive or SharePoint for cloud backup.
-
Test Copilot's features by generating content or editing a paragraph.
Once everything is set up, Copilot will be your go-to assistant for writing, editing, and document management! 🎉
Conclusion 🎬
And that's everything you need to know to get started with Microsoft Copilot! We've covered how to set it up in Word—including enabling AutoSave and saving to the cloud. In the next chapter, we'll dive into how Copilot can help you draft documents quickly and efficiently. 🏃♂️💨
So, if you haven't already, hit that subscribe button, and I'll see you in the next section! 👋